Use Docker to Deploy Ani-RSS for Automatic Anime Tracking
[timeline] 2025-07-06 | v2 update for this post | See the upgrade guide at the end of the article [/timeline]
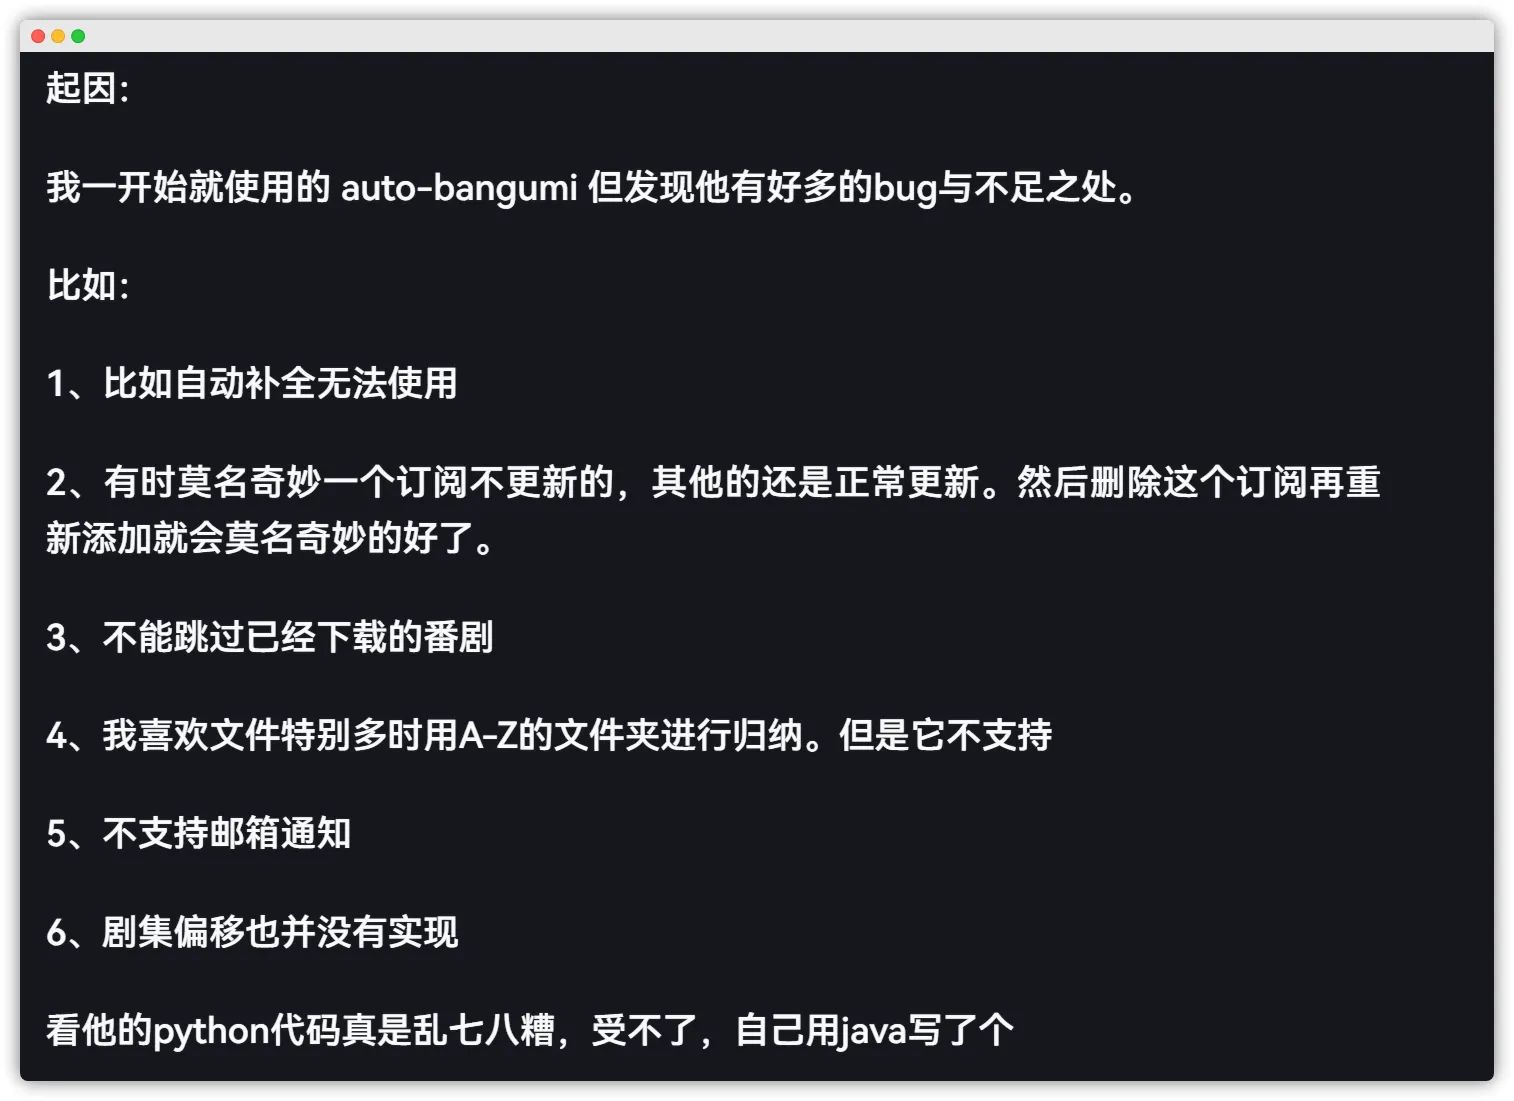
Ani-RSS works very similarly to AutoBangumi, but solves a lot of AutoBangumi’s pain points. The author is insanely productive, sometimes shipping three or four releases a day. (Ani-RSS will outlive ab!)
1. Preface
Project repo: https://github.com/wushuo894/ani-rss
Official docs: Ani-RSS
Official deployment guide (recommended reading): Quick Start
2D fans rejoice.
2. Deployment (this post is based on Debian 12)
2.1 Install Docker
The following operations must be done as the root user. Use sudo -i or su root to switch to root.
First, install some required packages:
apt updateapt upgrade -yapt install curl vim wget gnupg dpkg apt-transport-https lsb-release ca-certificatesThen add Docker’s GPG key and apt repo:
Debian
curl -sSL https://download.docker.com/linux/debian/gpg | gpg --dearmor > /usr/share/keyrings/docker-ce.gpgecho "deb [arch=$(dpkg --print-architecture) signed-by=/usr/share/keyrings/docker-ce.gpg] https://download.docker.com/linux/debian $(lsb_release -sc) stable" > /etc/apt/sources.list.d/docker.listUbuntu
curl -sSL https://download.docker.com/linux/debian/gpg | gpg --dearmor > /usr/share/keyrings/docker-ce.gpgecho "deb [arch=$(dpkg --print-architecture) signed-by=/usr/share/keyrings/docker-ce.gpg] https://download.docker.com/linux/ubuntu $(lsb_release -sc) stable" > /etc/apt/sources.list.d/docker.listFor servers in mainland China you can use Tsinghua TUNA mirrors:
Debian
curl -sS https://download.docker.com/linux/debian/gpg | gpg --dearmor > /usr/share/keyrings/docker-ce.gpgecho "deb [arch=$(dpkg --print-architecture) signed-by=/usr/share/keyrings/docker-ce.gpg] https://mirrors.tuna.tsinghua.edu.cn/docker-ce/linux/debian $(lsb_release -sc) stable" > /etc/apt/sources.list.d/docker.listUbuntu
curl -sS https://download.docker.com/linux/debian/gpg | gpg --dearmor > /usr/share/keyrings/docker-ce.gpgecho "deb [arch=$(dpkg --print-architecture) signed-by=/usr/share/keyrings/docker-ce.gpg] https://mirrors.tuna.tsinghua.edu.cn/docker-ce/linux/ubuntu $(lsb_release -sc) stable" > /etc/apt/sources.list.d/docker.listThen update the system and install Docker CE and the Docker Compose plugin:
apt updateapt install docker-ce docker-ce-cli containerd.io docker-compose-pluginYou can now use the docker version command to verify that the installation succeeded.
2.2 Install Docker Compose
Since we already installed docker-compose-plugin, Docker now ships with the docker compose command, which basically replaces docker-compose:
root@debian ~ # docker compose versionDocker Compose version v2.27.1If some images or commands are not compatible, you can still install the standalone Docker Compose binary.
We can download the latest release directly from Docker’s GitHub:
curl -L https://github.com/docker/compose/releases/latest/download/docker-compose-Linux-x86_64 > /usr/local/bin/docker-composechmod +x /usr/local/bin/docker-composeNow use docker-compose version to verify:
root@debian ~ # docker-compose versionDocker Compose version v2.27.12.3 Modify Docker configuration
The following configuration adds a custom internal IPv6 range, enables IPv6 for containers, and limits log size to prevent Docker logs from filling your disk:
cat > /etc/docker/daemon.json << EOF{ "log-driver": "json-file", "log-opts": { "max-size": "20m", "max-file": "3" }, "ipv6": true, "fixed-cidr-v6": "fd00:dead:beef:c0::/80", "experimental":true, "ip6tables":true}EOFThen restart the Docker service:
systemctl restart docker3. Deploy Ani-RSS
3.1 Create configuration directories
mkdir -p /root/docker/ani-rss/configYou can also choose your own download directory, as long as it matches the paths below.mkdir -p /root/docker/ani-rss/downloads (optional)cd /docker/ani-rss| Param | Purpose | Default |
|---|---|---|
| PORT | Port | 7789 |
| CONFIG | Config directory | /config |
| TZ | Time zone | Asia/Shanghai |
PS: If you want to enable the “auto skip already-downloaded files” feature, make sure qBittorrent and this program use exactly the same Docker bind-mount paths.
3.2 Deploy with docker-compose.yaml
It is strongly recommended to spin up a dedicated qBittorrent instance for Ani-RSS instead of sharing the same qBittorrent with other projects.
Here’s the image I’m using:
swr.ap-southeast-1.myhuaweicloud.com/soyorin/ani-rss:latest
qBittorrent is strongly recommended.
Create a docker-compose.yaml file with the following content:
vim docker-compose.yamlservices: ani-rss: container_name: ani-rss volumes: - /root/docker/ani-rss/config:/config - /docker/ani-rss/downloads:/download # 下载的存储路径 需要和ani-rss保持一致 ports: - 7789:7789 environment: - PORT=7789 - CONFIG=/config - TZ=Asia/Shanghai restart: always image: swr.ap-southeast-1.myhuaweicloud.com/soyorin/ani-rss:latest
qbittorrent: image: swr.ap-southeast-1.myhuaweicloud.com/soyorin/qbittorrent:latest container_name: qbittorrent-mikan restart: always tty: true network_mode: bridge hostname: qbitorrent stop_grace_period: 10m volumes: - /docker/ani-rss/downloads:/download # 下载的存储路径 需要和ani-rss保持一致 tmpfs: - /tmp environment: - QB_USERNAME=你的账户 - QB_PASSWORD=你的密码 - WEBUI_PORT=15768 #qb 的 web 端口 - BT_PORT=34567 # BT端口 - PUID=0 - PGID=0 ports: - 15768:15768 # qb web 端口映射 - 34567:34567 - 34567:34567/udp3.3 Start the stack
docker compose up -dCheck whether it’s running:
docker ps -a
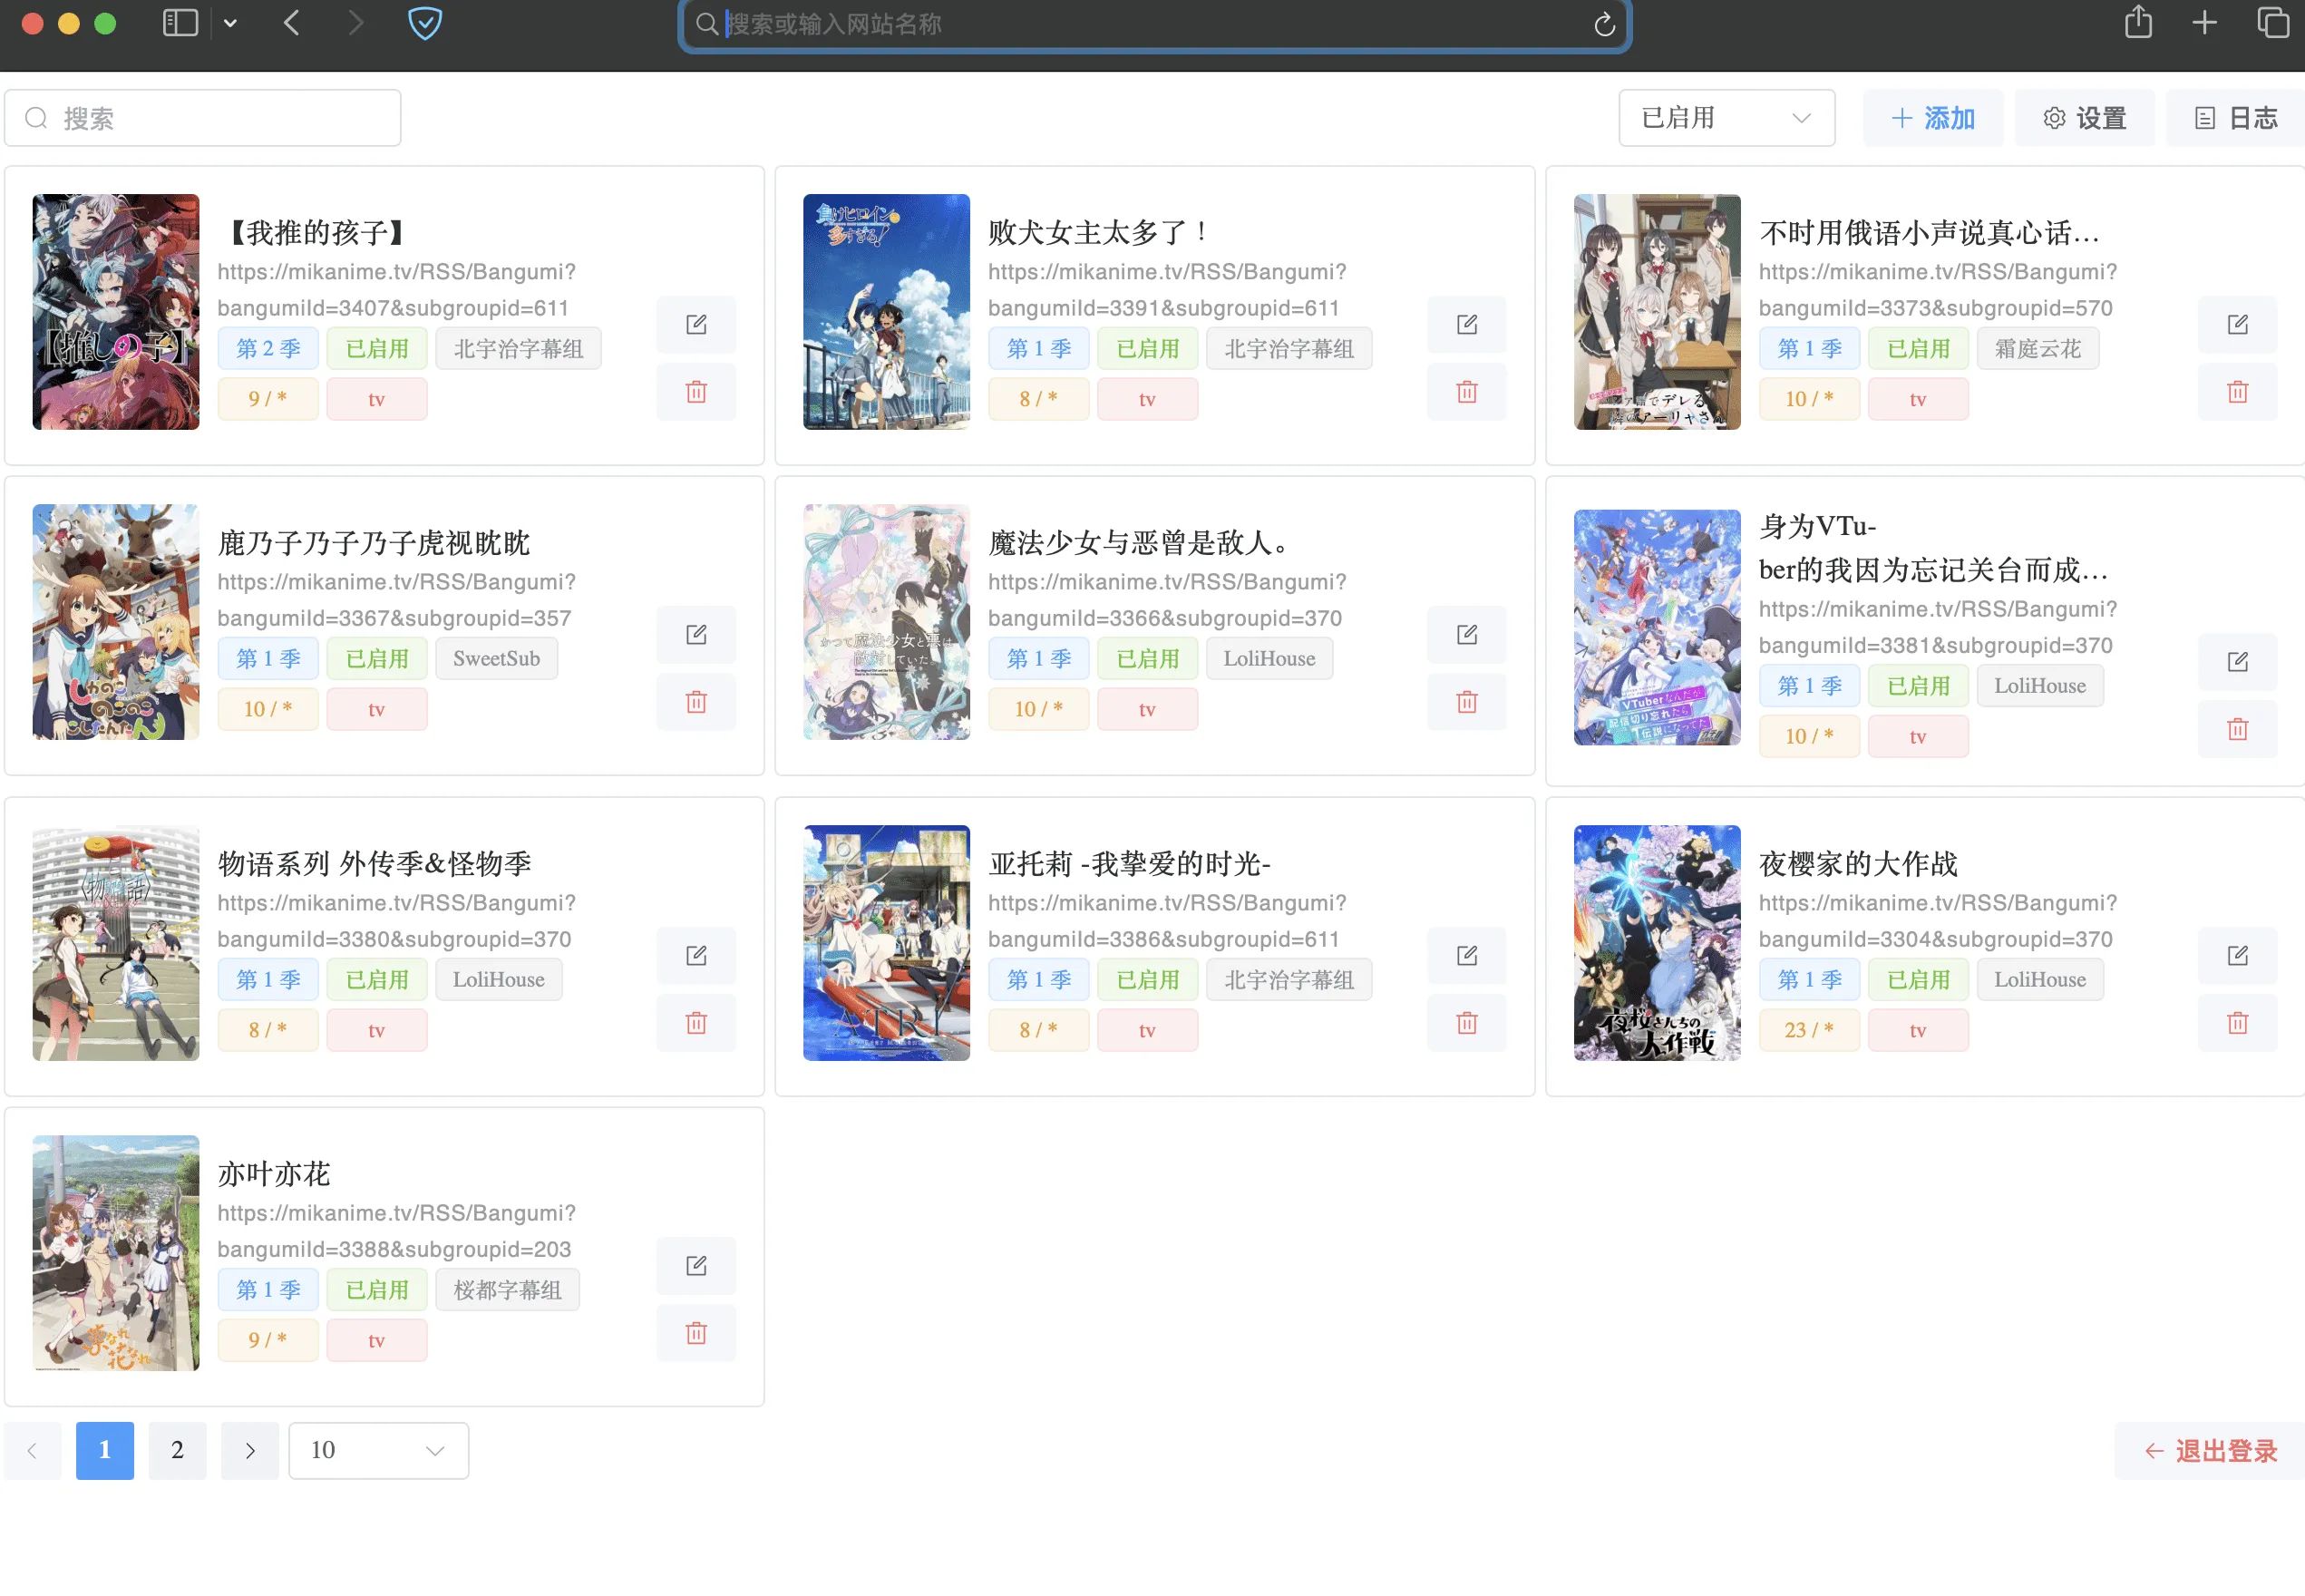
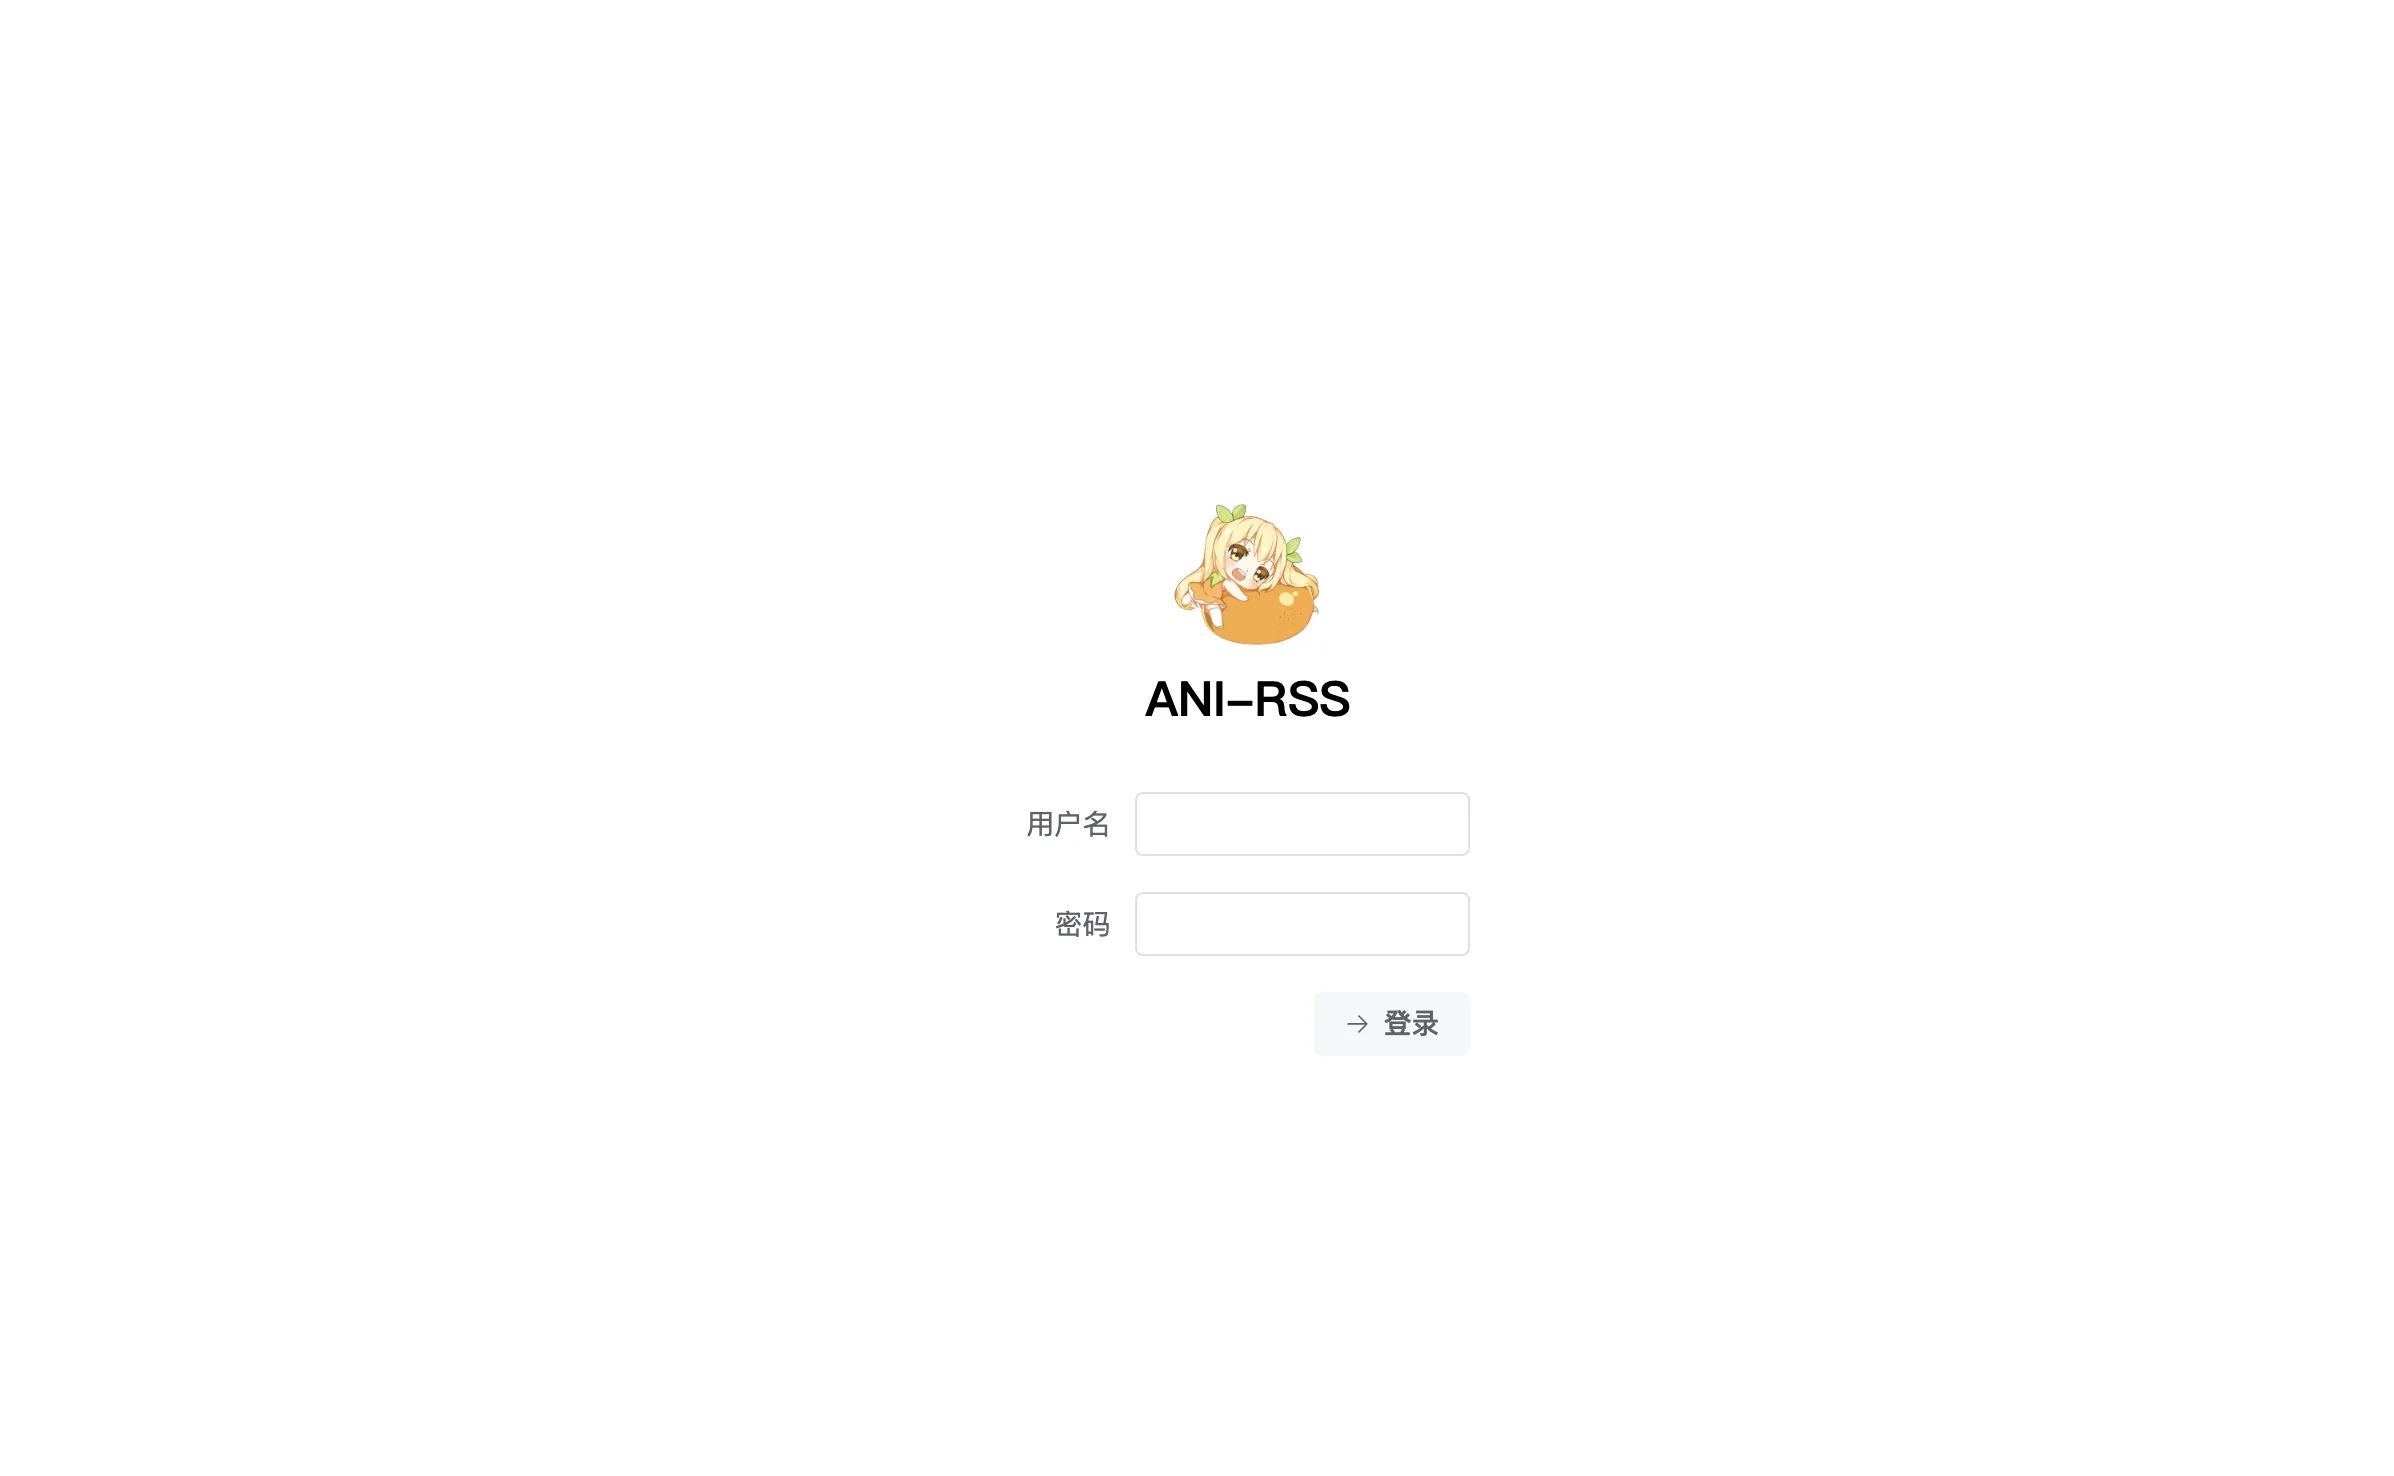
4. Access and usage
Default username: admin
Default password: admin
Open http://<ip>:7789 in your browser.
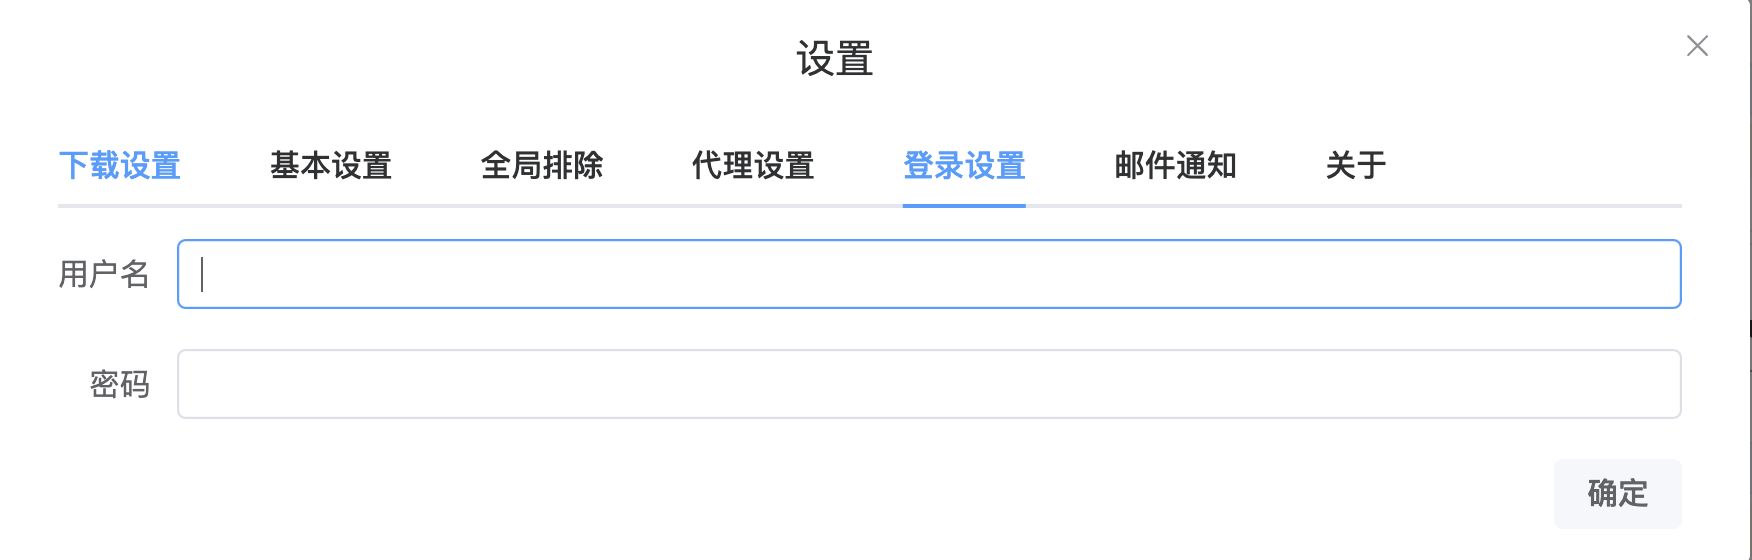
4.1 Change the password
Since the panel can be exposed to the public internet, you must change the username and password. For qBittorrent you can set them directly in docker-compose.yaml. Ani-RSS credentials are changed in the Web UI.
Top-right corner → Settings → Login settings
4.2 Recommended settings
4.2.1 Connection settings
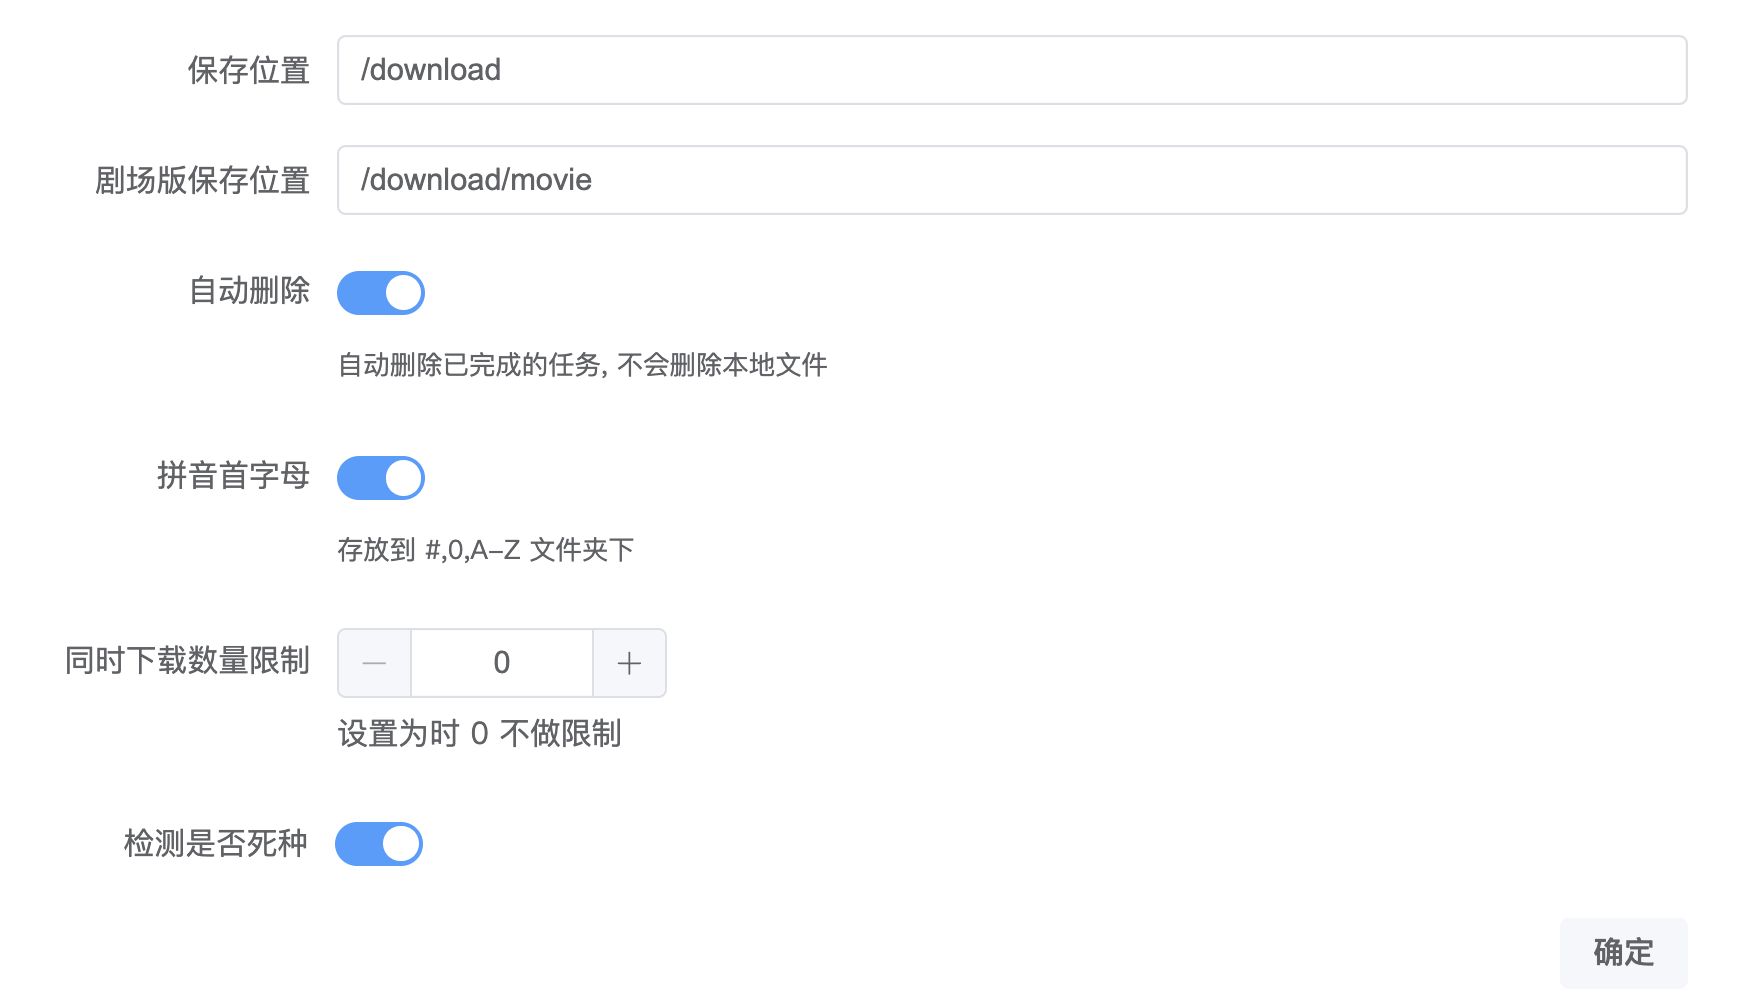
Connect to qBittorrent, and configure the save path and storage method.
Everything is quite self-explanatory, so I won’t go into detail here. I recommend enabling automatic deletion and pinyin initials.
The save path must match the container-internal path defined in docker-compose.yaml.
Note: Do not add a trailing / to the URL in settings.
Automatically delete completed tasks
When a torrent is finished downloading and seeding, delete the task in the downloader, but keep the local files.
Limit concurrent downloads
Prevents qBittorrent from freezing due to excessive I/O when too many torrents are downloading simultaneously.
Adjust based on your hardware; 1–2 is recommended.
Pinyin initials
Used to organize shows into A–Z folders, e.g.:
.├── #│ └── 【我推的孩子】│ └── Season 2│ ├── 【我推的孩子】 S02E12.mkv│ ├── 【我推的孩子】 S02E13.mkv│ ├── 【我推的孩子】 S02E14.mkv│ ├── 【我推的孩子】 S02E15.mkv│ ├── 【我推的孩子】 S02E16.mkv│ ├── 【我推的孩子】 S02E17.mkv│ ├── 【我推的孩子】 S02E18.mkv│ ├── 【我推的孩子】 S02E19.mkv│ └── 【我推的孩子】 S02E20.mkv├── B│ ├── 不时用俄语小声说真心话的邻桌艾莉同学│ │ └── Season 1│ │ ├── 不时用俄语小声说真心话的邻桌艾莉同学 S01E01.mp4│ │ ├── 不时用俄语小声说真心话的邻桌艾莉同学 S01E02.mp4│ │ ├── 不时用俄语小声说真心话的邻桌艾莉同学 S01E03.mp4│ │ ├── 不时用俄语小声说真心话的邻桌艾莉同学 S01E04.mp4│ │ ├── 不时用俄语小声说真心话的邻桌艾莉同学 S01E05.mp4│ │ ├── 不时用俄语小声说真心话的邻桌艾莉同学 S01E06.mp4│ │ ├── 不时用俄语小声说真心话的邻桌艾莉同学 S01E07.mp4│ │ ├── 不时用俄语小声说真心话的邻桌艾莉同学 S01E08.mp4│ │ ├── 不时用俄语小声说真心话的邻桌艾莉同学 S01E09.mp4│ │ └── 不时用俄语小声说真心话的邻桌艾莉同学 S01E10.mp4│ └── 败犬女主太多了!│ └── Season 1│ ├── 败犬女主太多了! S01E01.mp4│ ├── 败犬女主太多了! S01E02.mkv│ ├── 败犬女主太多了! S01E03.mkv│ ├── 败犬女主太多了! S01E04.mkv│ ├── 败犬女主太多了! S01E05.mkv│ ├── 败犬女主太多了! S01E06.mkv│ ├── 败犬女主太多了! S01E07.mkv│ └── 败犬女主太多了! S01E08.mkvExample settings
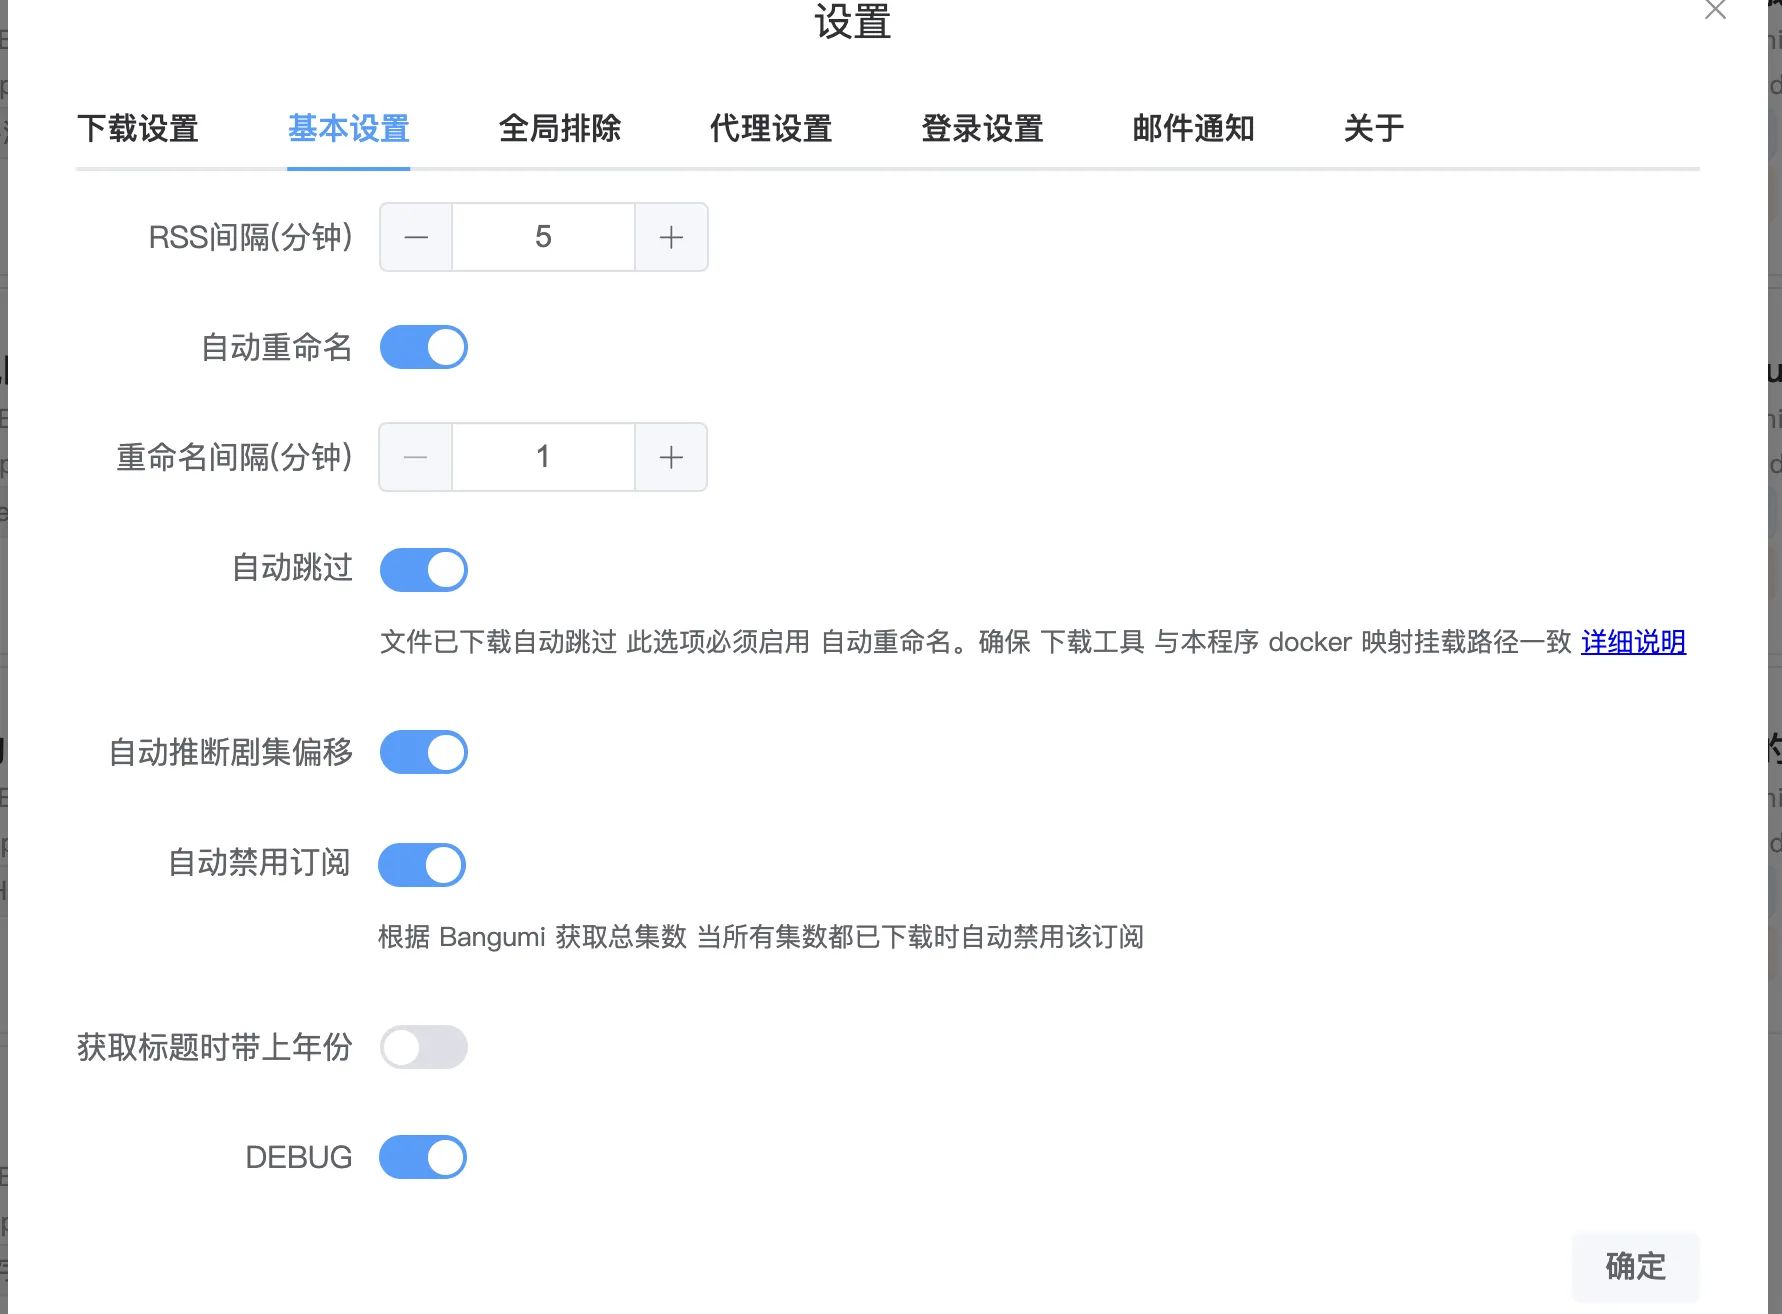
4.2.2 Basic settings
RSS interval (minutes)
How often RSS feeds are checked for updates, in minutes.
Auto rename
Automatically renames videos and subtitles to be scrape-friendly.
For example:
2024-09-01 13:29:06.865 [rss-task-thread] INFO ani.rss.util.TorrentUtil - 添加下载 Wonderful 光之美少女! S01E312024-09-01 13:29:06.866 [rss-task-thread] INFO ani.rss.util.TorrentUtil - 下载种子 Wonderful 光之美少女! S01E312024-09-01 13:29:46.352 [rename-task-thread] INFO ani.rss.util.TorrentUtil - 重命名 [FLsnow][Wonderful_Precure!][31][1080P]/[FLsnow][Wonderful_Precure!][31][1080P].mkv ==> Wonderful 光之美少女! S01E31.mkv2024-09-01 13:29:46.362 [rename-task-thread] INFO ani.rss.util.TorrentUtil - 重命名 [FLsnow][Wonderful_Precure!][31][1080P]/[FLsnow][Wonderful_Precure!][31][1080P].cht.ass ==> Wonderful 光之美少女! S01E31.cht.ass2024-09-01 13:29:46.365 [rename-task-thread] INFO ani.rss.util.TorrentUtil - 重命名 [FLsnow][Wonderful_Precure!][31][1080P]/[FLsnow][Wonderful_Precure!][31][1080P].chs.ass ==> Wonderful 光之美少女! S01E31.chs.ass2024-09-01 13:38:49.392 [rename-task-thread] INFO ani.rss.util.TorrentUtil - 删除已完成任务 Wonderful 光之美少女! S01E31Rename interval (minutes)
In minutes.
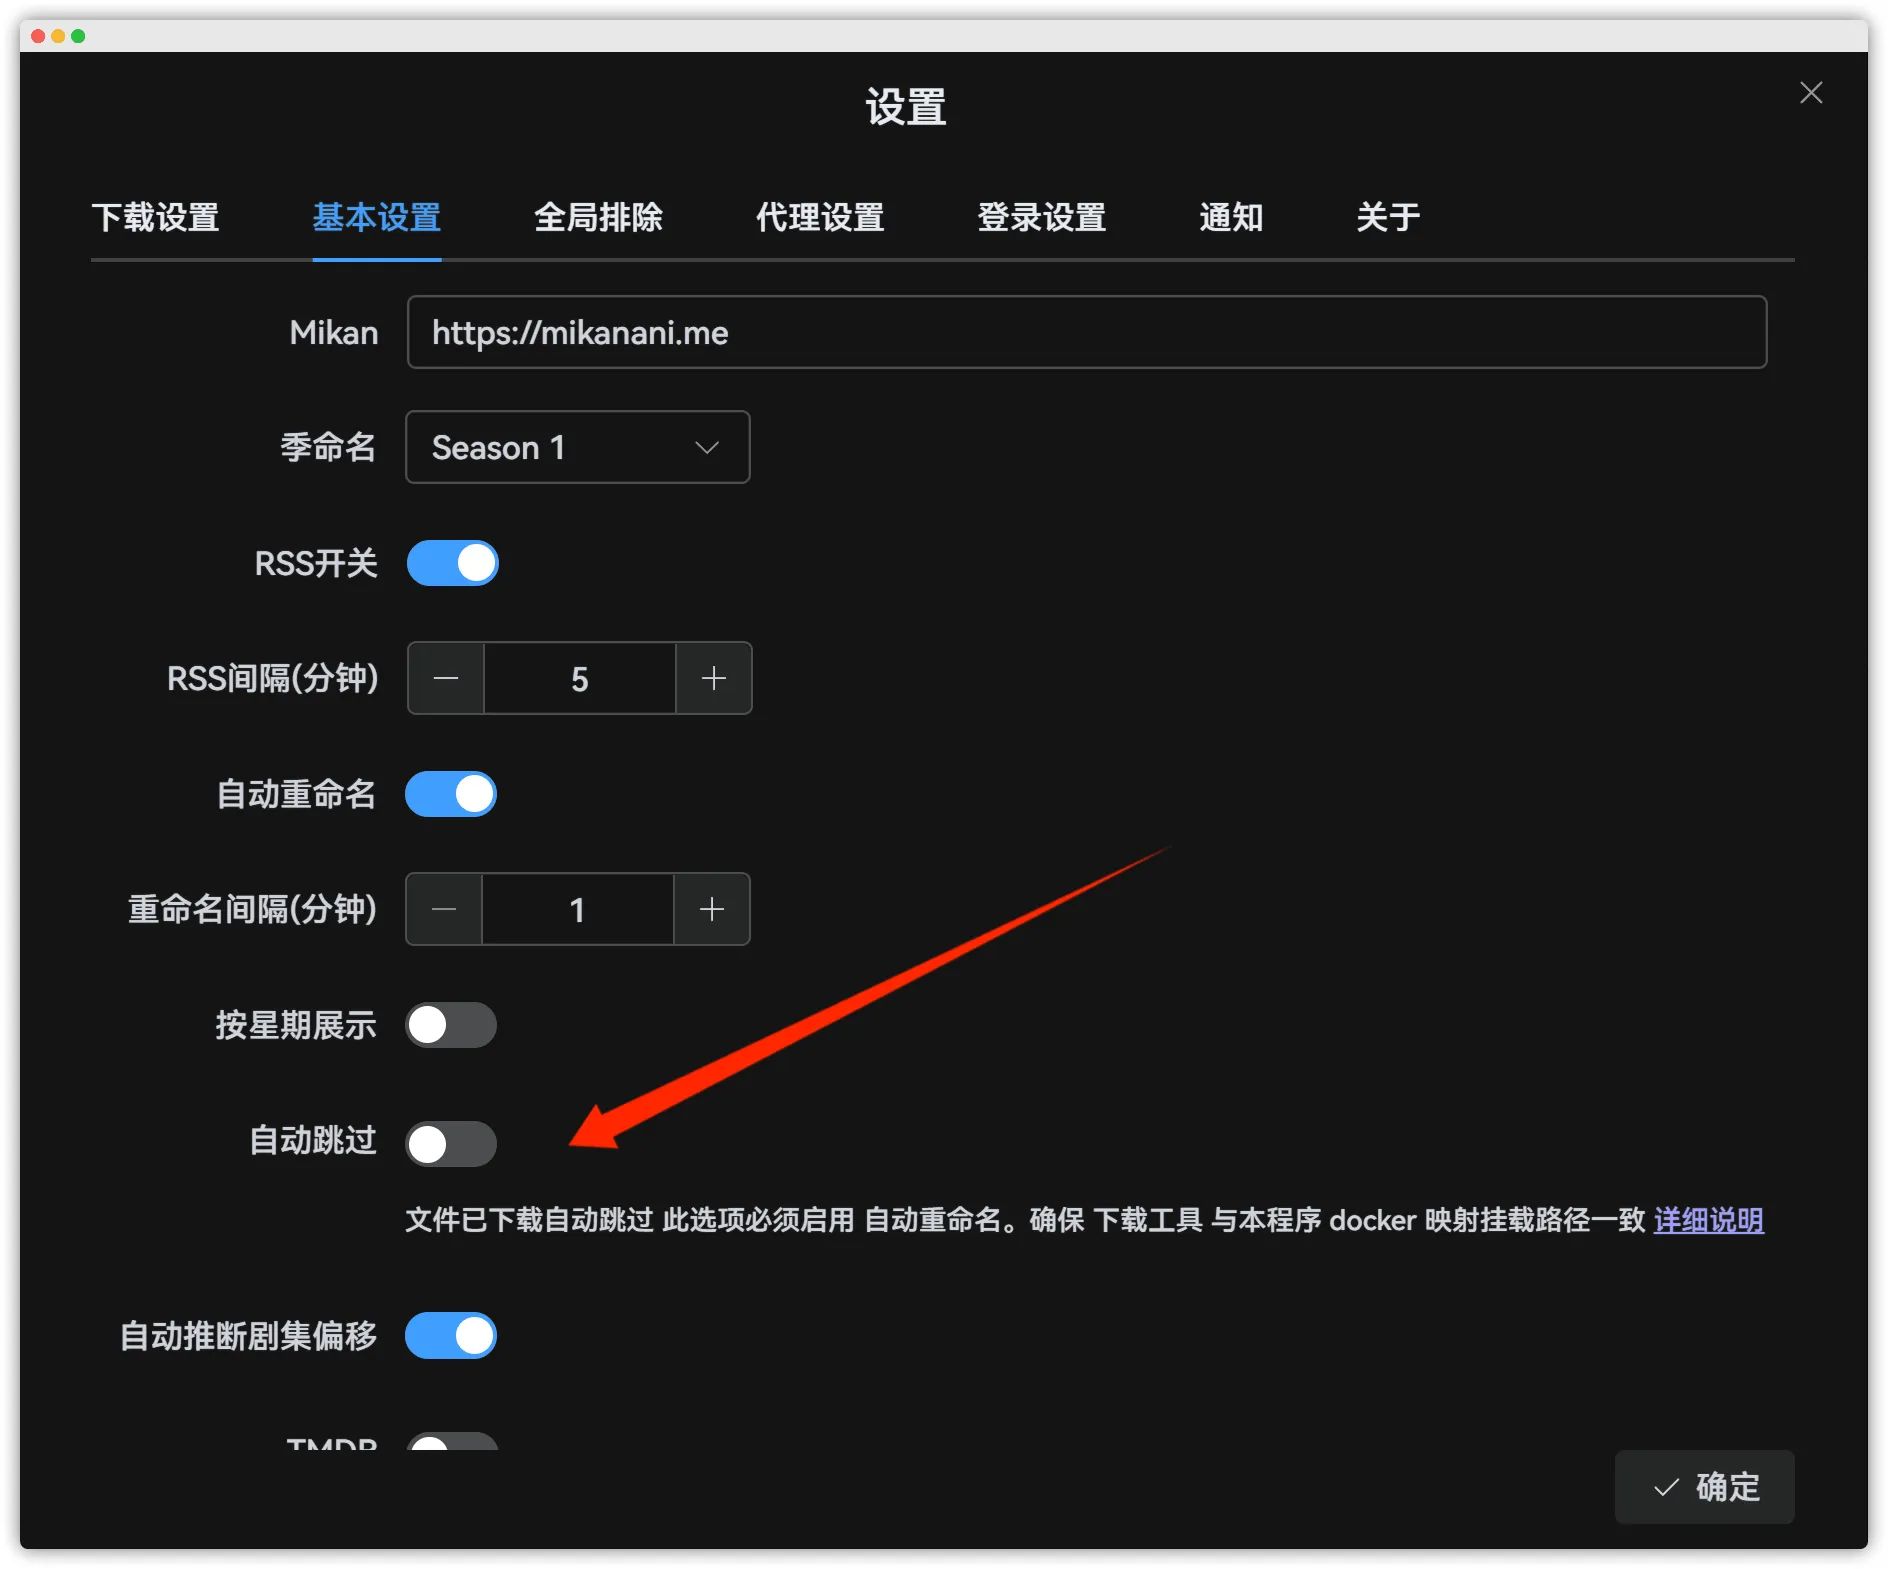
Auto skip
Automatically detects whether an episode already exists in the season folder.
Supported naming patterns:
├─A│ └─安达与岛村│ ├─S1│ │ 安达与岛村 S1E1.mp4│ ├─S01│ │ 安达与岛村 S01E02.mp4│ ├─Season 1│ │ S1E3.mp4│ └─Season 01│ S01E04.mp4│ 安达与岛村(2020) S1E5.mp4│ 安达与岛村(2020) S01E06.mp4PS: This option requires auto rename to be enabled. Also make sure the Docker bind paths for your downloader and ani-rss are exactly the same.
Auto infer episode offset
When adding an RSS feed, infer the episode offset based on the minimum episode number.
For example, if “Mushoku Tensei Season 2” starts at episode 0, the offset will automatically be detected as +1.
If “【Oshi no Ko】Season 2” starts at episode 12 for some groups, the offset will be detected as -11.
Whether to enable this depends on your personal preference.
Auto disable subscription
Fetches the total number of episodes from Bangumi, and automatically disables a subscription once all episodes have been downloaded.
Example settings
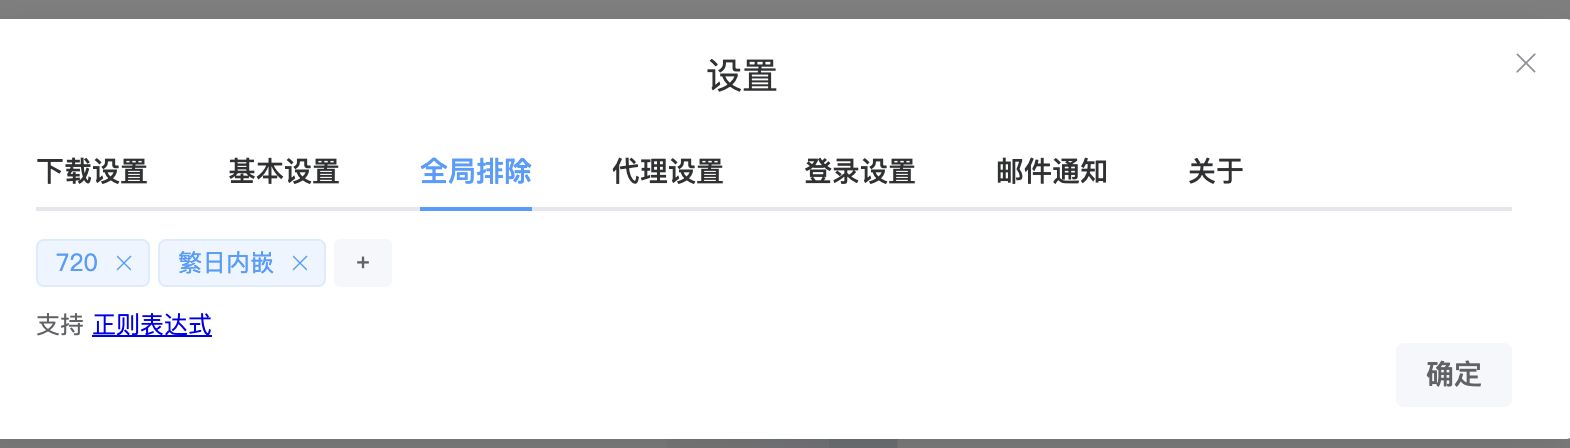
4.2.3 Global exclusion rules
Fansub groups usually publish multiple variants of each release. You can use exclusions to keep only the variants you prefer.
For example:
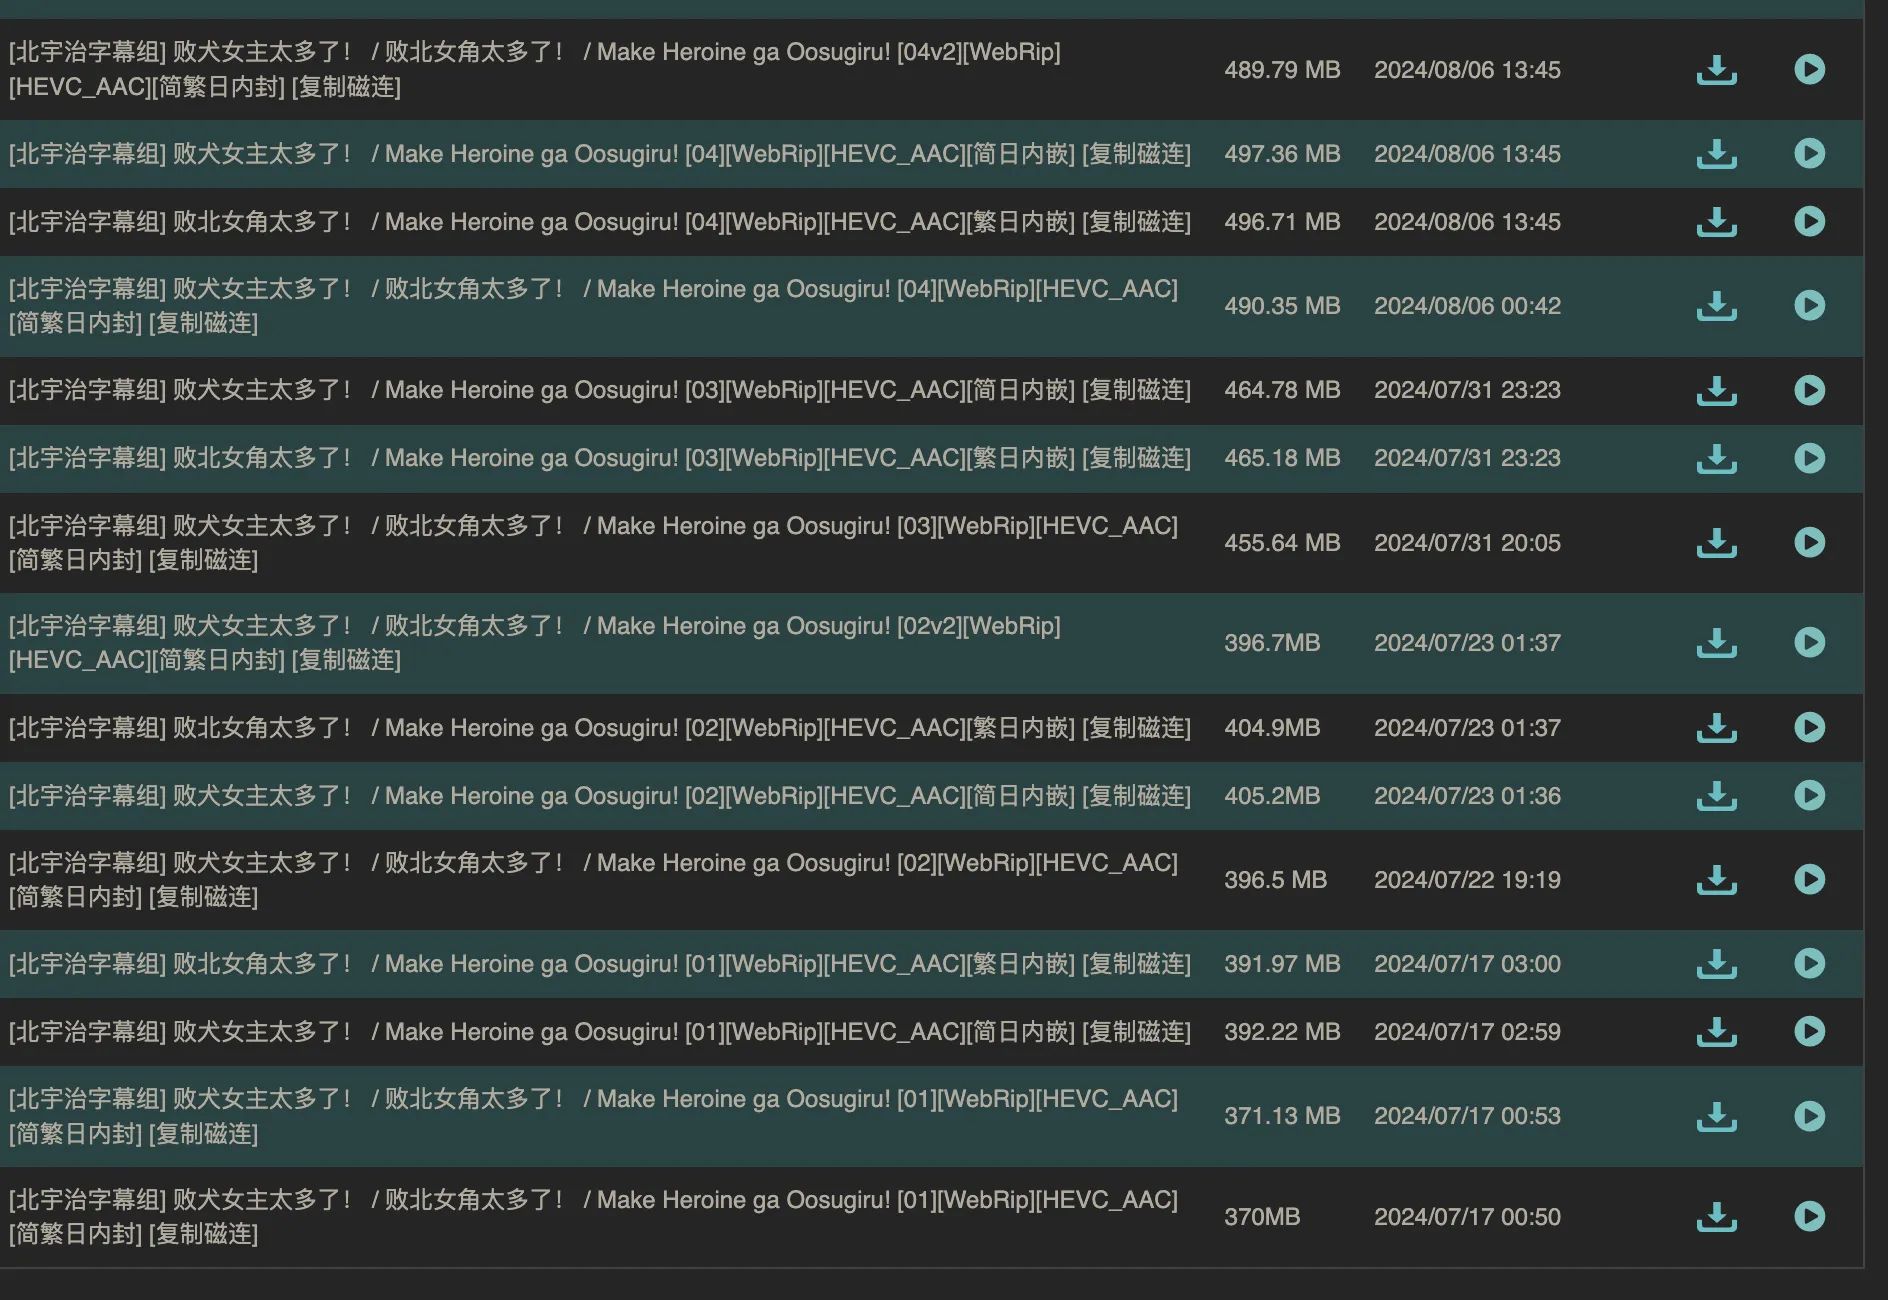
If you don’t want traditional Chinese + Japanese versions, configure that under global settings.
You can also set exclusions for individual shows:
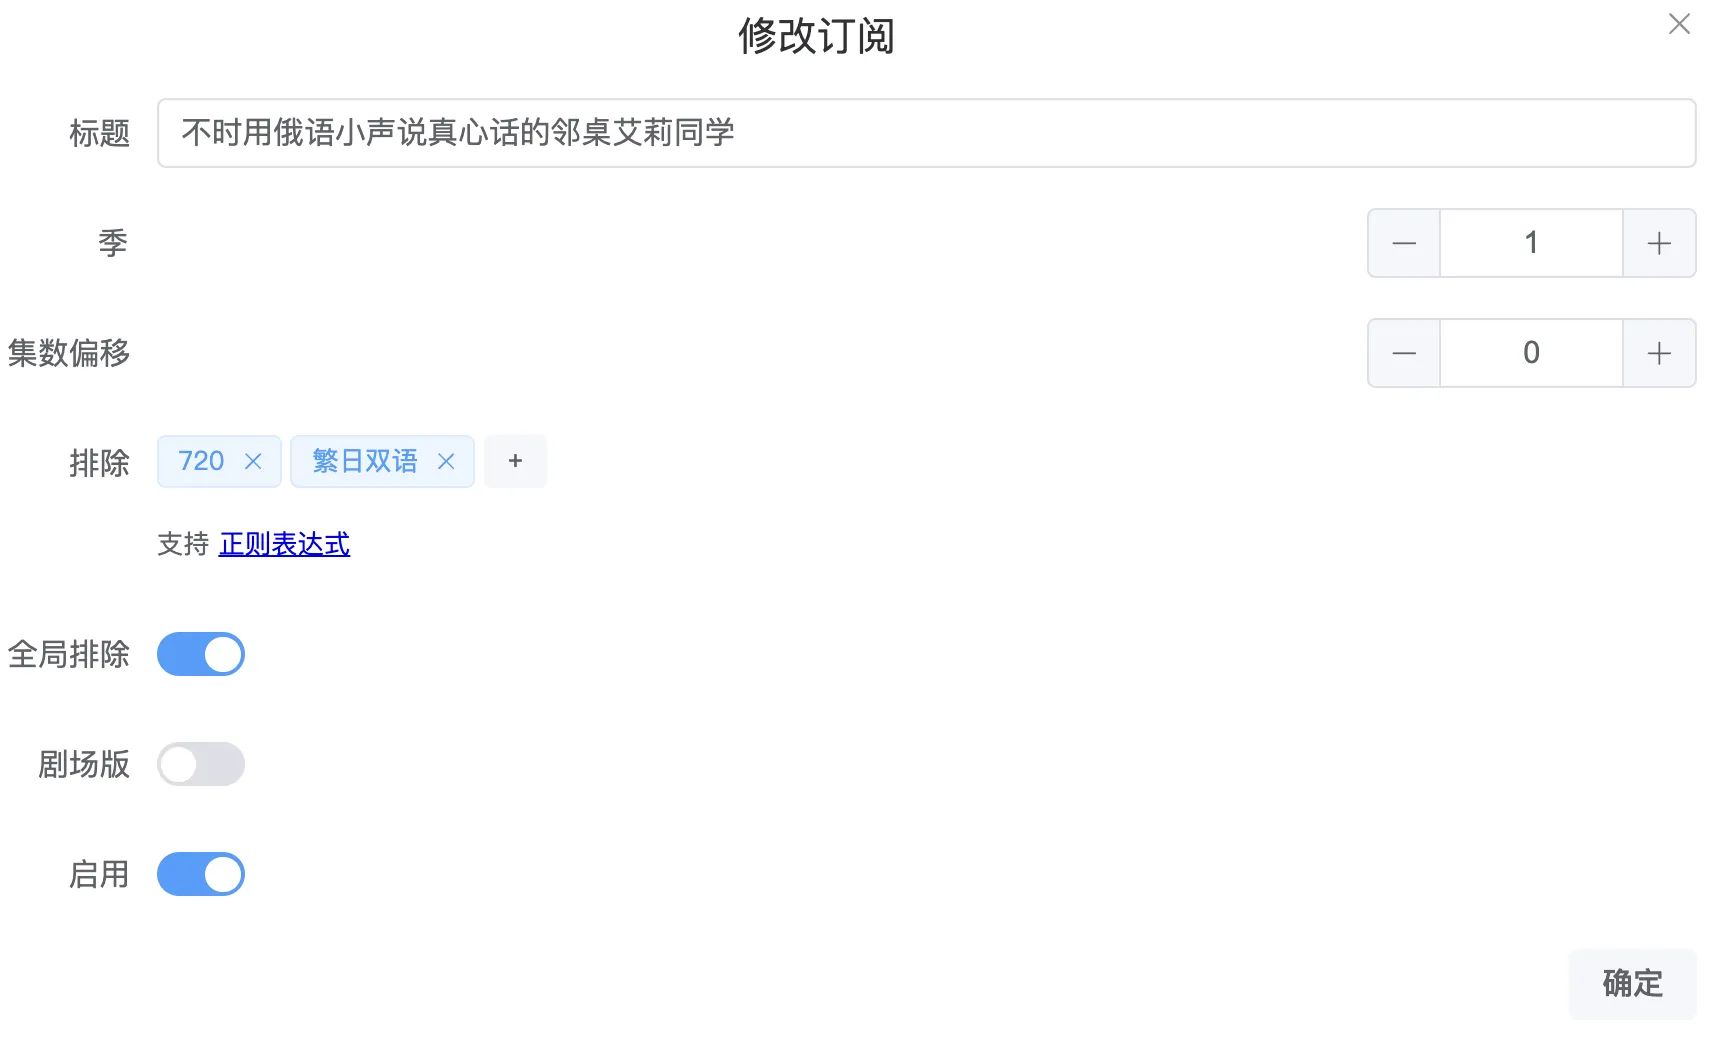
4.3.4 Telegram notification settings
4.3.4.1 Get a token
First, go to Telegram’s BotFather and create a bot (just follow the prompts).
-
Send
/newbot. BotFather will reply:Alright, a new bot. How are we going to call it? Please choose a name for your bot.
-
This is the display name, not the unique username. You can change it later with
/setname. For example, set it toZhang san's sweety bot. -
Next you’ll be asked for a unique username. It must end with
bot, soabc_botorHelloWorldbotare valid. If the name is taken, you’ll have to try again, for exampletest_bot.Good. Now let’s choose a username for your bot. It must end in
bot. Like this, for example: TetrisBot or tetris_bot. -
Done! Your bot is created and you’ll receive an important API token—keep it safe. The bot URL is also generated, for example:
https://t.me/test_bot.Done! Congratulations on your new bot. You will find it at t.me/test_bot. You can now add a description, about section and profile picture for your bot, see /help for a list of commands. By the way, when you’ve finished creating your cool bot, ping our Bot Support if you want a better username for it. Just make sure the bot is fully operational before you do this.
Use this token to access the HTTP API:
12345678
Keep your token secure and store it safely, it can be used by anyone to control your bot.For a description of the Bot API, see this page: https://core.telegram.org/bots/api
-
Some other useful commands:
/setdescription– set the bot description/setuserpic– set the bot avatar. The image must be at least 150x150, and you must upload it as a compressed photo, not as a file.
4.3.4.2 Get your chatId
Check this URL: https://api.telegram.org/bot{token}/getUpdates
Replace {token} with the token from the previous step, then paste the URL into your browser and hit Enter. You’ll get a response like:
{"ok": true, "result": []}
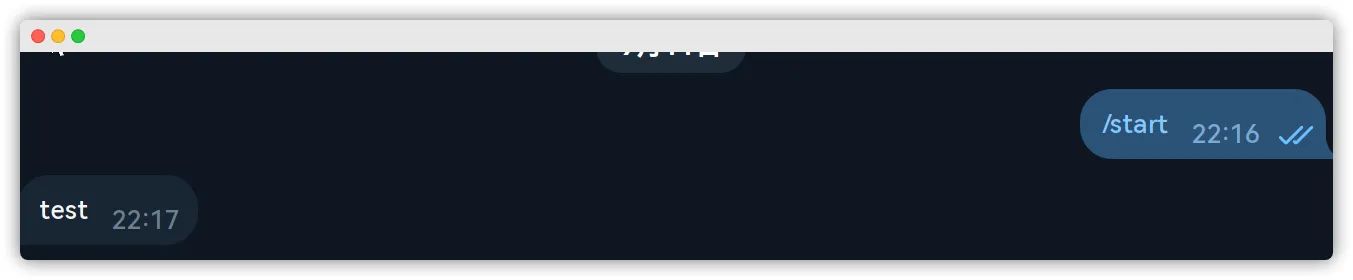
Now open your bot in Telegram and send it any message, e.g. “Hello World”. Request the same URL again, then use Ctrl+F in your browser to search for “id”: and you’ll find your chat_id.
4.3.4.3 Fill in and enable
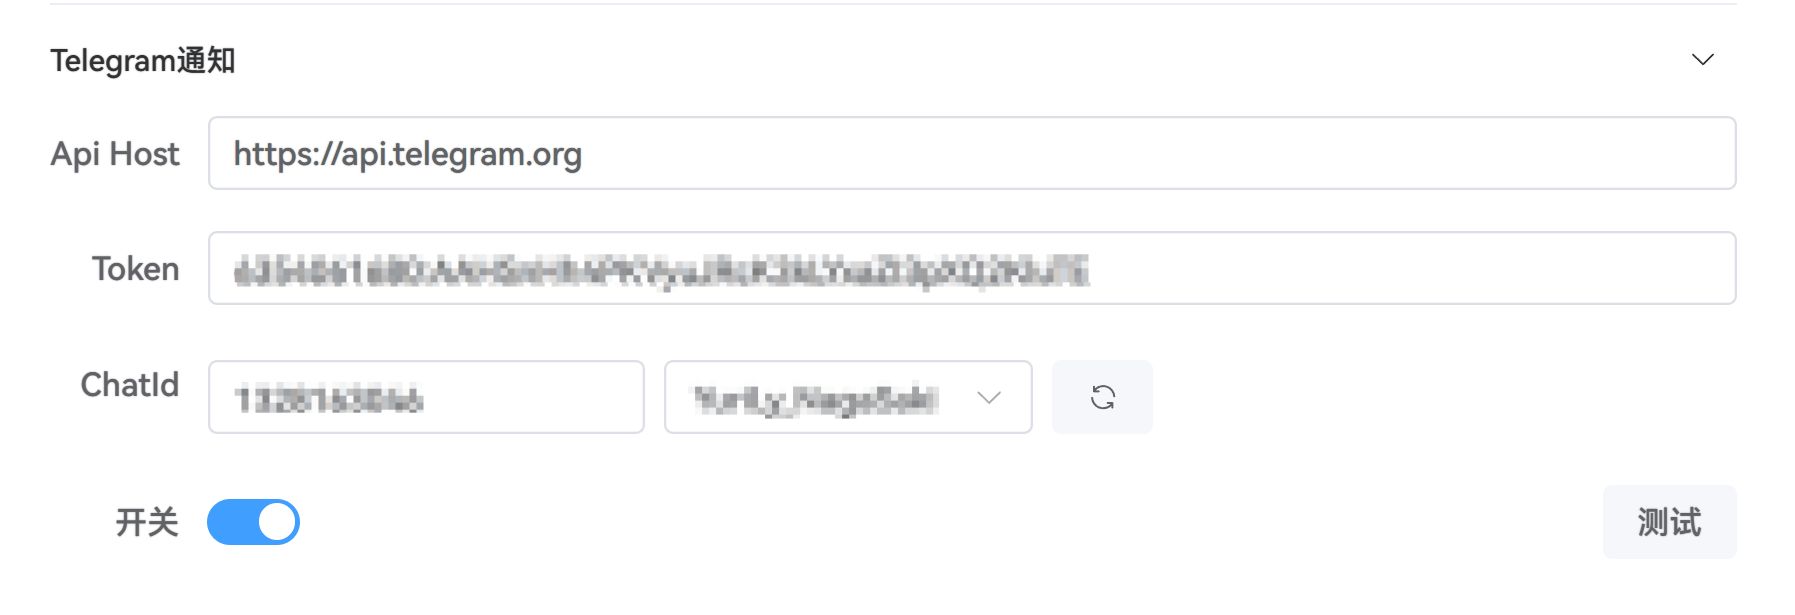
Click “Test” and you should receive a message.
4.3.5 Bark notifications
4.3.5.1 Deploy Bark
Create a directory:
mkdir -p /root/docker/bark
vim docker-compose.yamlservices: bark-server: image: finab/bark-server container_name: bark-server restart: always volumes: - ./data:/data ports: - "18999:8080"之后输入 http://ip:8090/ping 访问了。如何有域名需求,自行设置反代。不做赘述iOS在 APP Store 里找到 Bark打开 APP,默认指向了官方服务器 api.day.app,需要点右上角的 + 号来添加我们前面搭建的私有服务器:输入你的 ip:端口测试连接并进行绑定会显示不同内容的发送格式# 推送内容https://地址/Xy4ssdd2pARjLfFY/这里改成你自己的推送内容# 推送标题https://地址/Xy4ssdd2pARjLfFY/推送标题/这里改成你自己的推送内容Once you have the URL, copy just the random-looking token segment like Xy4ssdd2pARjLfFY.
Paste that into Ani-RSS.

4.4 How to “wash” and switch sources
For simulcasts we usually care about speed, so we might subscribe via Ani using Baha CR or other streaming sources. However, Baha is in traditional Chinese and translations may vary, so for archival we often prefer high-quality fansub releases. Ani-RSS has first-class support for this workflow.
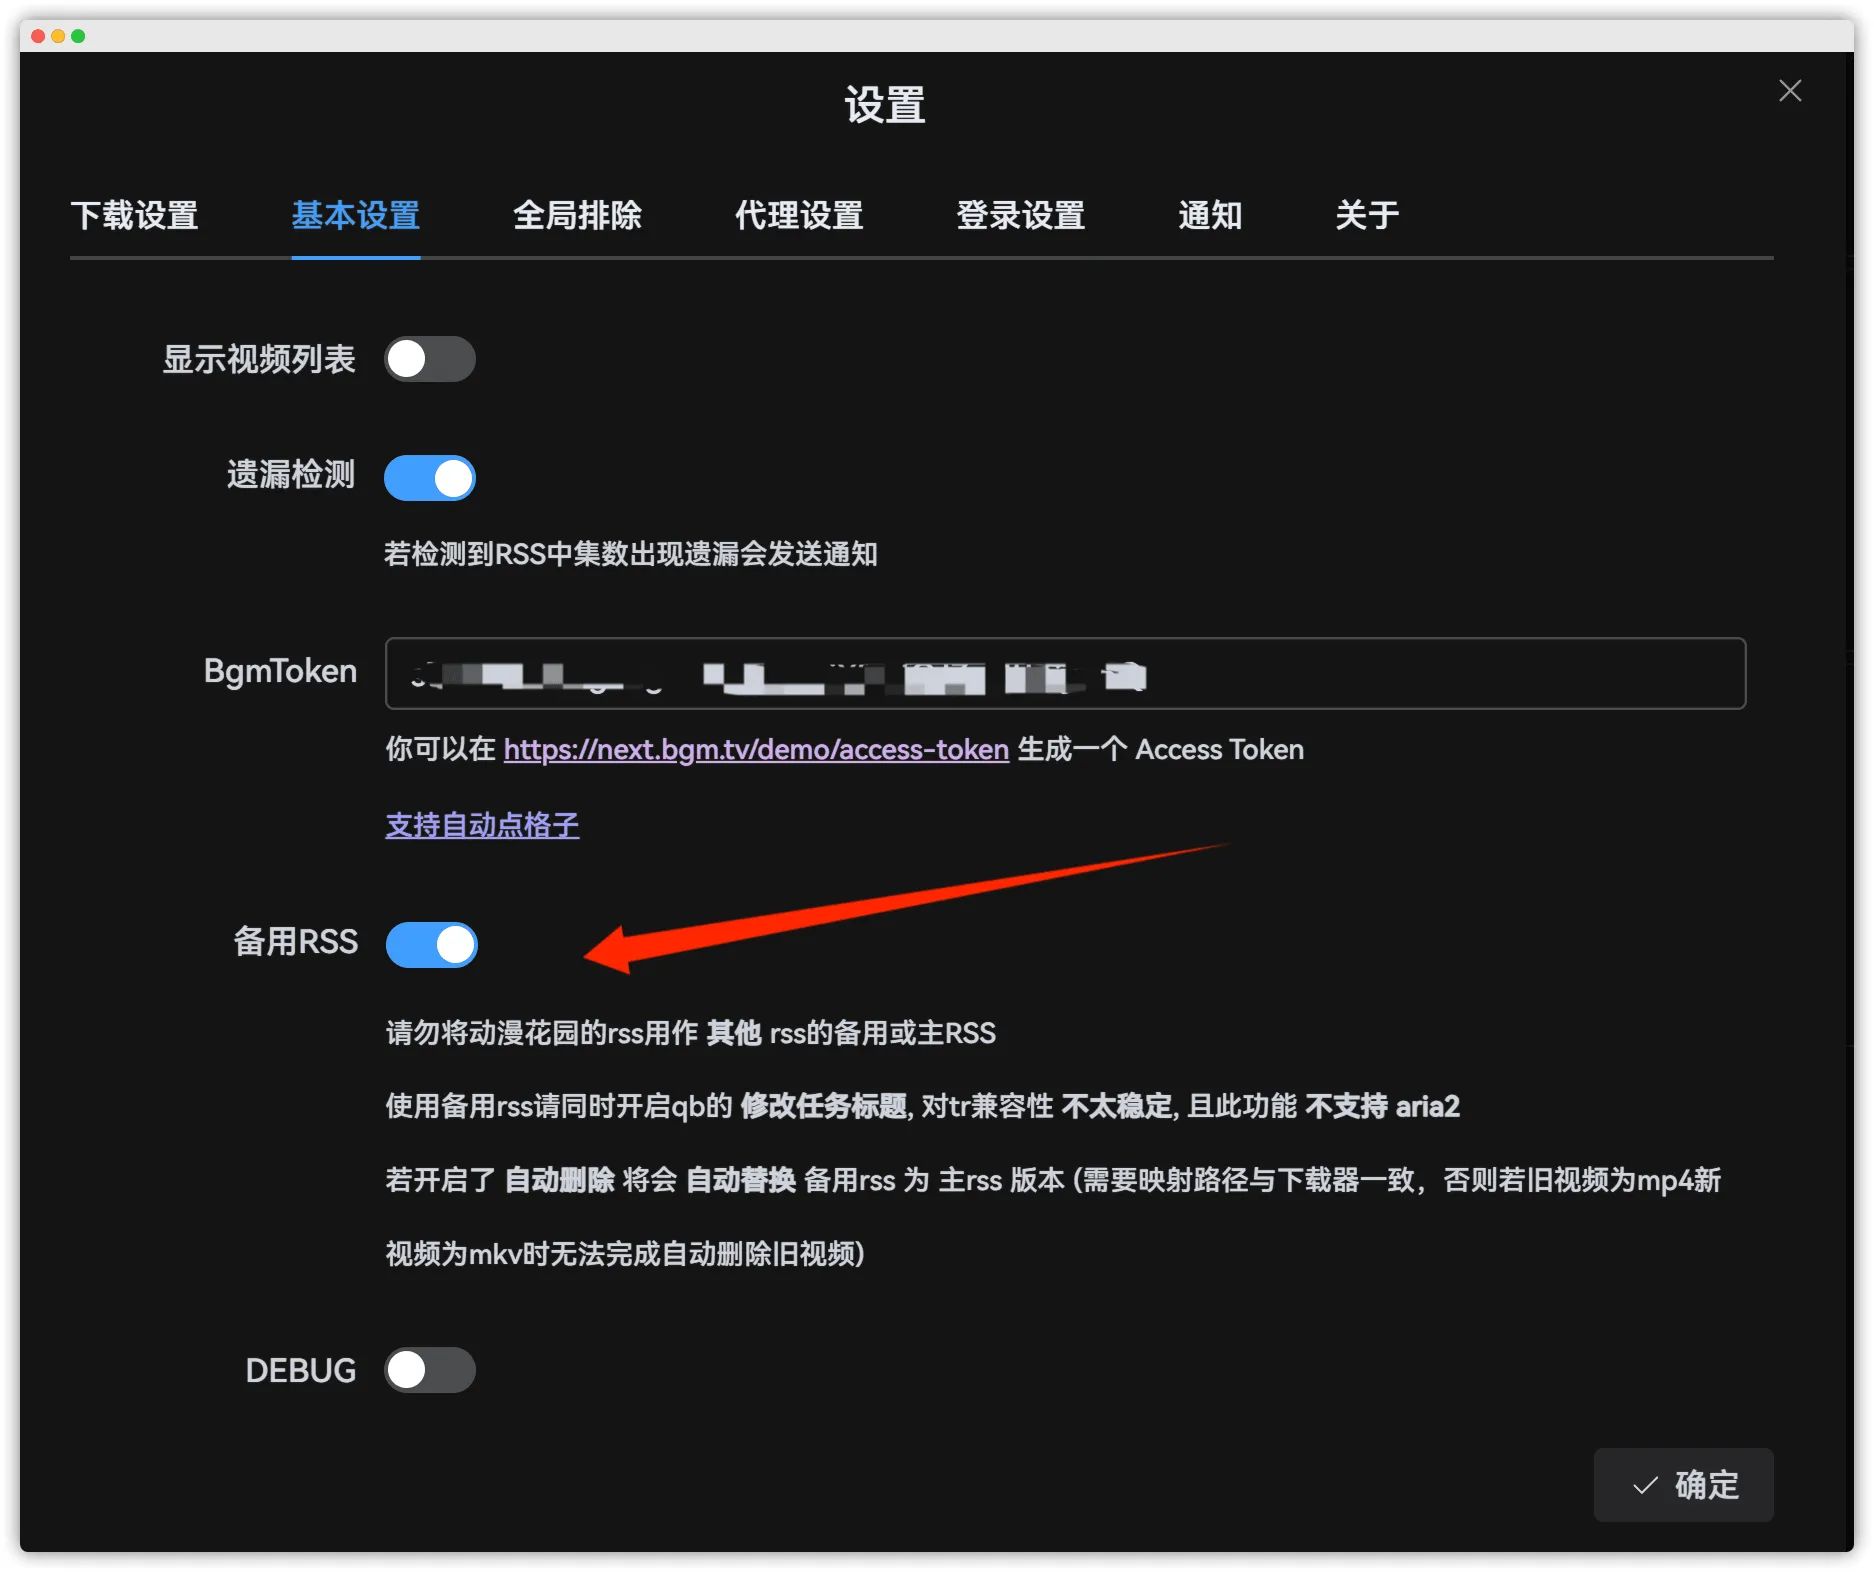
First, in basic settings, enable the standby RSS switch and disable auto skip.
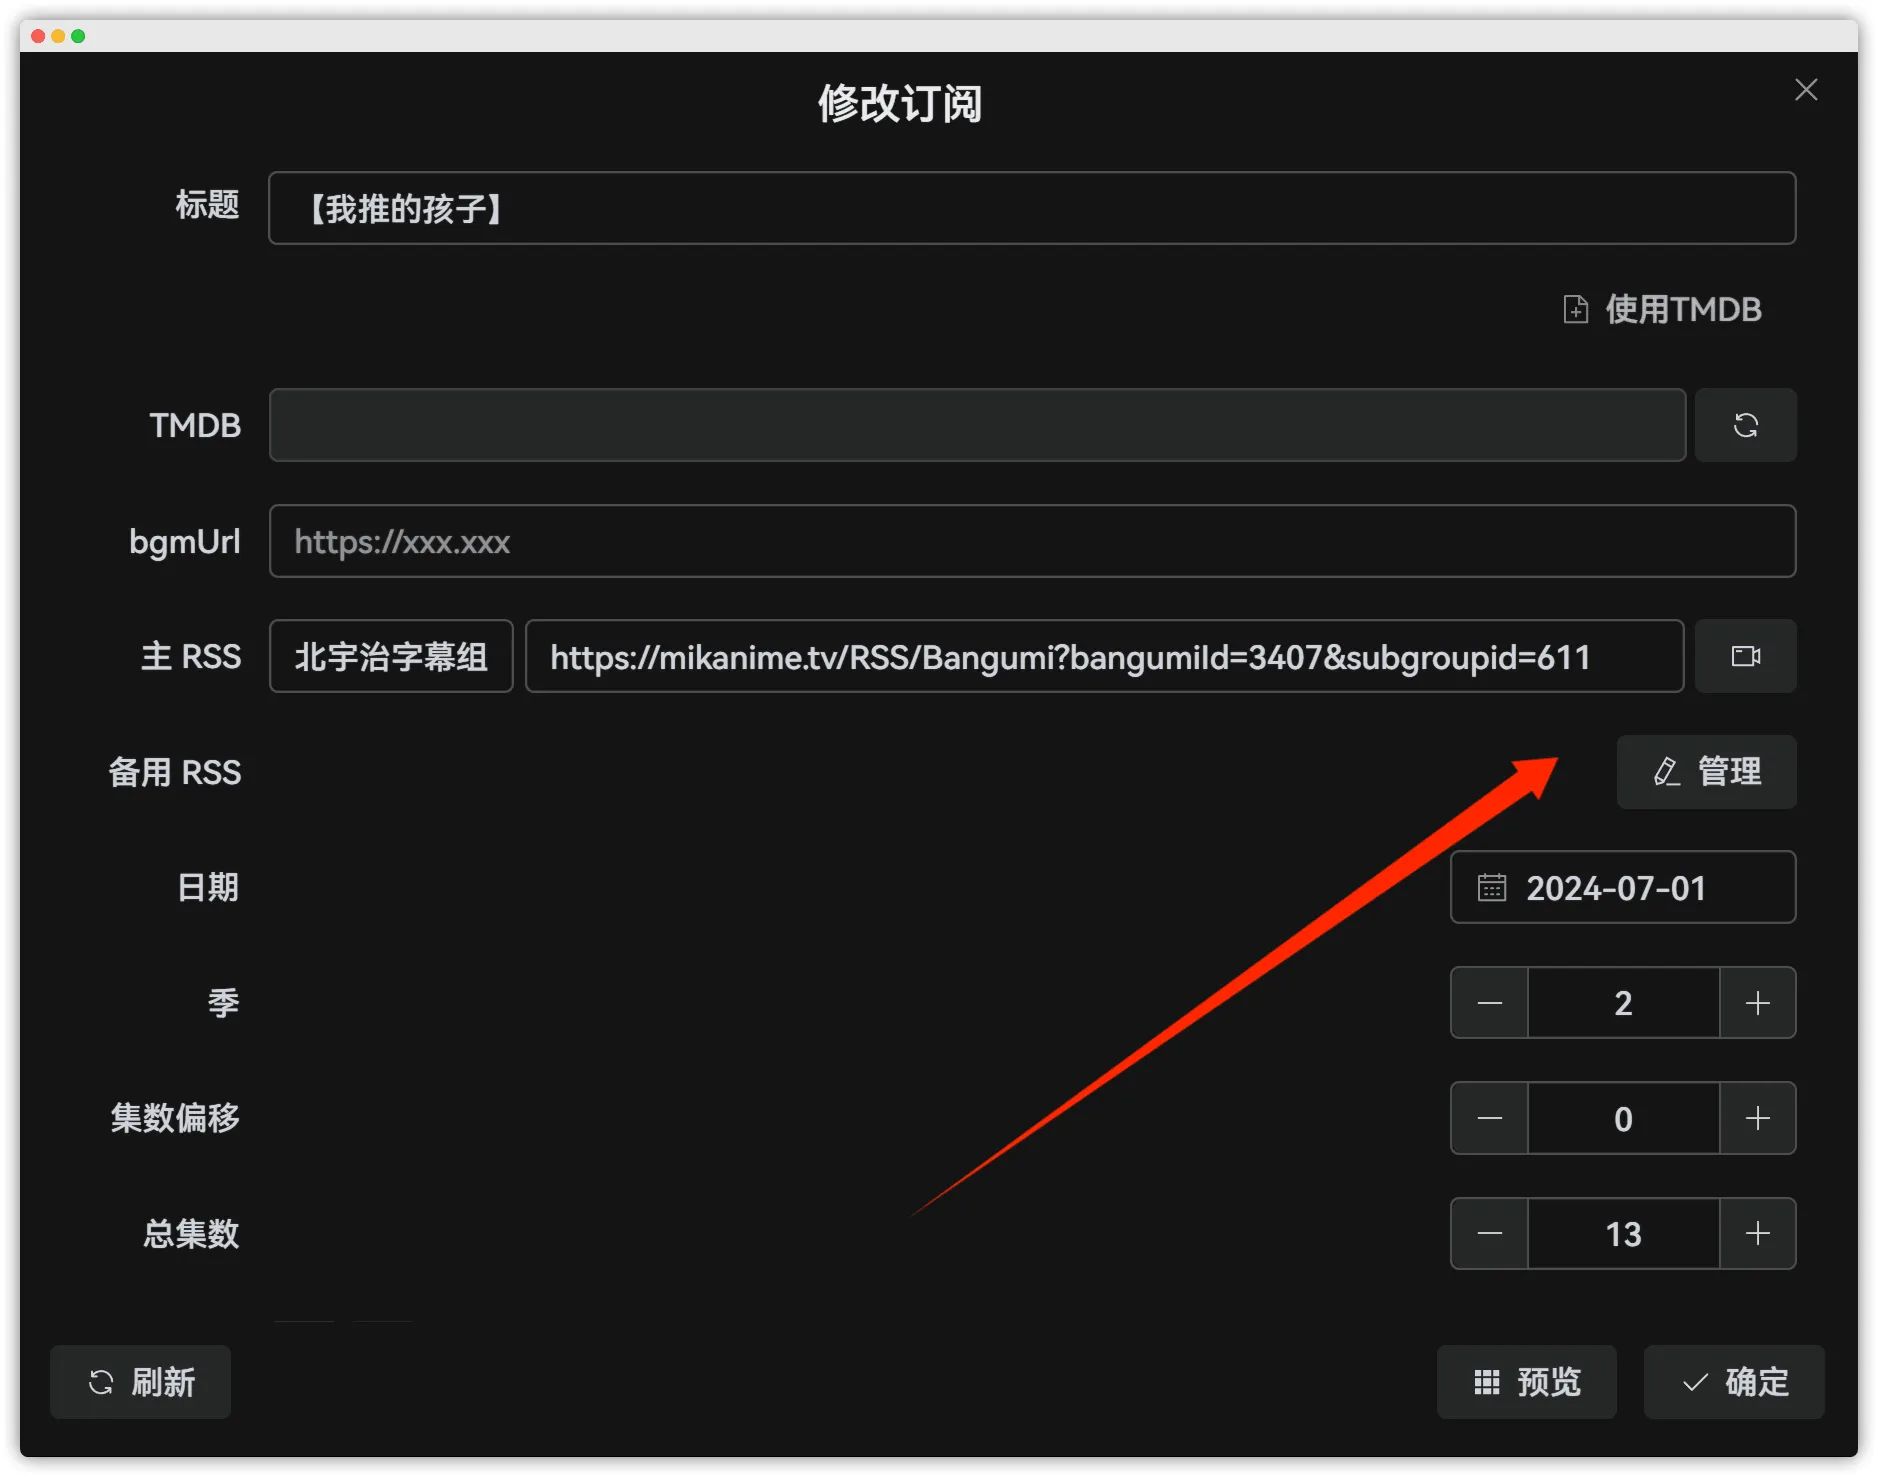
Then, for your existing subscriptions, set the fansub group version as the primary RSS, and streaming sources like Ani/Baha as standby RSS.
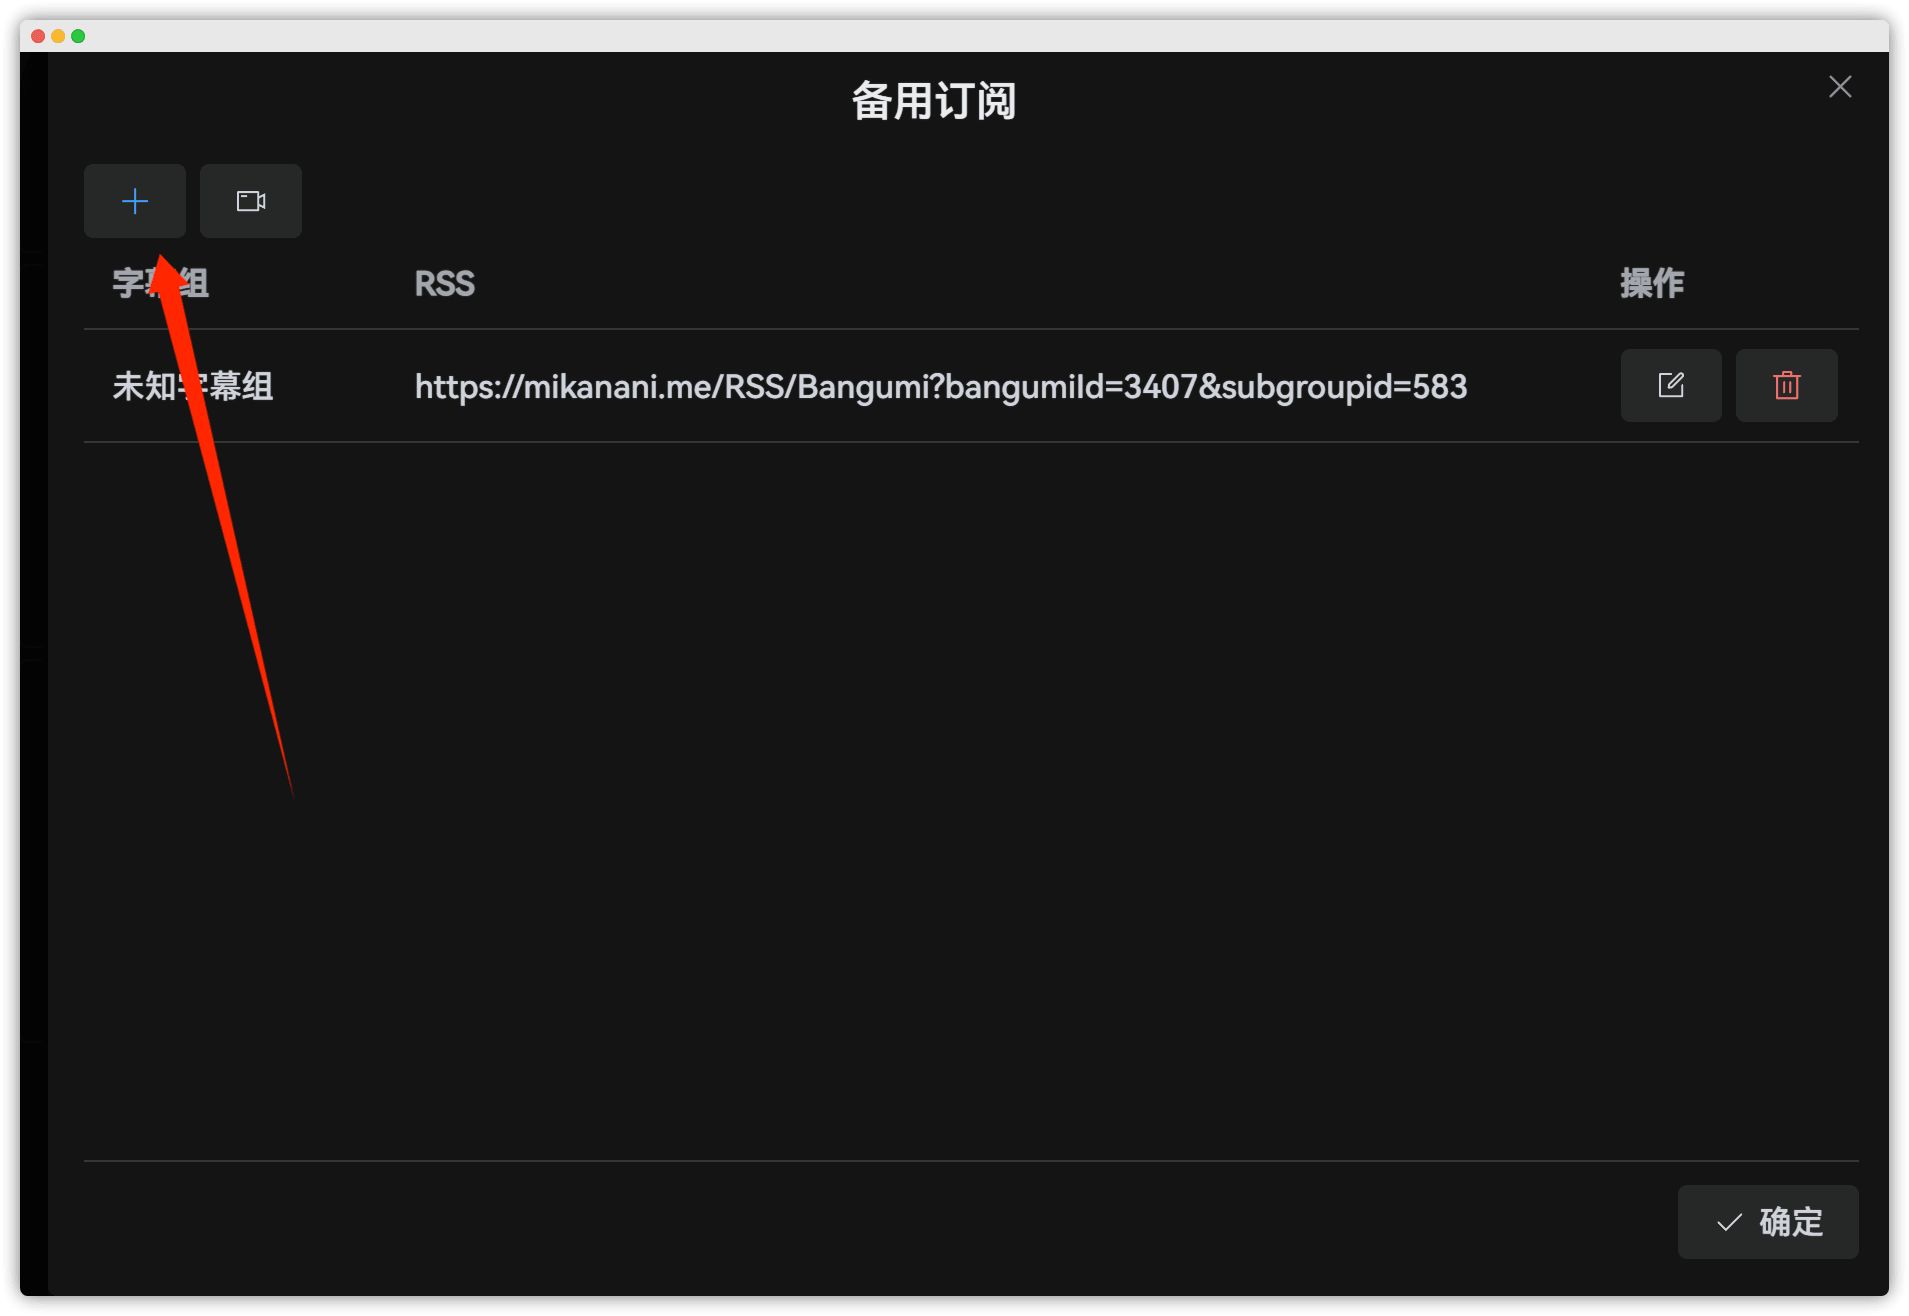
Adding standby RSS works the same way as primary RSS—just choose Ani again.
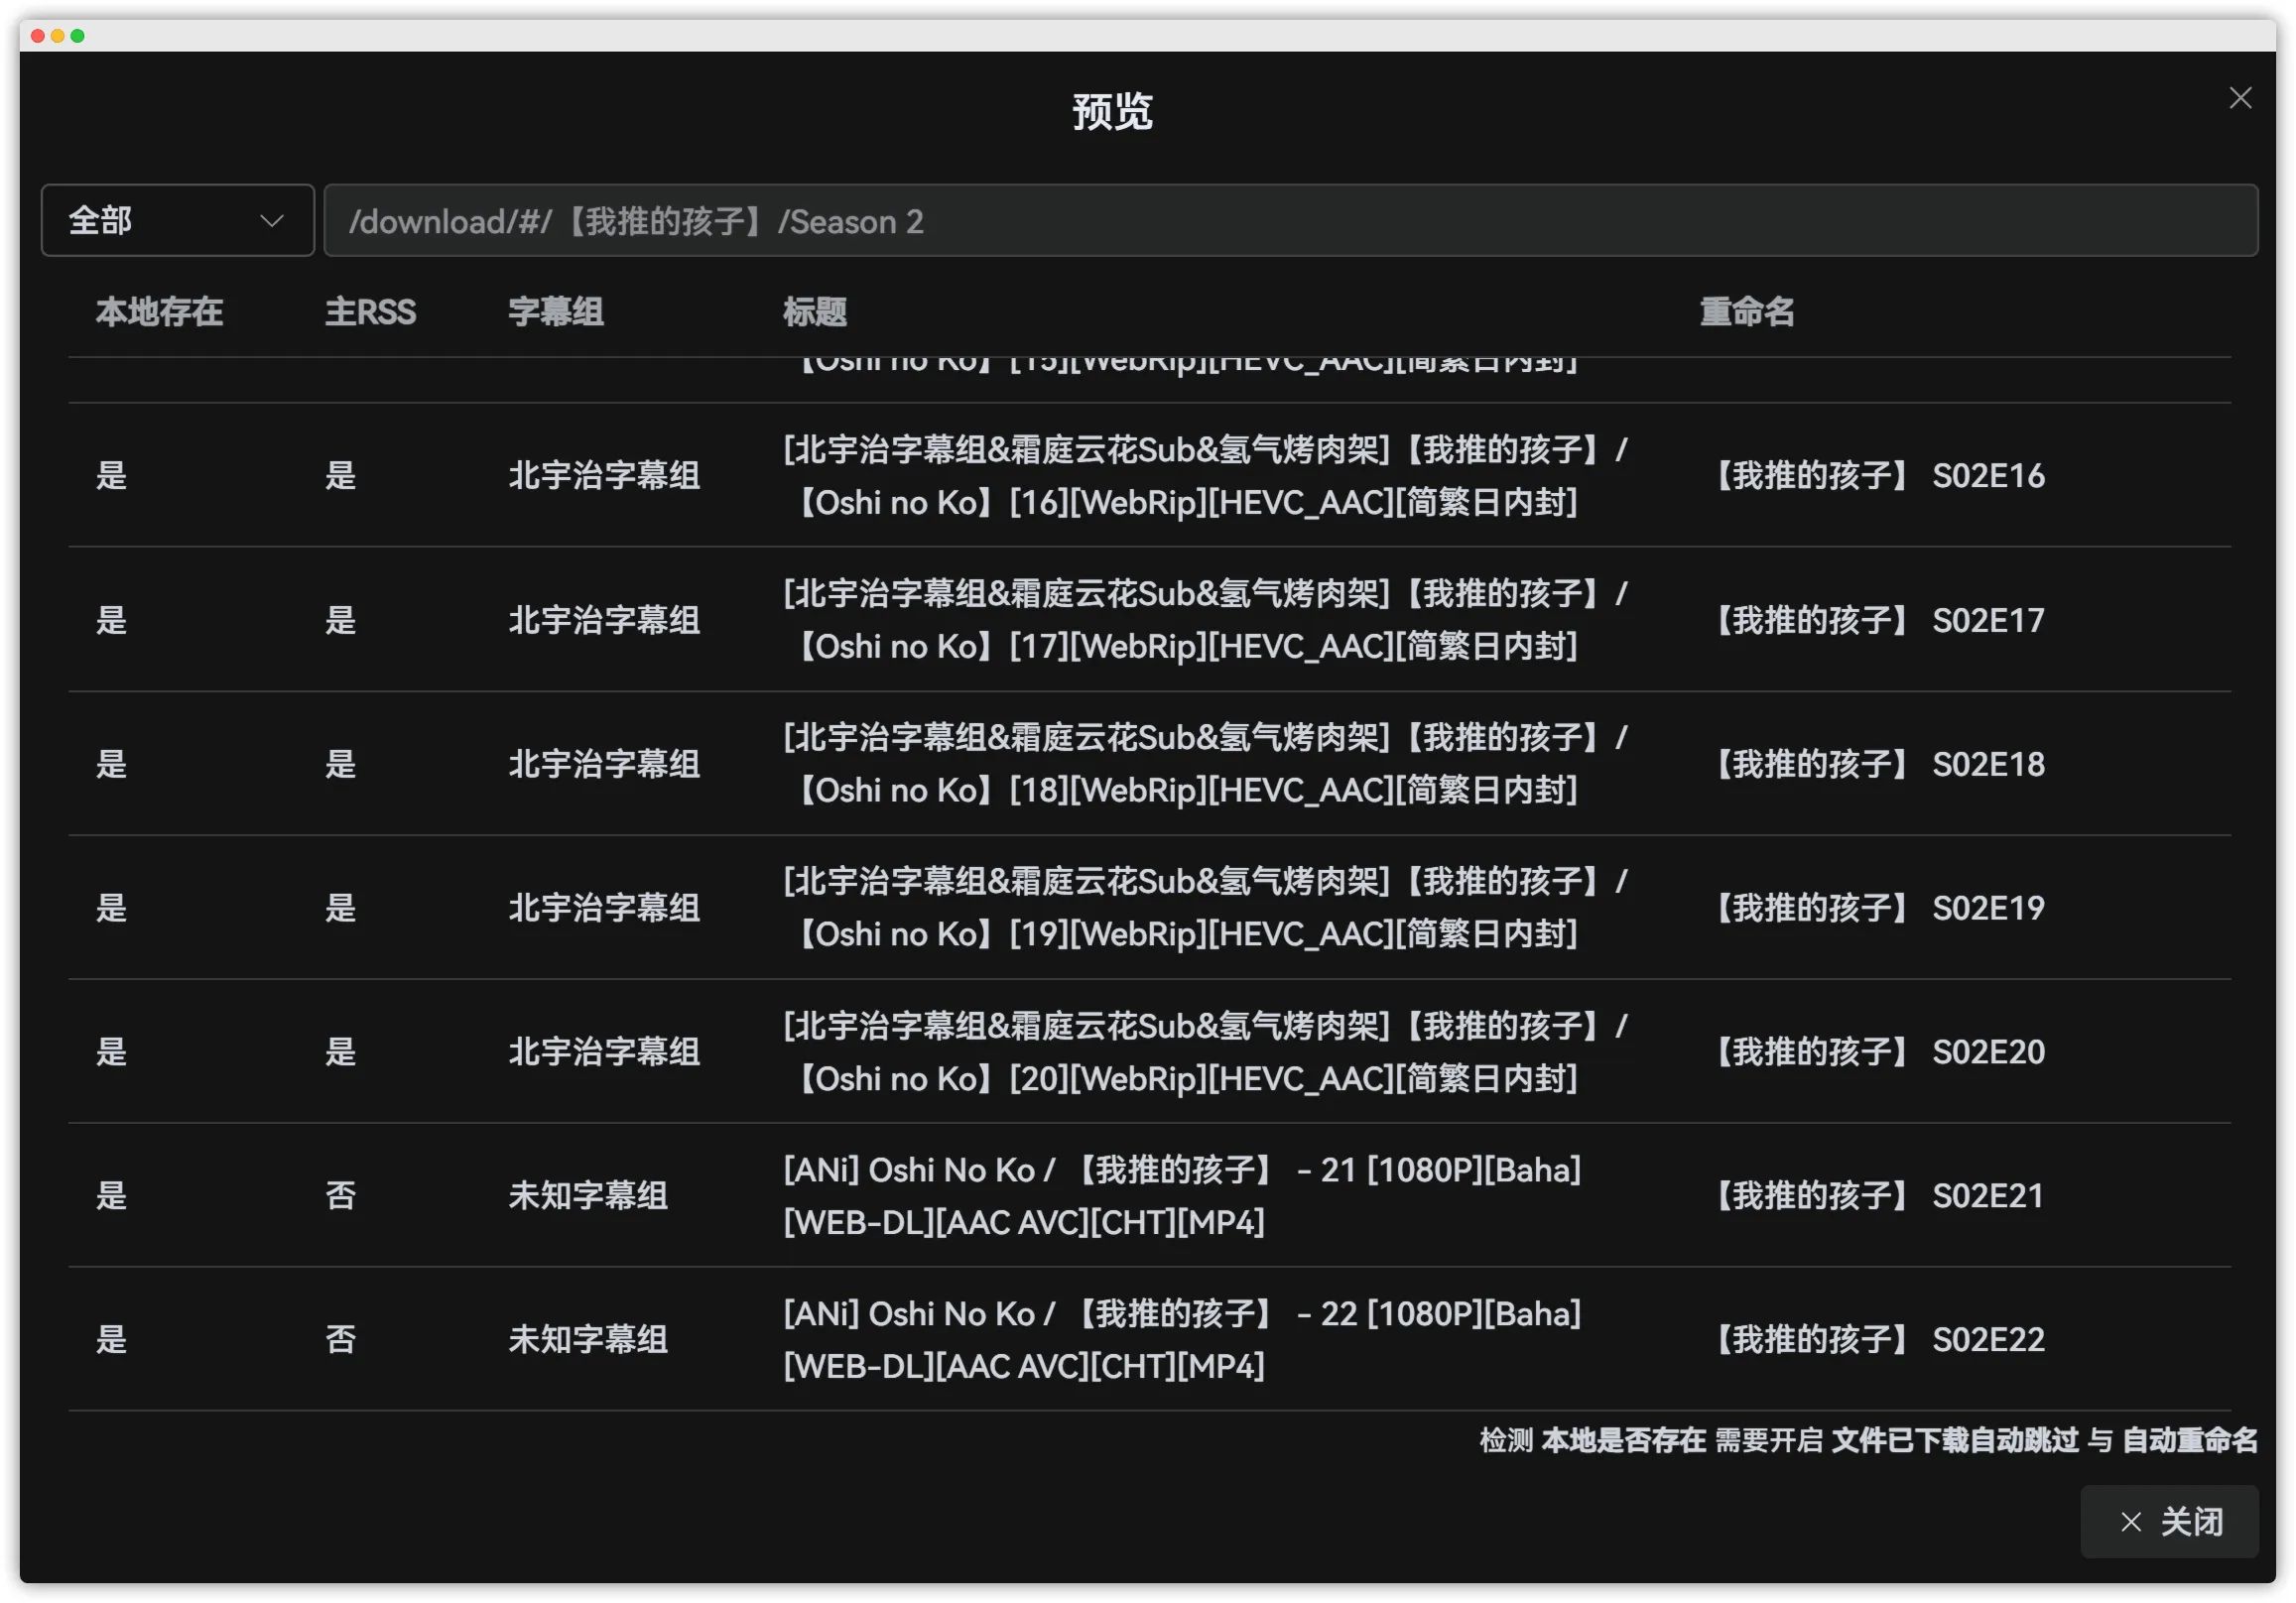
After adding, you can preview the behavior. When a new episode airs, Ani-RSS will first download from the standby RSS, ensuring you get it as soon as possible. Once the primary RSS (fansub) releases its version, Ani-RSS will delete the standby version and archive the primary version instead.
Upgrade to v2
The author accumulated too much “spaghetti code”, so a breaking v2 release was made.
If your current version works fine for you, there’s no need to rush the upgrade; most new features aren’t strictly essential.
1. Stop ani-rss
docekr stop ani-rss
2. Copy ani.json and config.json to `ani.v2.json` and `config.v2.json`.Since the files are persisted, we’ll back them up and rename them directly.cp ani.json ani.json.bakmv ani.json ani.v2.jsoncp config.json config.json.bakmv config.json config.v2.json
3. Open `ani.v2.json` in a text editor and replace backRssList with standbyRssList
If you’re on Linux, you can just run:sed -i 's/"backRssList"/"standbyRssList"/g' ani.v2.json
4. Restart ani-rss. Most of your settings will be preserved.
PS: You may need to rewrite your save-path templates.5. If you’re lazy
Refer to the CatCat Emby server usage guide and apply through me.