Hostbrr Storagebox Mounting Guide
These past two days I’ve been looking into backups. I happened to chat with the owner of hostbrr, and he reminded me that their Storagebox fully supports all kinds of backup scenarios.
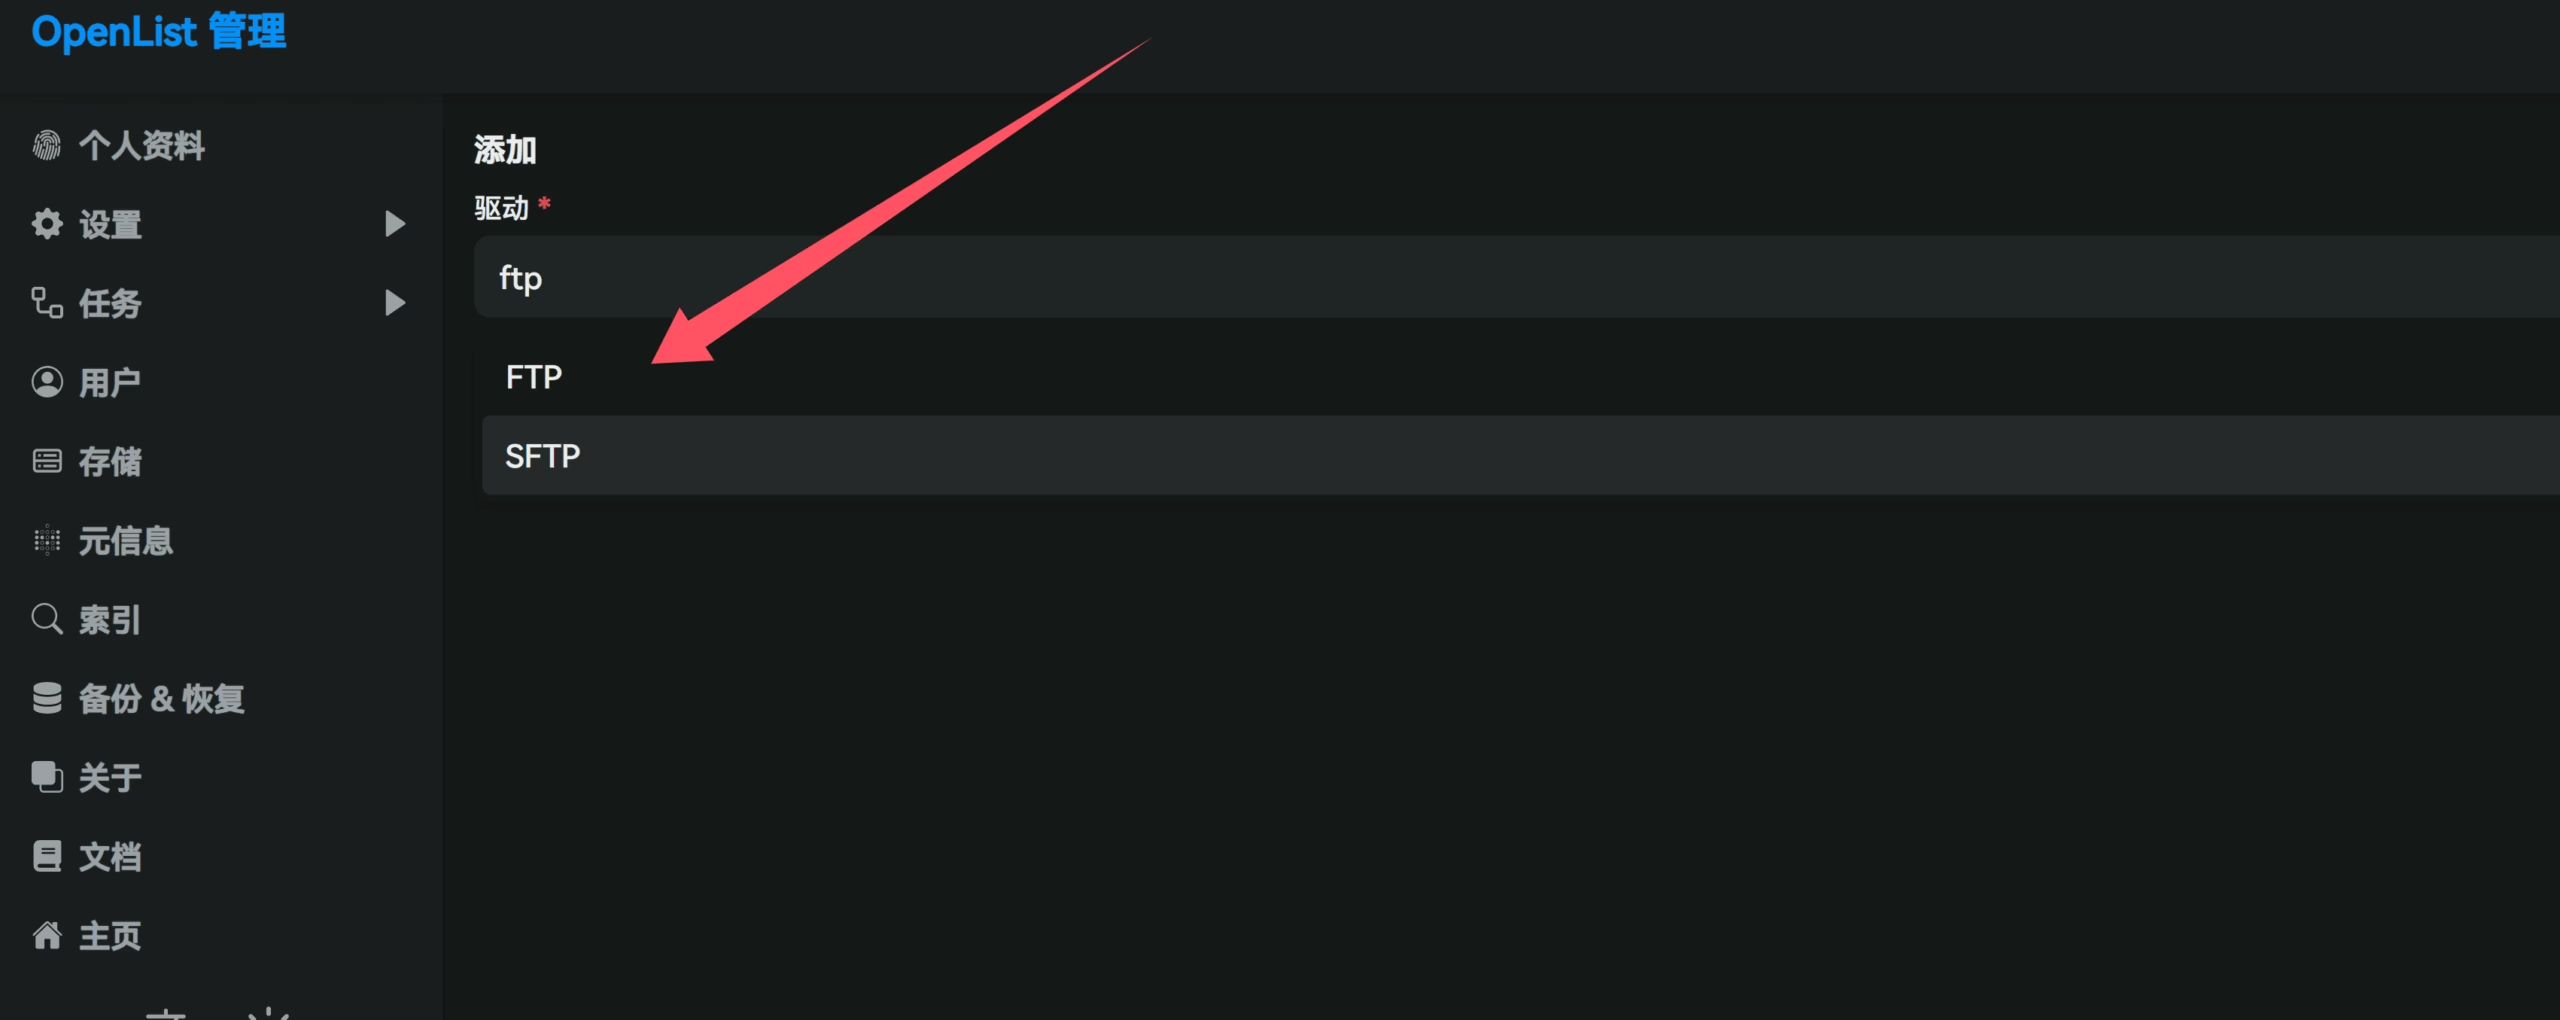
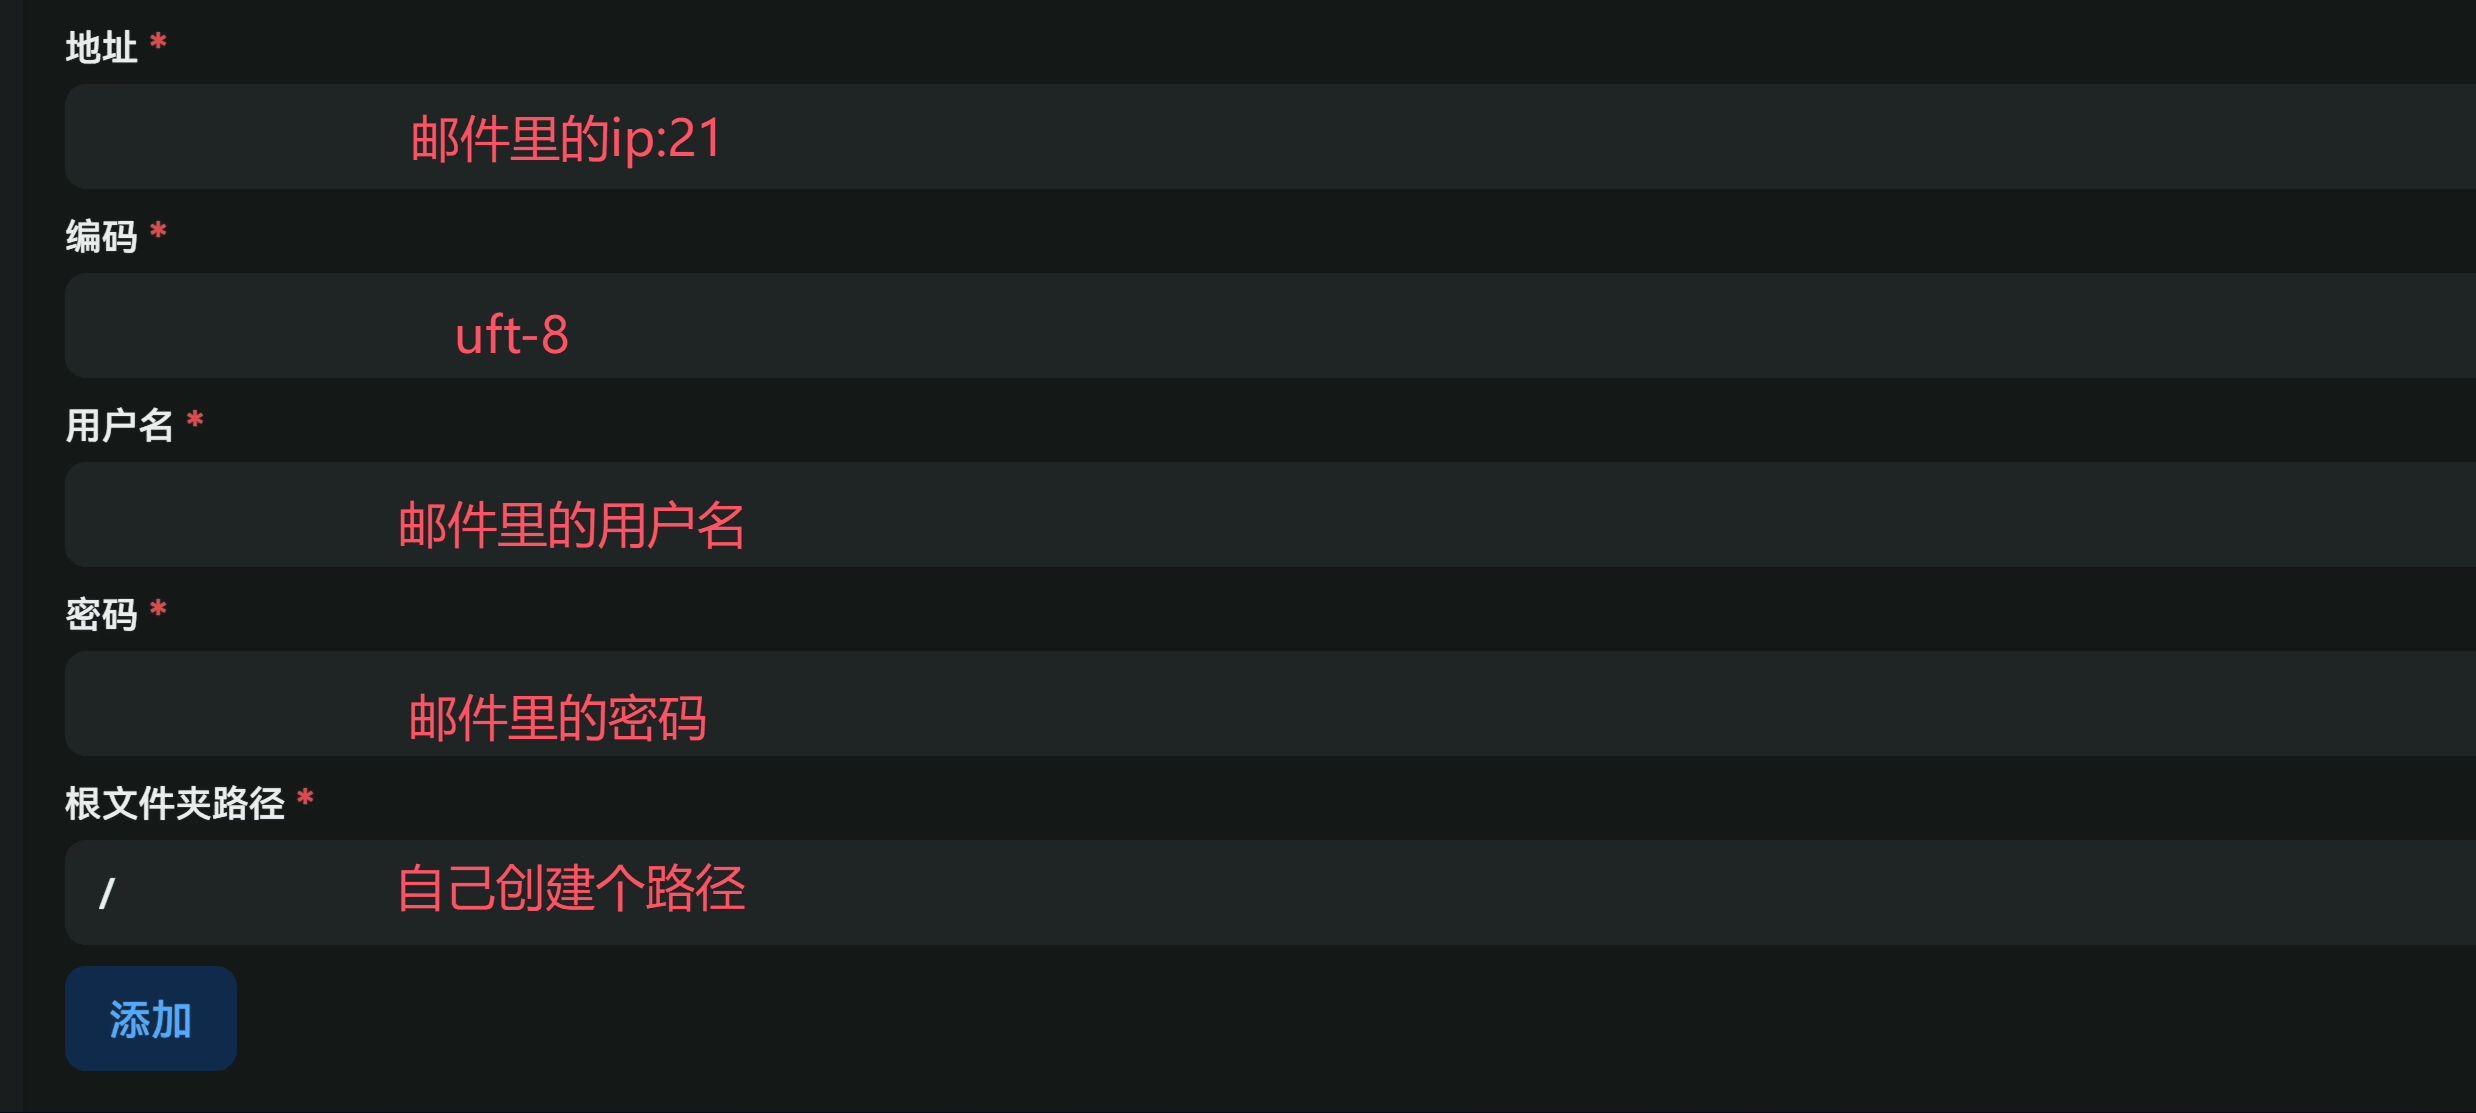
Mounting with OpenAlist (same for Alist)
The installation won’t be covered in detail here, there are one-click scripts available.
Let’s focus on the configuration.
Once you’ve mounted it, if you know, you know.
After that, enabling WebDAV lets you back up your other services as well.
Your WebDAV details:
- Access URL: http[s]://domain
/dav/ - Username: Alist login username, most likely
adminby default - Password: Alist login password
Rclone Sync
Install Rclone
curl https://rclone.org/install.sh | bashIf you see something like the following, the installation is successful.
rclone v1.70.2 has successfully installed.Now run "rclone config" for setup. Check https://rclone.org/docs/ for more details.Configuration
rclone config [22:23:42]2025/07/05 22:23:49 NOTICE: Config file "/root/.config/rclone/rclone.conf" not found - using defaultsNo remotes found, make a new one?n) New remotes) Set configuration passwordq) Quit confign/s/q> n
Enter name for new remote.name> hostbrrA long list of storage types will appear.
Find ftp.
15 / Encrypt/Decrypt a remote \ (crypt)16 / Enterprise File Fabric \ (filefabric)17 / FTP \ (ftp)18 / FileLu Cloud Storage \ (filelu)19 / Files.com \ (filescom)In my case it’s 17.
61 / iCloud Drive \ (iclouddrive)62 / premiumize.me \ (premiumizeme)63 / seafile \ (seafile)Storage> 17Connection details:
Option host.FTP host to connect to.E.g. "ftp.example.com".Enter a value.host> ## You’ll get this in the activation email
Option user.FTP username.Enter a value of type string. Press Enter for the default (root).user> ## You’ll get this in the activation email
Option port.FTP port number.Enter a signed integer. Press Enter for the default (21).port> ## Use the default, just press Enter
Option pass.FTP password.Choose an alternative below. Press Enter for the default (n).y) Yes, type in my own passwordg) Generate random passwordn) No, leave this optional password blank (default)y/g/n> y # choose YEnter the password:password: ## You’ll get this in the activation emailConfirm the password:password:## You’ll get this in the activation email
Option tls.Use Implicit FTPS (FTP over TLS).When using implicit FTP over TLS the client connects using TLSright from the start which breaks compatibility withnon-TLS-aware servers. This is usually served over port 990 ratherthan port 21. Cannot be used in combination with explicit FTPS.Enter a boolean value (true or false). Press Enter for the default (false).tls> ## Press Enter to accept the default
Option explicit_tls.Use Explicit FTPS (FTP over TLS).When using explicit FTP over TLS the client explicitly requestssecurity from the server in order to upgrade a plain text connectionto an encrypted one. Cannot be used in combination with implicit FTPS.Enter a boolean value (true or false). Press Enter for the default (false).explicit_tls> ## Press Enter to accept the default
Edit advanced config?y) Yesn) No (default)y/n> n ## Press Enter for the defaultConfirming the configuration
Configuration complete.Options:- type: ftp- host: host- user: name- pass: *** ENCRYPTED ***Keep this "hostbrr" remote?y) Yes this is OK (default)e) Edit this remoted) Delete this remotey/e/d> y
Current remotes:
Name Type==== ====hostbrr ftp
e) Edit existing remoten) New remoted) Delete remoter) Rename remotec) Copy remotes) Set configuration passwordq) Quit confige/n/d/r/c/s/q> qAt this point the remote setup is complete.
rclone ls hostbrr:/# If everything above is correct, this will list files under the FTP user’s root directory on the remote.rclone copy hostbrr:/example.txt /root/ -P# If everything above is correct, this will copy example.txt from the remote FTP root to the local /root folder.rclone copy /root/example.txt hostbrr:/-P# If everything above is correct, this will copy example.txt from the local /root folder to the remote FTP root.# The "-P" flag shows approximate transfer speed.rclone copy /hdd/media/av/JAV hostbrr:/backup -P [22:45:37]Transferred: 2.783 GiB / 86.698 GiB, 3%, 98.724 MiB/s, ETA 14m30sChecks: 0 / 0, -, Listed 31Transferred: 10 / 23, 43%Elapsed time: 29.0sTransferring: * 明里䌷/IPZZ-599/IPZZ-599.mp4: 2% /25.031Gi, 17.634Mi/s, 23m44s * 川越にこ,浅野こころ/SONE-711/SONE-711.mkv: 1% /29.724Gi, 17.706Mi/s, 28m10s * 渚あいり,白上咲花/SONE-768/SONE-768-C.mp4: 4% /19.572Gi, 33.807Mi/s, 9m24s * 渚あいり,白上咲花/SONE-768/SONE-768-破解-C.mp4: 13% /6.357Gi, 32.225Mi/s, 2m54sMounting remote storage locally
Install fuse3:
apt updateapt install fuse3Create a local directory corresponding to the remote: mkdir /usr/examplehost
Create a mount service: vim /etc/systemd/system/rclone-examplehost.service
[Unit]Description=RcloneAssertPathIsDirectory=/usr/examplehostAfter=network-online.target[Service]Type=simpleExecStart=rclone mount examplehost:/ /usr/examplehost --vfs-cache-mode writes --vfs-cache-max-age 1h --vfs-cache-max-size 10G --vfs-cache-poll-interval 10m --no-modtime --header Referer: -vExecStop=fusermount -u /usr/examplehostRestart=on-abortUser=root[Install]WantedBy=default.targetThen run:
systemctl daemon-reloadsystemctl enable rclone-examplehost.servicesystemctl restart rclone-examplehost.servicesystemctl status rclone-examplehost.serviceIf the status looks normal, run df -h and you should see the mounted space. From here, you can customize and extend things as you like.
Rsync Backup
This is even simpler:
rsync -avz --info=progress2 -e "ssh -p PORT" /root/example name@ip:/home/name/exampleEnter the SSH password and syncing will take off immediately.