Set Up a K8s Cluster with kubeadm
Environment Preparation
Prepare three Linux machines (Ubuntu 20.04 LTS is used as the example here). The three machines must be able to communicate with each other. I’m using VPSs here, so I’m not exposing the IPs.
Below are the three Ubuntu 20.04 LTS nodes used in this article:
| hostname | IP | system | memory |
|---|---|---|---|
| k8s-master | Ubuntu 20.04 LTS | 8GB | |
| k8s-worker1 | Ubuntu 20.04 LTS | 8GB | |
| k8s-worker2 | Ubuntu 20.04 LTS | 8GB |
Install containerd, kubeadm, kubelet, kubectl#
Save the following shell script into a file, for example master.sh, and copy it to all three machines.
Then run the script on each machine with:
sudo sh master.shTo change the Kubernetes version, edit the last line of the script below. The version we use here is
1.28.0. You can list available versions withapt list -a kubeadm.
#!/bin/bash
echo "[TASK 1] Disable and turn off SWAP"sed -i '/swap/d' /etc/fstabswapoff -a
echo "[TASK 2] Stop and Disable firewall"systemctl disable --now ufw >/dev/null 2>&1
echo "[TASK 3] Enable and Load Kernel modules"cat >>/etc/modules-load.d/containerd.conf<<EOFoverlaybr_netfilterEOFmodprobe overlaymodprobe br_netfilter
echo "[TASK 4] Add Kernel settings"cat >>/etc/sysctl.d/kubernetes.conf<<EOFnet.bridge.bridge-nf-call-ip6tables = 1net.bridge.bridge-nf-call-iptables = 1net.ipv4.ip_forward = 1EOFsysctl --system >/dev/null 2>&1
echo "[TASK 5] Install containerd runtime"mkdir -p /etc/apt/keyringscurl -fsSL https://download.docker.com/linux/ubuntu/gpg | sudo gpg --dearmor -o /etc/apt/keyrings/docker.gpgecho "deb [arch=$(dpkg --print-architecture) signed-by=/etc/apt/keyrings/docker.gpg] https://download.docker.com/linux/ubuntu \ $(lsb_release -cs) stable" | sudo tee /etc/apt/sources.list.d/docker.list > /dev/nullapt -qq update >/dev/null 2>&1apt install -qq -y containerd.io >/dev/null 2>&1containerd config default >/etc/containerd/config.tomlsed -i 's/SystemdCgroup = false/SystemdCgroup = true/' /etc/containerd/config.tomlsystemctl restart containerdsystemctl enable containerd >/dev/null 2>&1
echo "[TASK 6] Add apt repo for kubernetes"curl -s https://packages.cloud.google.com/apt/doc/apt-key.gpg | apt-key add - >/dev/null 2>&1apt-add-repository "deb http://apt.kubernetes.io/ kubernetes-xenial main" >/dev/null 2>&1
echo "[TASK 7] Install Kubernetes components (kubeadm, kubelet and kubectl)"apt install -qq -y kubeadm=1.28.0-00 kubelet=1.28.0-00 kubectl=1.28.0-00 >/dev/null 2>&1After the script finishes, you can verify the installation of kubeadm, kubelet, and kubectl. If all of them return a version string, the installation was successful.
kubeadm versionkubelet --versionkubectl version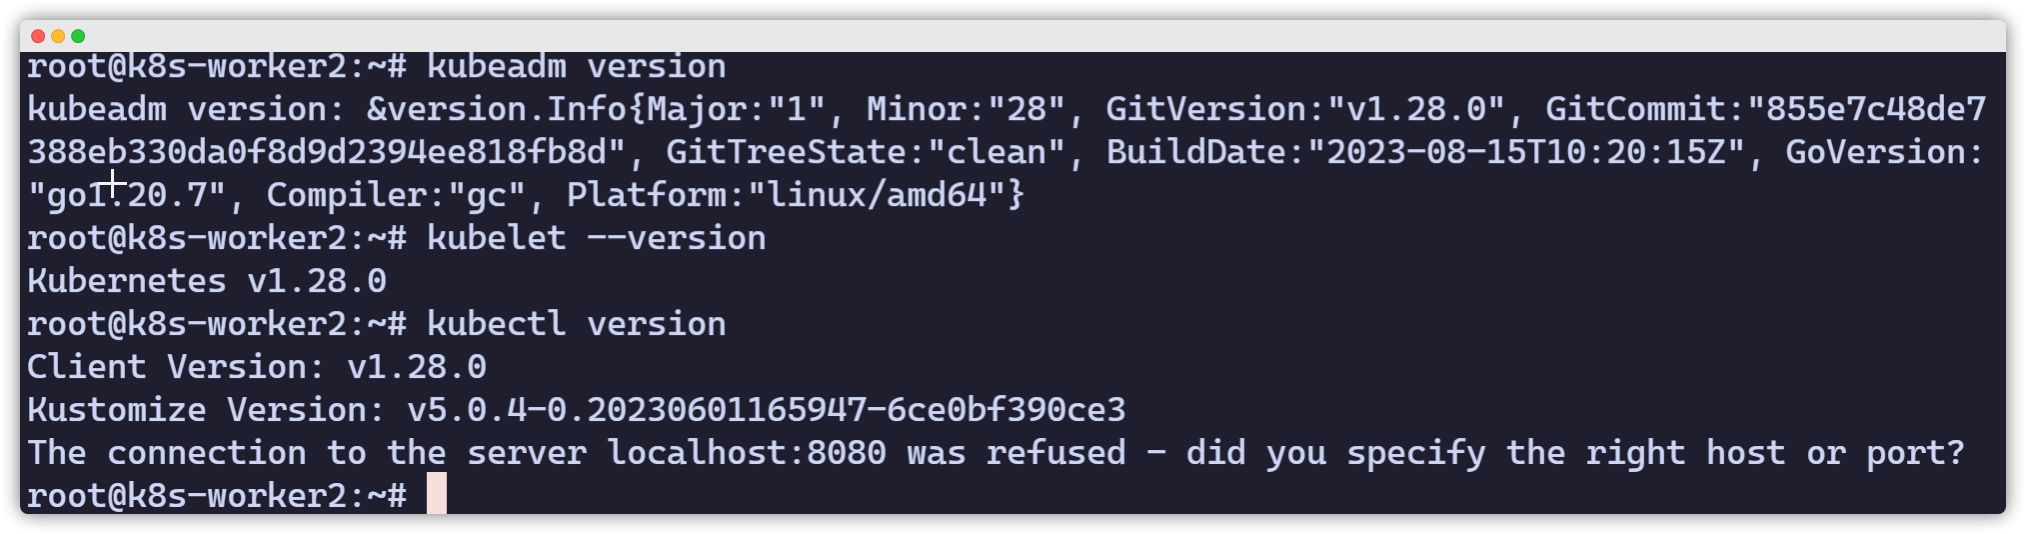
Initialize the master node
[admonition title=“Warning” color=“blue”]All of the following operations are done on the master node.[/admonition]
You can pre-pull the images required by the cluster (optional):
sudo kubeadm config images pullIf pulling succeeds, you will see output similar to:
[config/images] Pulled registry.k8s.io/kube-apiserver:v1.28.2[config/images] Pulled registry.k8s.io/kube-controller-manager:v1.28.2[config/images] Pulled registry.k8s.io/kube-scheduler:v1.28.2[config/images] Pulled registry.k8s.io/kube-proxy:v1.28.2[config/images] Pulled registry.k8s.io/pause:3.9[config/images] Pulled registry.k8s.io/etcd:3.5.6-0[config/images] Pulled registry.k8s.io/coredns/coredns:v1.9.3Initialize kubeadm
--apiserver-advertise-address: the IP address used by the local node to communicate with other nodes, i.e. the master node IP--pod-network-cidr: the pod network CIDR
vagrant@k8s-master:~$ sudo kubeadm init --apiserver-advertise-address=192.168.56.10 --pod-network-cidr=10.244.0.0/16Make sure you save the last part of the output. It tells you what to do next:
- Prepare
.kube - Deploy a pod network add-on
- Add worker nodes
Your Kubernetes control-plane has initialized successfully!
To start using your cluster, you need to run the following as a regular user:
mkdir -p $HOME/.kube sudo cp -i /etc/kubernetes/admin.conf $HOME/.kube/config sudo chown $(id -u):$(id -g) $HOME/.kube/config
Alternatively, if you are the root user, you can run:
export KUBECONFIG=/etc/kubernetes/admin.conf
You should now deploy a pod network to the cluster.Run "kubectl apply -f [podnetwork].yaml" with one of the options listed at: https://kubernetes.io/docs/concepts/cluster-administration/addons/
Then you can join any number of worker nodes by running the following on each as root:
kubeadm join ip:6443 --token 75tjpr.mekbas8r3yvimqen \ --discovery-token-ca-cert-hash sha256:3366cd93860eaac418ce9b35dda601c88676fe6ba99388672aba4e76cc7369e4Configure .kube
mkdir -p $HOME/.kubesudo cp -i /etc/kubernetes/admin.conf $HOME/.kube/configsudo chown $(id -u):$(id -g) $HOME/.kube/configCheck status
$ kubectl get nodes$ kubectl get pods -AShell auto-completion (Bash)
source <(kubectl completion bash)echo "source <(kubectl completion bash)" >> ~/.bashrcDeploy a pod network add-on
Go to https://kubernetes.io/docs/concepts/cluster-administration/addons/ and choose a network add-on, then deploy it according to the linked documentation.
Here we choose the overlay network add-on named flannel. Deployment steps are as follows:
Download the file https://raw.githubusercontent.com/flannel-io/flannel/master/Documentation/kube-flannel.yml and make the following adjustments:
curl -LO https://raw.githubusercontent.com/flannel-io/flannel/master/Documentation/kube-flannel.ymlMake sure the network matches the --pod-network-cidr we configured, 10.244.0.0/16:
net-conf.json: | { "Network": "10.244.0.0/16", "Backend": { "Type": "vxlan" } }In the args for the kube-flannel container, make sure there is an iface= argument whose value is the interface name corresponding to our --apiserver-advertise-address=ip.
ip a- name: kube-flannel #image: flannelcni/flannel:v0.18.0 for ppc64le and mips64le (dockerhub limitations may apply) image: rancher/mirrored-flannelcni-flannel:v0.18.0 command: - /opt/bin/flanneld args: - --ip-masq - --kube-subnet-mgr - --iface=网卡名Example:
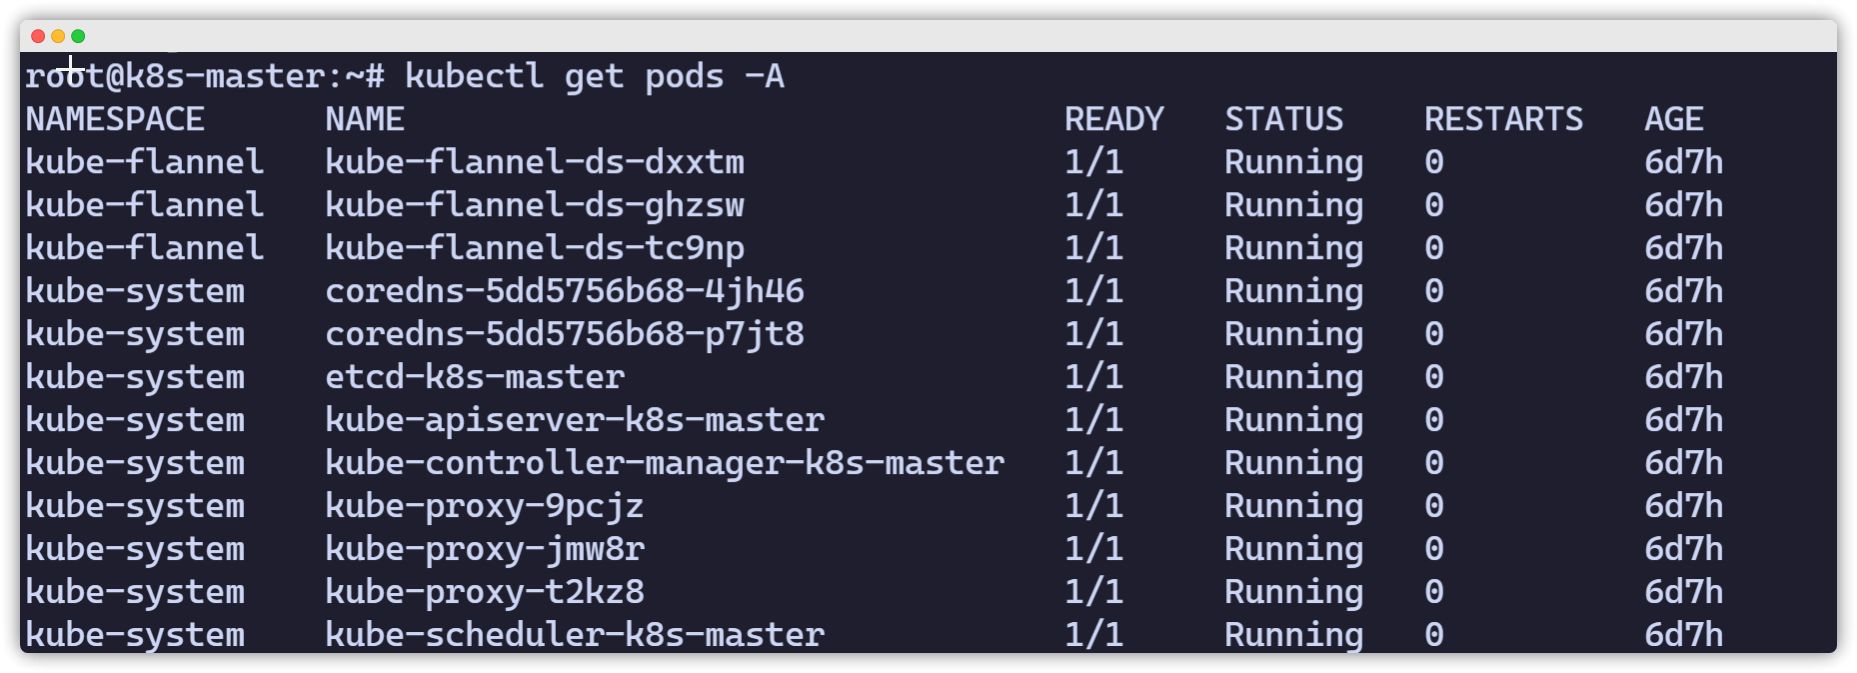
vagrant@k8s-master:~$ ip a1: lo: <LOOPBACK,UP,LOWER_UP> mtu 65536 qdisc noqueue state UNKNOWN group default qlen 1000 link/loopback 00:00:00:00:00:00 brd 00:00:00:00:00:00 inet 127.0.0.1/8 scope host lo valid_lft forever preferred_lft forever inet6 ::1/128 scope host valid_lft forever preferred_lft forever2: enp0s3: <BROADCAST,MULTICAST,UP,LOWER_UP> mtu 1500 qdisc fq_codel state UP group default qlen 1000 link/ether 02:9a:67:51:1e:b6 brd ff:ff:ff:ff:ff:ff inet 10.0.2.15/24 brd 10.0.2.255 scope global dynamic enp0s3 valid_lft 85351sec preferred_lft 85351sec inet6 fe80::9a:67ff:fe51:1eb6/64 scope link valid_lft forever preferred_lft forever3: enp0s8: <BROADCAST,MULTICAST,UP,LOWER_UP> mtu 1500 qdisc fq_codel state UP group default qlen 1000 link/ether 08:00:27:59:c5:26 brd ff:ff:ff:ff:ff:ff inet 192.168.56.10/24 brd 192.168.56.255 scope global enp0s8 valid_lft forever preferred_lft forever inet6 fe80::a00:27ff:fe59:c526/64 scope link valid_lft forever preferred_lft foreverCheck the result. If you see output like the following, with all pods in Running state (especially coredns and flannel), it means the network add-on was deployed successfully.
Add worker nodes
Adding worker nodes is very simple: just run the join command on each worker node. Pay attention to --token.
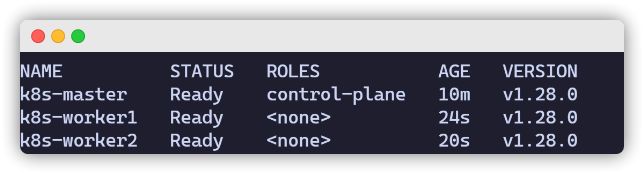
sudo kubeadm join 192.168.56.10:6443 --token 0pdoeh.wrqchegv3xm3k1ow \ --discovery-token-ca-cert-hash sha256:f4e693bde148f5c0ff03b66fb24c51f948e295775763e8c5c4e60d24ff57fe82Finally, check the nodes and pods from the master node (for example, with two worker nodes):
kubectl get nodes