TeamSpeak Server Setup Guide on Ubuntu 20
I. Introduction
First, here’s the official TeamSpeak website: https://www.teamspeak.com/en/
Let’s briefly introduce TeamSpeak. In short, it’s a long-standing open-source VoIP application that supports voice calls, online chat, file sharing, and more. Its biggest strengths are high customizability plus extremely low bandwidth and system resource usage. In this guide I’ll use Ubuntu 20 as an example to show how to set up your own TeamSpeak voice server.
II. Preparation
Before we start installing the server, prepare the following:
-
A server with a public IP address
-
The TeamSpeak server archive matching your server OS
-
The TeamSpeak client installer for your desktop system
-
Tools that can remotely connect to your server and upload files, such as PuTTY, Xshell, WinSCP, or MobaXterm
About downloading the server: after opening the TeamSpeak website, click Downloads and then select the Server tab.
Choose the server build that matches your OS. In my case, the server is running 64-bit Ubuntu, so I download the LINUX SERVER 64-BIT build:
All of the remaining steps will be done on Linux. The Windows Server version is even simpler—you just download it and double-click the single .exe file—so I won’t go into detail here.
After downloading the server, the process for downloading the client is similar. Switch to the Client tab and download the installer that matches your client OS.
You can also download the newer client version if you prefer the look; the usage is more or less the same.
III. Install and Configure the Server
1. Create and prepare configuration
Once all files are ready, we can start installing the server.
First, update the package index and dependencies:
sudo apt updateTypically, we log into the server as the root user, but TeamSpeak is not allowed to run under root. So we need to create a dedicated user to run the TeamSpeak server:
useradd teamspeak -mpasswd teamspeakAfter the second command you’ll be prompted to enter and confirm a password for the new user. Just follow the prompts.
Next, upload the TeamSpeak server archive to the server and extract it, then rename the directory (here I upload directly to the root directory):
tar -xvf teamspeak3-server_linux_amd64-3.13.7.tar.bz2mv teamspeak3-server_linux_amd64 teamspeak3Note: the exact server version number may change as new releases come out, so don’t copy this command blindly—adjust it according to the actual filename.
Since we’ll run the server as the teamspeak user, we need to copy the extracted directory to that user’s home and fix ownership:
cp -R teamspeak3 /home/teamspeak/chown -R teamspeak:teamspeak /home/teamspeak/teamspeak3/Now we can run the server. First, switch to the user we just created:
su - teamspeakThen change into the server directory (the one we renamed and copied earlier):
cd teamspeak3Before starting the server, we need to create a license acceptance file. If we skip this, the server will error out at startup because it can’t find the license file:
touch .ts3server_license_acceptedWith the license file created, we can start the server:
./ts3server_startscript.sh startAfter it starts, you should see a block of I M P O R T A N T information. That means the server is running successfully.
Copy that output somewhere safe; you’ll need it later. Then press Ctrl + C to stop the server for now.
2. Open firewall ports
On most servers nowadays, firewall rules can be managed directly in the provider’s control panel. You’ll need to allow three ports:
-
9987/udp
-
10011/tcp
-
30033/tcp
If you also have a firewall service running on the server itself, you can add the rules manually:
systemctl start firewalldfirewall-cmd --zone=public --add-port=9987/udp --permanentfirewall-cmd --zone=public --add-port=10011/tcp --permanentfirewall-cmd --zone=public --add-port=30033/tcp --permanentfirewall-cmd --reloadIV. Configure systemd Auto-Start
First switch back to the root user (you’ll be prompted for the root password):
su -Now create a custom systemd service file ts3.service (you can use vim or any editor you like):
vim /lib/systemd/system/ts3.servicePut the following content into the service file:
[Unit]Description=Teamspeak serverAfter=network.target[Service]WorkingDirectory=/home/teamspeak/teamspeak3User=teamspeakGroup=teamspeakType=forkingExecStart=/home/teamspeak/teamspeak3/ts3server_startscript.sh start inifile=ts3server.iniExecStop=/home/teamspeak/teamspeak3/ts3server_startscript.sh stopPIDFile=/home/teamspeak/teamspeak3/ts3server.pidRestartSec=15Restart=always[Install]WantedBy=multi-user.targetNote: WorkingDirectory, ExecStart, ExecStop, and PIDFile must all use the correct absolute paths for your installation. If your directory structure is different from mine, remember to adjust these paths.
Save and exit the editor, then reboot the server if needed.
After the service file is in place, we can use systemctl to manage the TeamSpeak server and enable auto-start at boot.
Start the server:
systemctl start ts3Stop the server:
systemctl stop ts3Enable auto-start on boot:
systemctl enable ts3Check server status:
systemctl status ts3At this point, the server-side configuration is complete and the service should be running.
V. Troubleshooting
Sometimes, when you run systemctl status ts3, you might see something like this:

In that case, first disable and stop the service, then reboot the server:
systemctl disable ts3systemctl stop ts3rebootAfter rebooting, switch to the teamspeak user, go to the TeamSpeak server directory, and run the following command:
su - teamspeakcd teamspeak3./ts3server_minimal_runscript.sh createinifile=1If you see output similar to this, it means the operation succeeded:
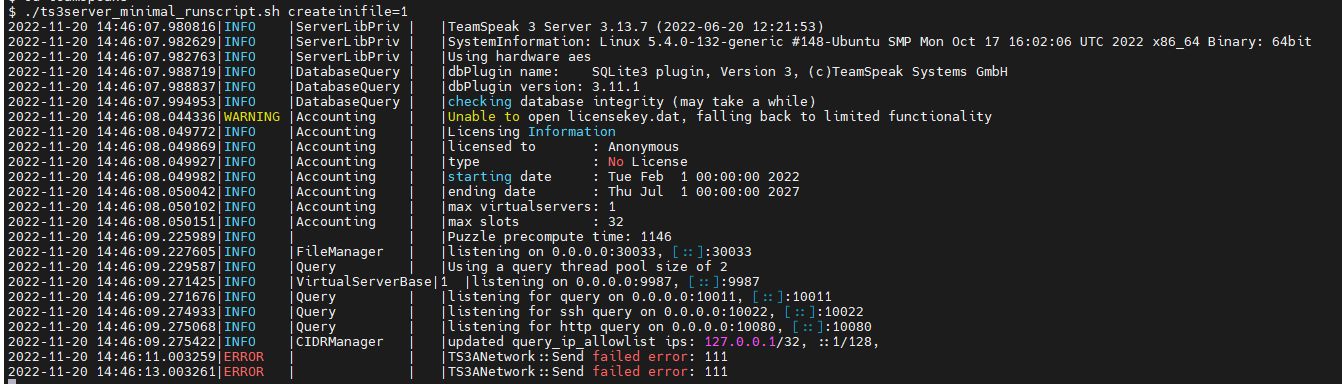
Now press Ctrl + C to exit, switch back to root, re-enable auto-start, and start the service again. Checking the status should now show something like this:
su -systemctl enable ts3systemctl start ts3systemctl status ts3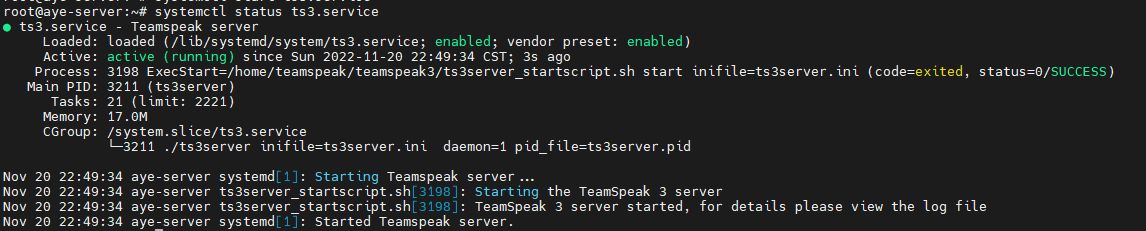
Now your TeamSpeak server is up and running successfully.