Install Any OS on Dedicated Servers with IPMI + netboot.xyz
When renting dedicated servers or bare metal, providers typically offer only limited OS templates. Want a specific version of Debian? Want to try Arch Linux? Need Proxmox VE? If it’s not in the templates, you’re stuck.
netboot.xyz solves this problem — a tiny ISO of just a few MB that lets you install almost any operating system over the network. Combined with IPMI remote control, you can install systems freely even when the server is on the other side of the world.
What is netboot.xyz?
netboot.xyz is a network boot tool based on iPXE. The concept is simple:
- The server boots from this small ISO
- The iPXE bootloader in the ISO connects to netboot.xyz servers
- Fetches the latest OS installation menu
- After selecting your desired system, it downloads and installs directly from official sources
Key advantages:
- Lightweight: The ISO is only a few MB, loads fast, and has low bandwidth requirements
- Always up-to-date: Menus and installation sources are fetched in real-time
- Rich selection: Supports almost all major Linux distributions, BSD, Windows PE, and various utility disks
- No local images needed: No need to download several GB ISO files in advance
What is IPMI?
IPMI (Intelligent Platform Management Interface) is a server’s out-of-band management interface, also known as BMC (Baseboard Management Controller). Different vendors have different brand names:
| Vendor | Name |
|---|---|
| Dell | iDRAC |
| HPE | iLO |
| Supermicro | IPMI |
| Lenovo | XCC |
| Huawei | iBMC |
What IPMI can do:
- Remote power on/off, reboot
- Remote console (KVM) — like sitting in front of the server
- Mount virtual media (ISO/USB images)
- Monitor hardware status (temperature, fans, power)
- View system logs
The key feature is Virtual Media — you can “insert” a local ISO file into the remote server’s virtual optical drive, allowing the server to boot from that ISO.
Prerequisites
1. Obtain IPMI Access
When renting a server, providers typically provide:
- IPMI IP address (usually on a separate management network)
- Username and password
- Web console URL
TIPIf the provider doesn’t proactively offer IPMI access, you can request it via a support ticket. Most dedicated/bare metal providers support this.
2. Download netboot.xyz ISO
Visit the netboot.xyz downloads page to get the ISO file.
Choose the correct version:
| Filename | Use Case |
|---|---|
netboot.xyz.iso | Recommended - Universal version, supports both Legacy BIOS and UEFI |
netboot.xyz-efi.iso | UEFI mode only |
netboot.xyz.img | For creating USB boot drives |
In most cases, downloading netboot.xyz.iso is sufficient.
3. Verify Network Environment
The server needs internet access because netboot.xyz requires:
- Connection to boot.netboot.xyz to fetch menus
- Downloading installation files from official distribution mirrors
IMPORTANTIf the server is in an isolated network or has strict firewall restrictions, netboot.xyz may not work properly. Consider self-hosting a netboot.xyz server in such cases.
Step-by-Step Guide
Step 1: Log into IPMI Console
Access the IPMI web interface in your browser and log in with the provided credentials.
NOTESome older IPMI systems only support specific browsers (like IE) or require Java plugins. Modern IPMI typically supports HTML5 consoles.
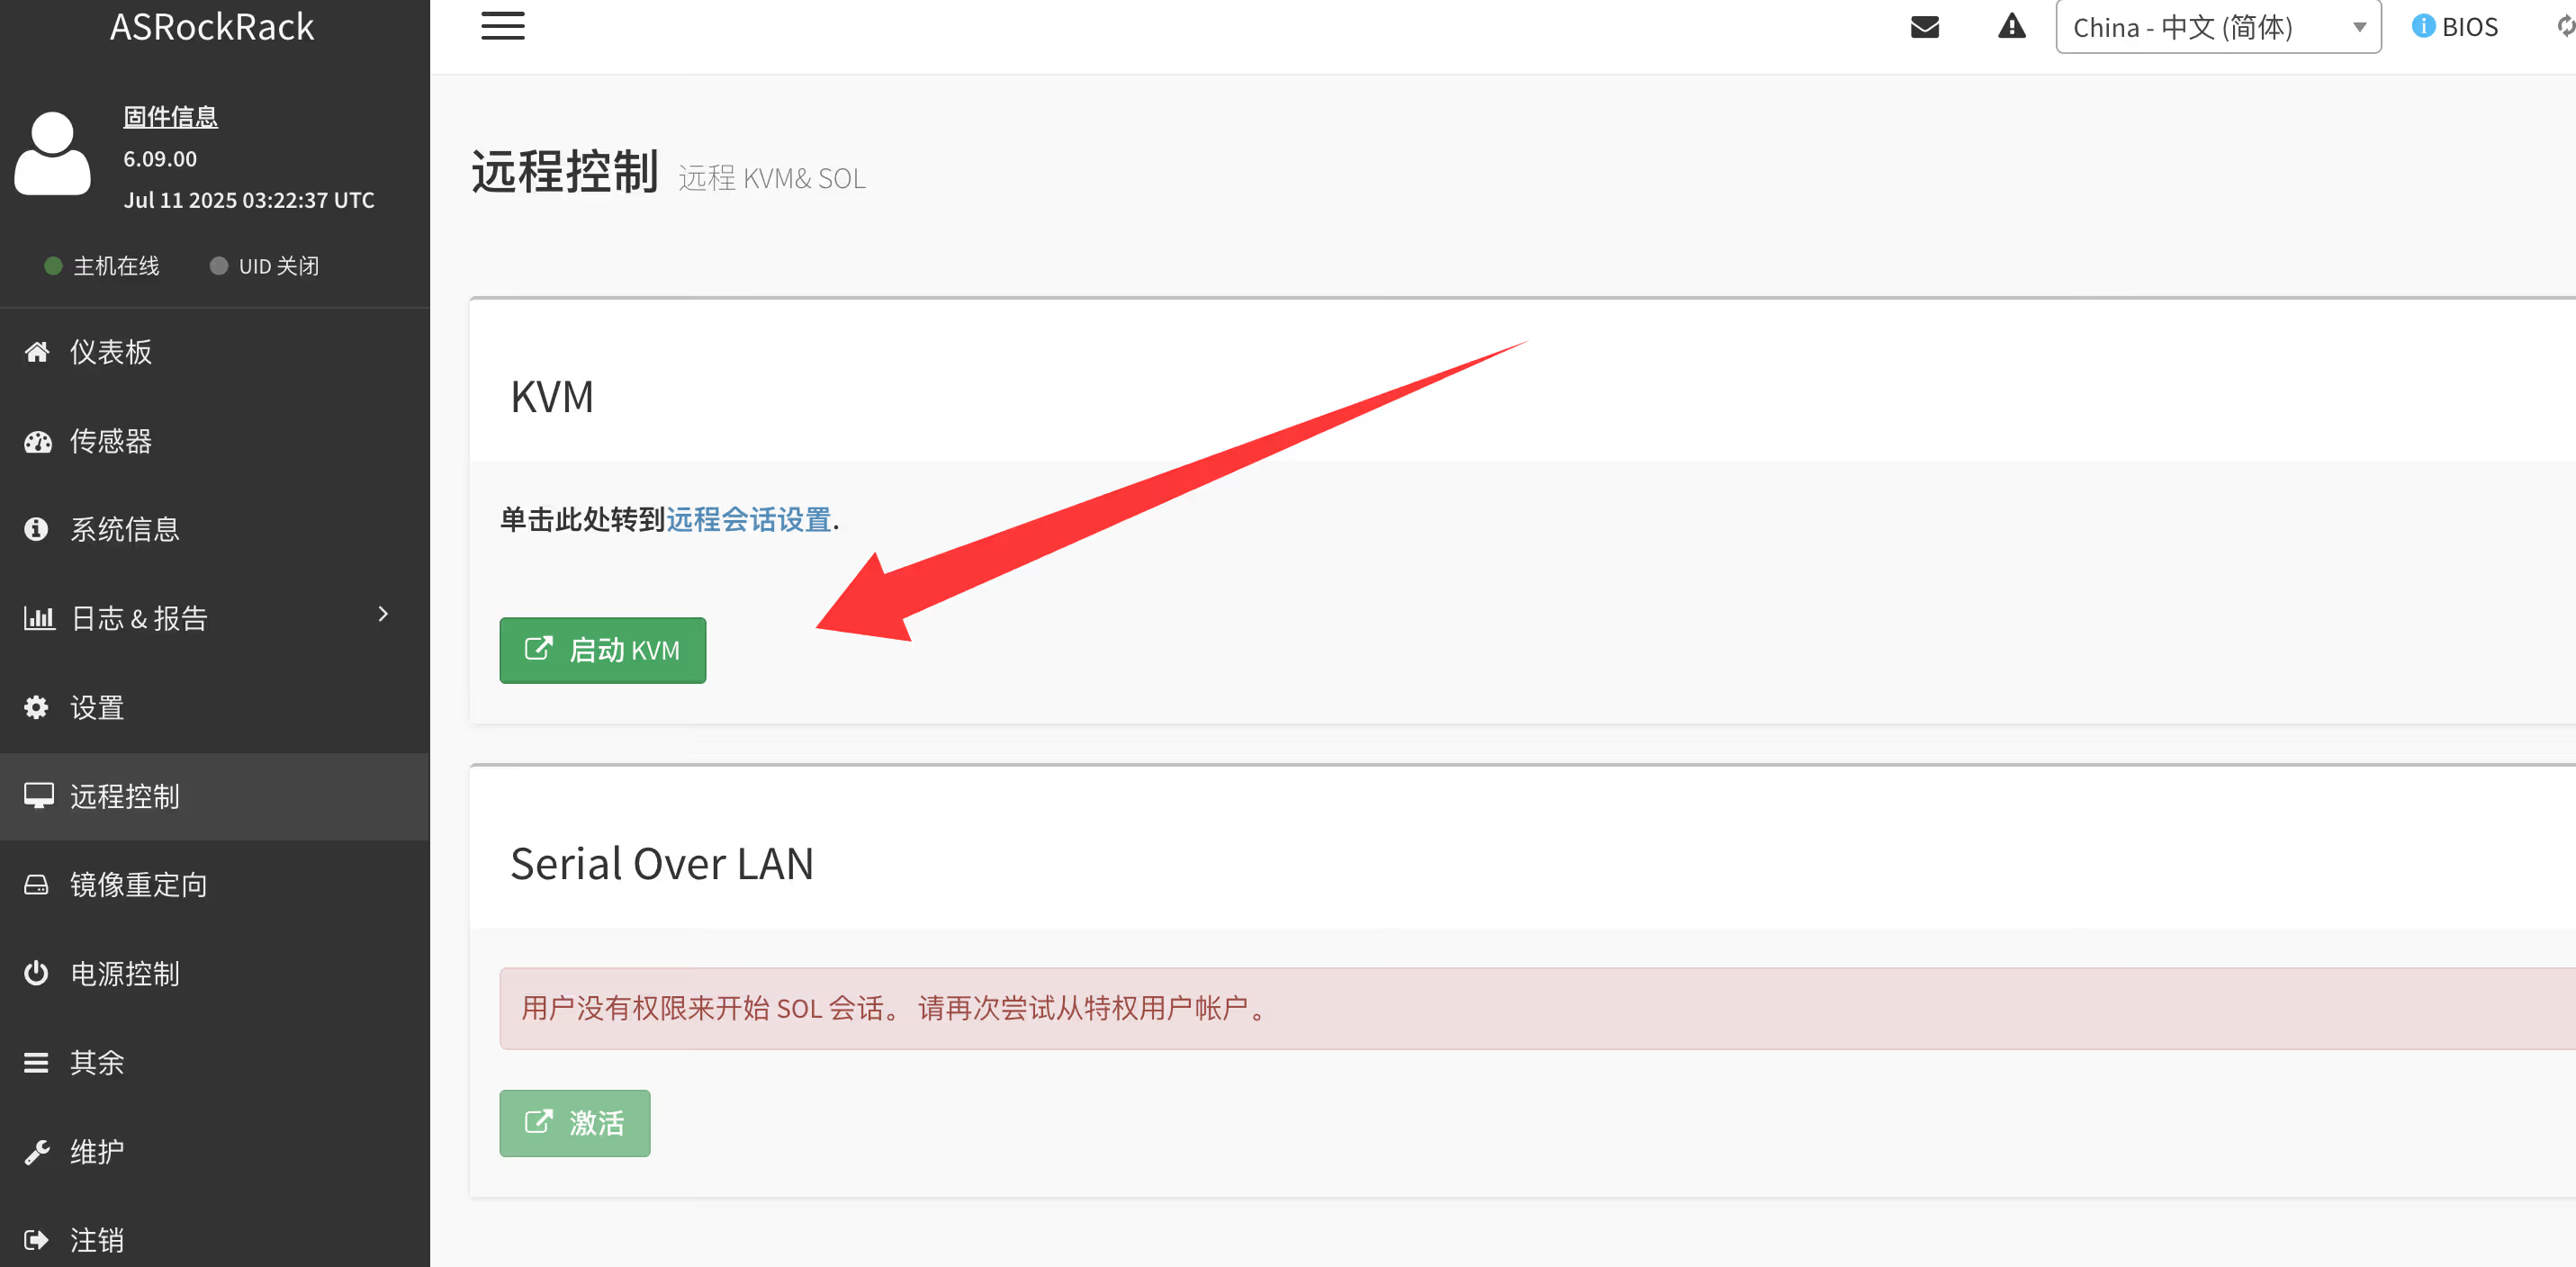
Step 2: Open Remote Console (KVM)
After logging in, find the remote console or KVM function. Location varies by vendor:
- Dell iDRAC: Configuration → Virtual Console
- HPE iLO: Remote Console → HTML5 Console
- Supermicro: Remote Control → iKVM/HTML5
After launching, a new window will open showing the server’s real-time display.
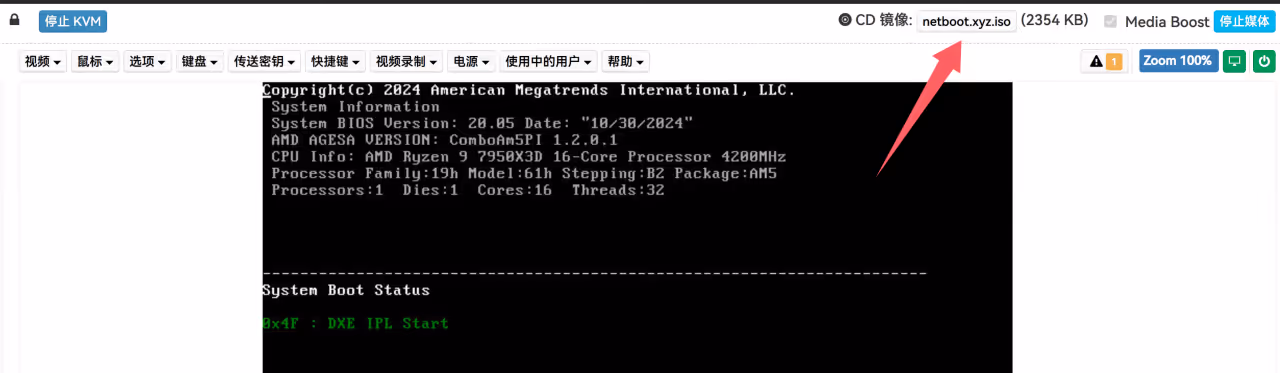
Step 3: Mount netboot.xyz ISO
In the KVM console or IPMI main interface, find the Virtual Media function:
- Click Virtual Media
- Select CD/DVD or ISO Image
- Browse and select the downloaded
netboot.xyz.iso - Click Connect or Mount
CAUTIONISO mounting may take a few seconds to tens of seconds depending on network conditions. Wait until the status shows “Connected” or “Mounted” before proceeding.
Step 4: Set Boot from Virtual Drive
There are two methods:
Method A: Temporarily change boot order (Recommended)
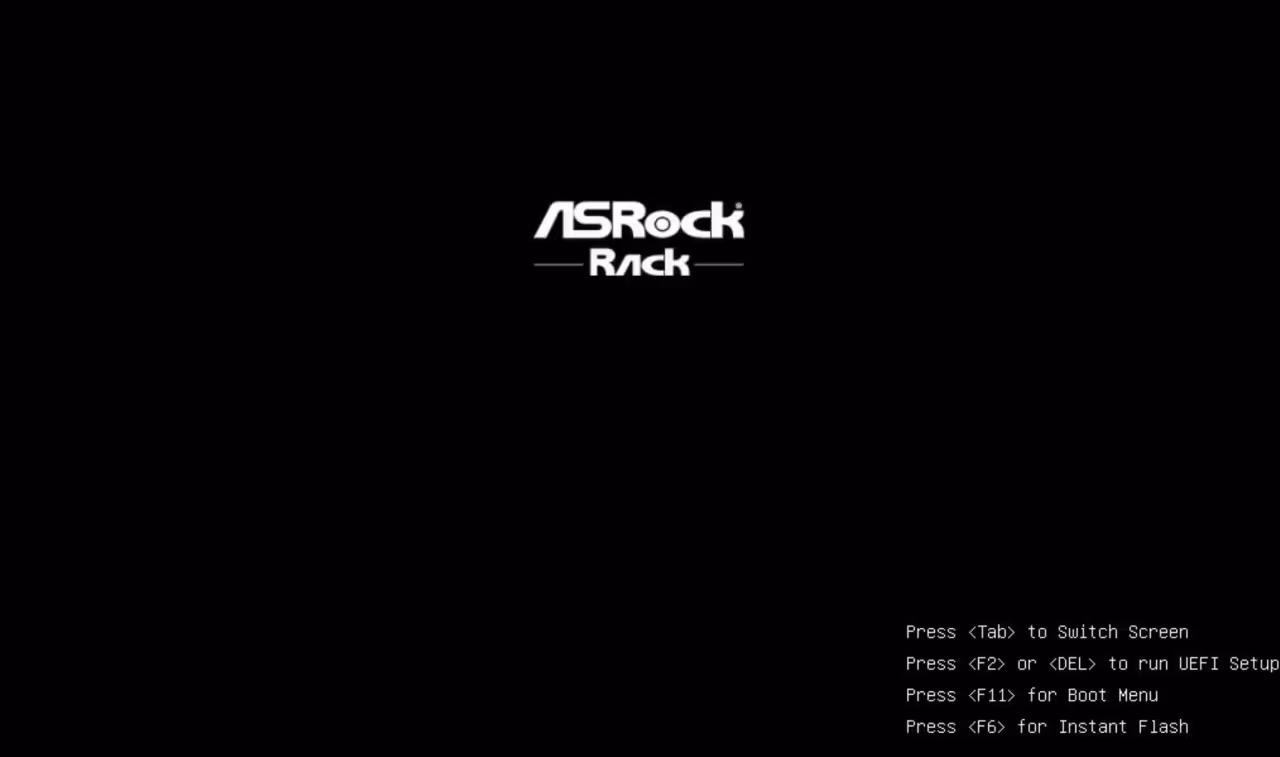
- Reboot the server
- Press the appropriate key during POST to enter boot menu
- Dell: F11
- HP: F11
- Supermicro: F11
- Generic: Esc or F12
- Select Virtual CD/DVD or UEFI: Virtual CD
Method B: Through BIOS settings
- Reboot the server, press Del or F2 to enter BIOS
- Find Boot options
- Set virtual optical drive as first boot device
- Save and exit
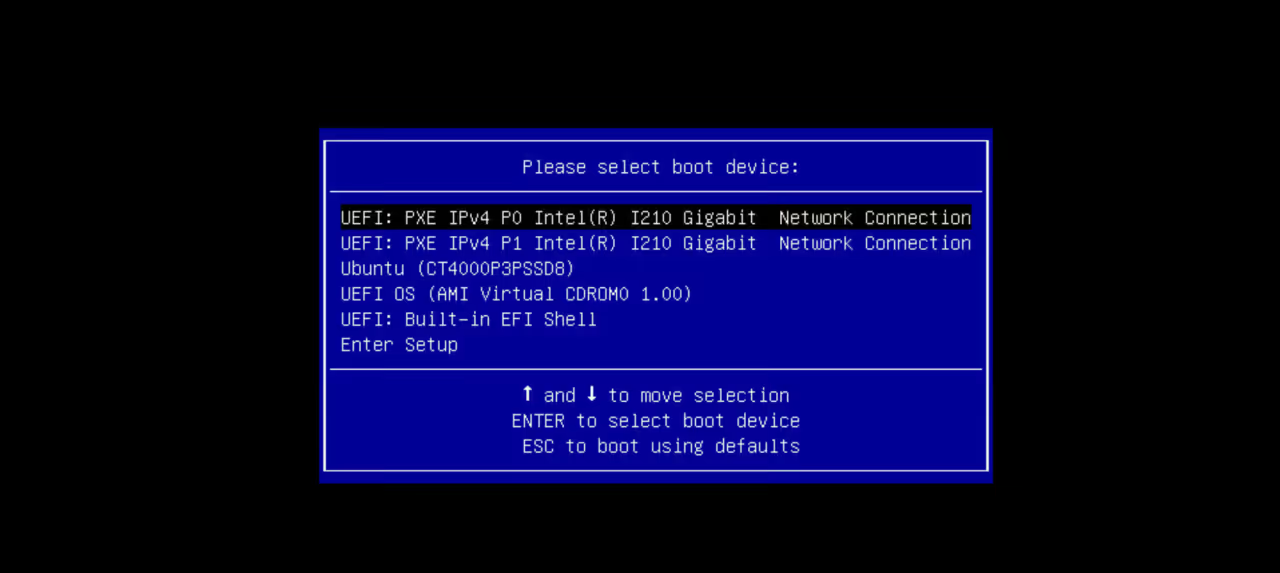
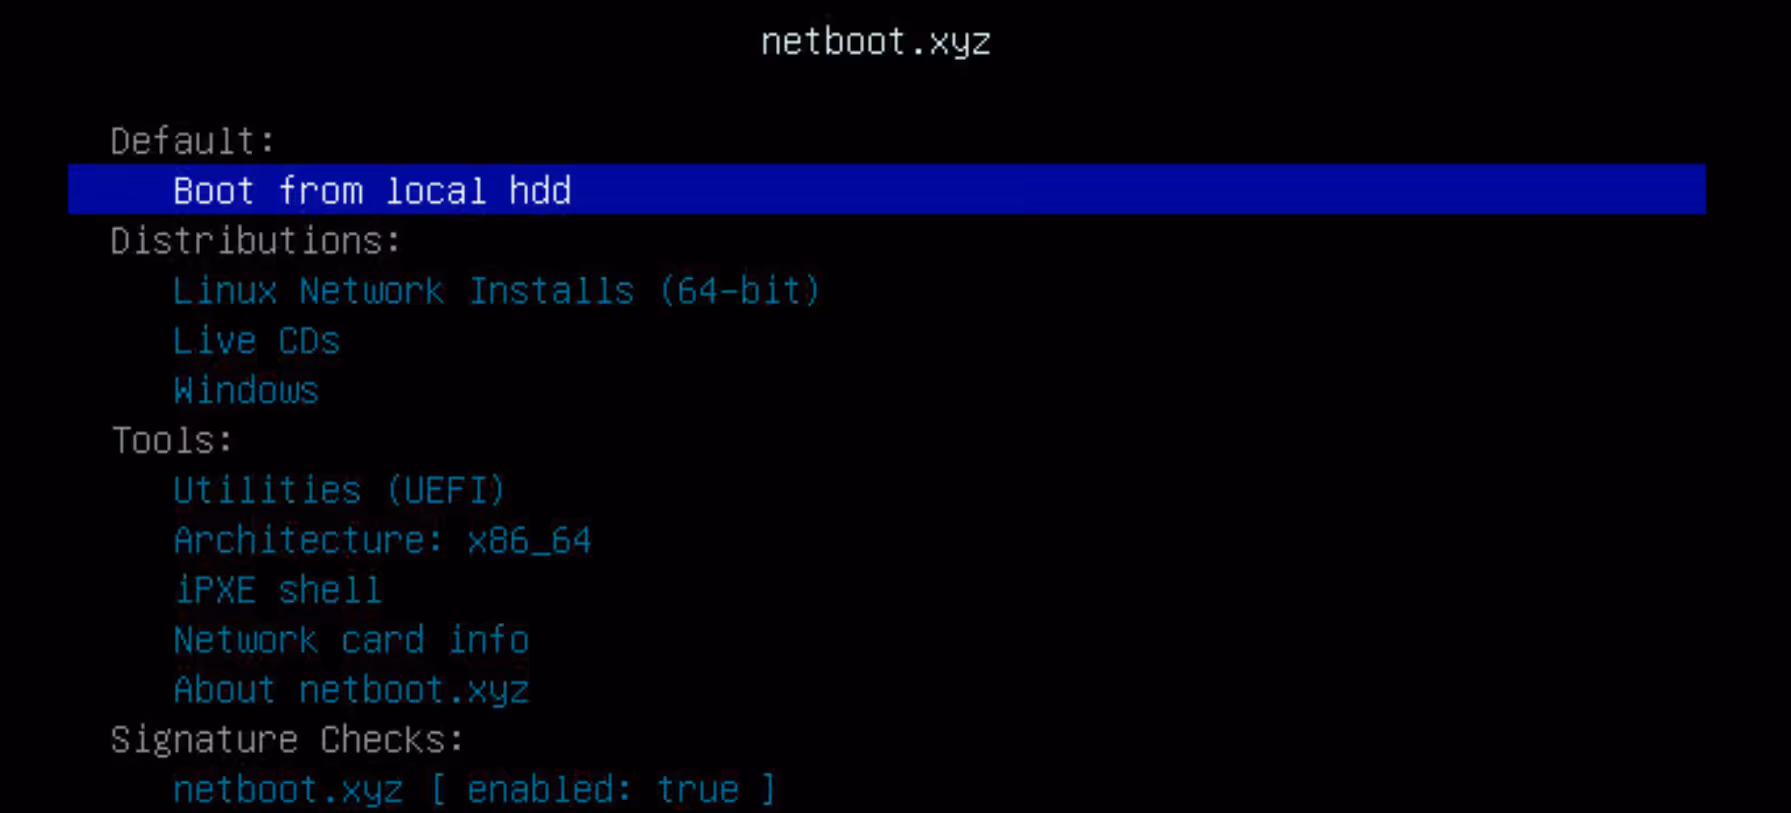
Select the fourth option to enter the netboot.xyz menu.
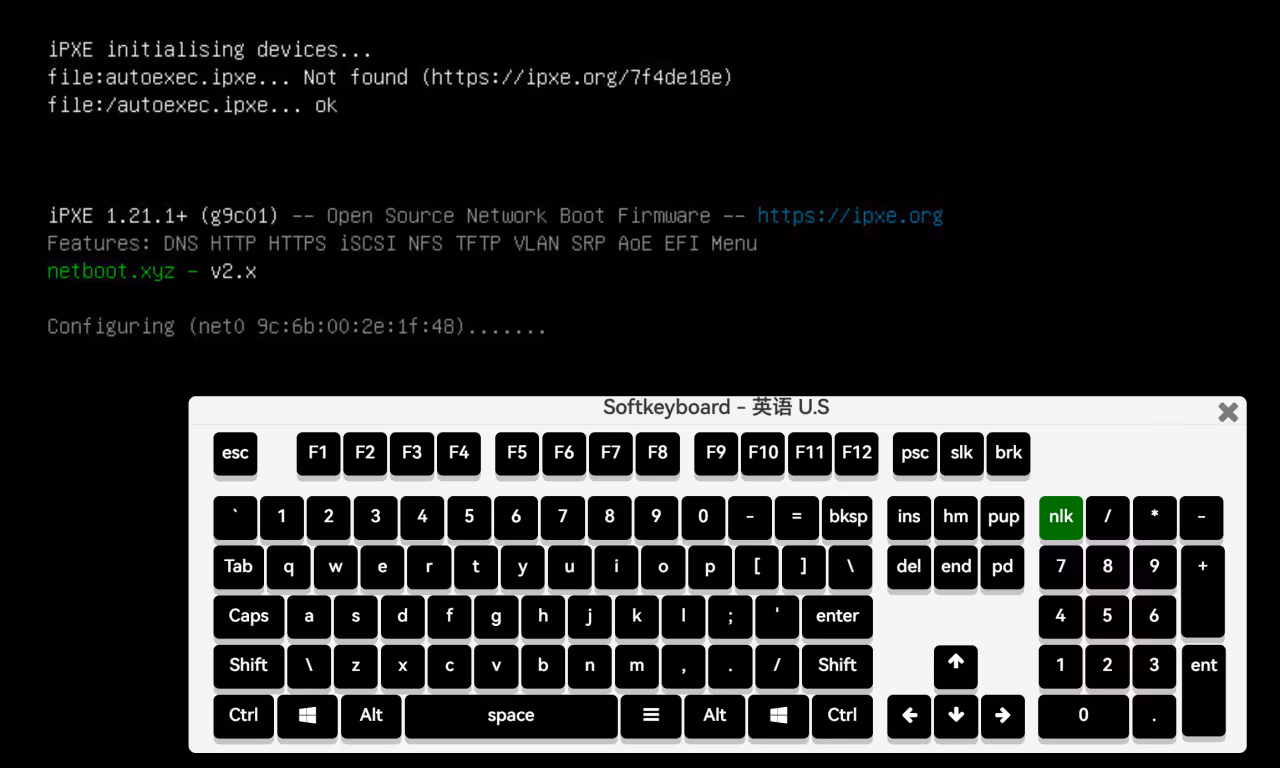
Step 5: Enter netboot.xyz Menu
After booting from the ISO, it will automatically attempt to get an IP address via DHCP and connect to netboot.xyz servers. Once successful, the main menu appears.
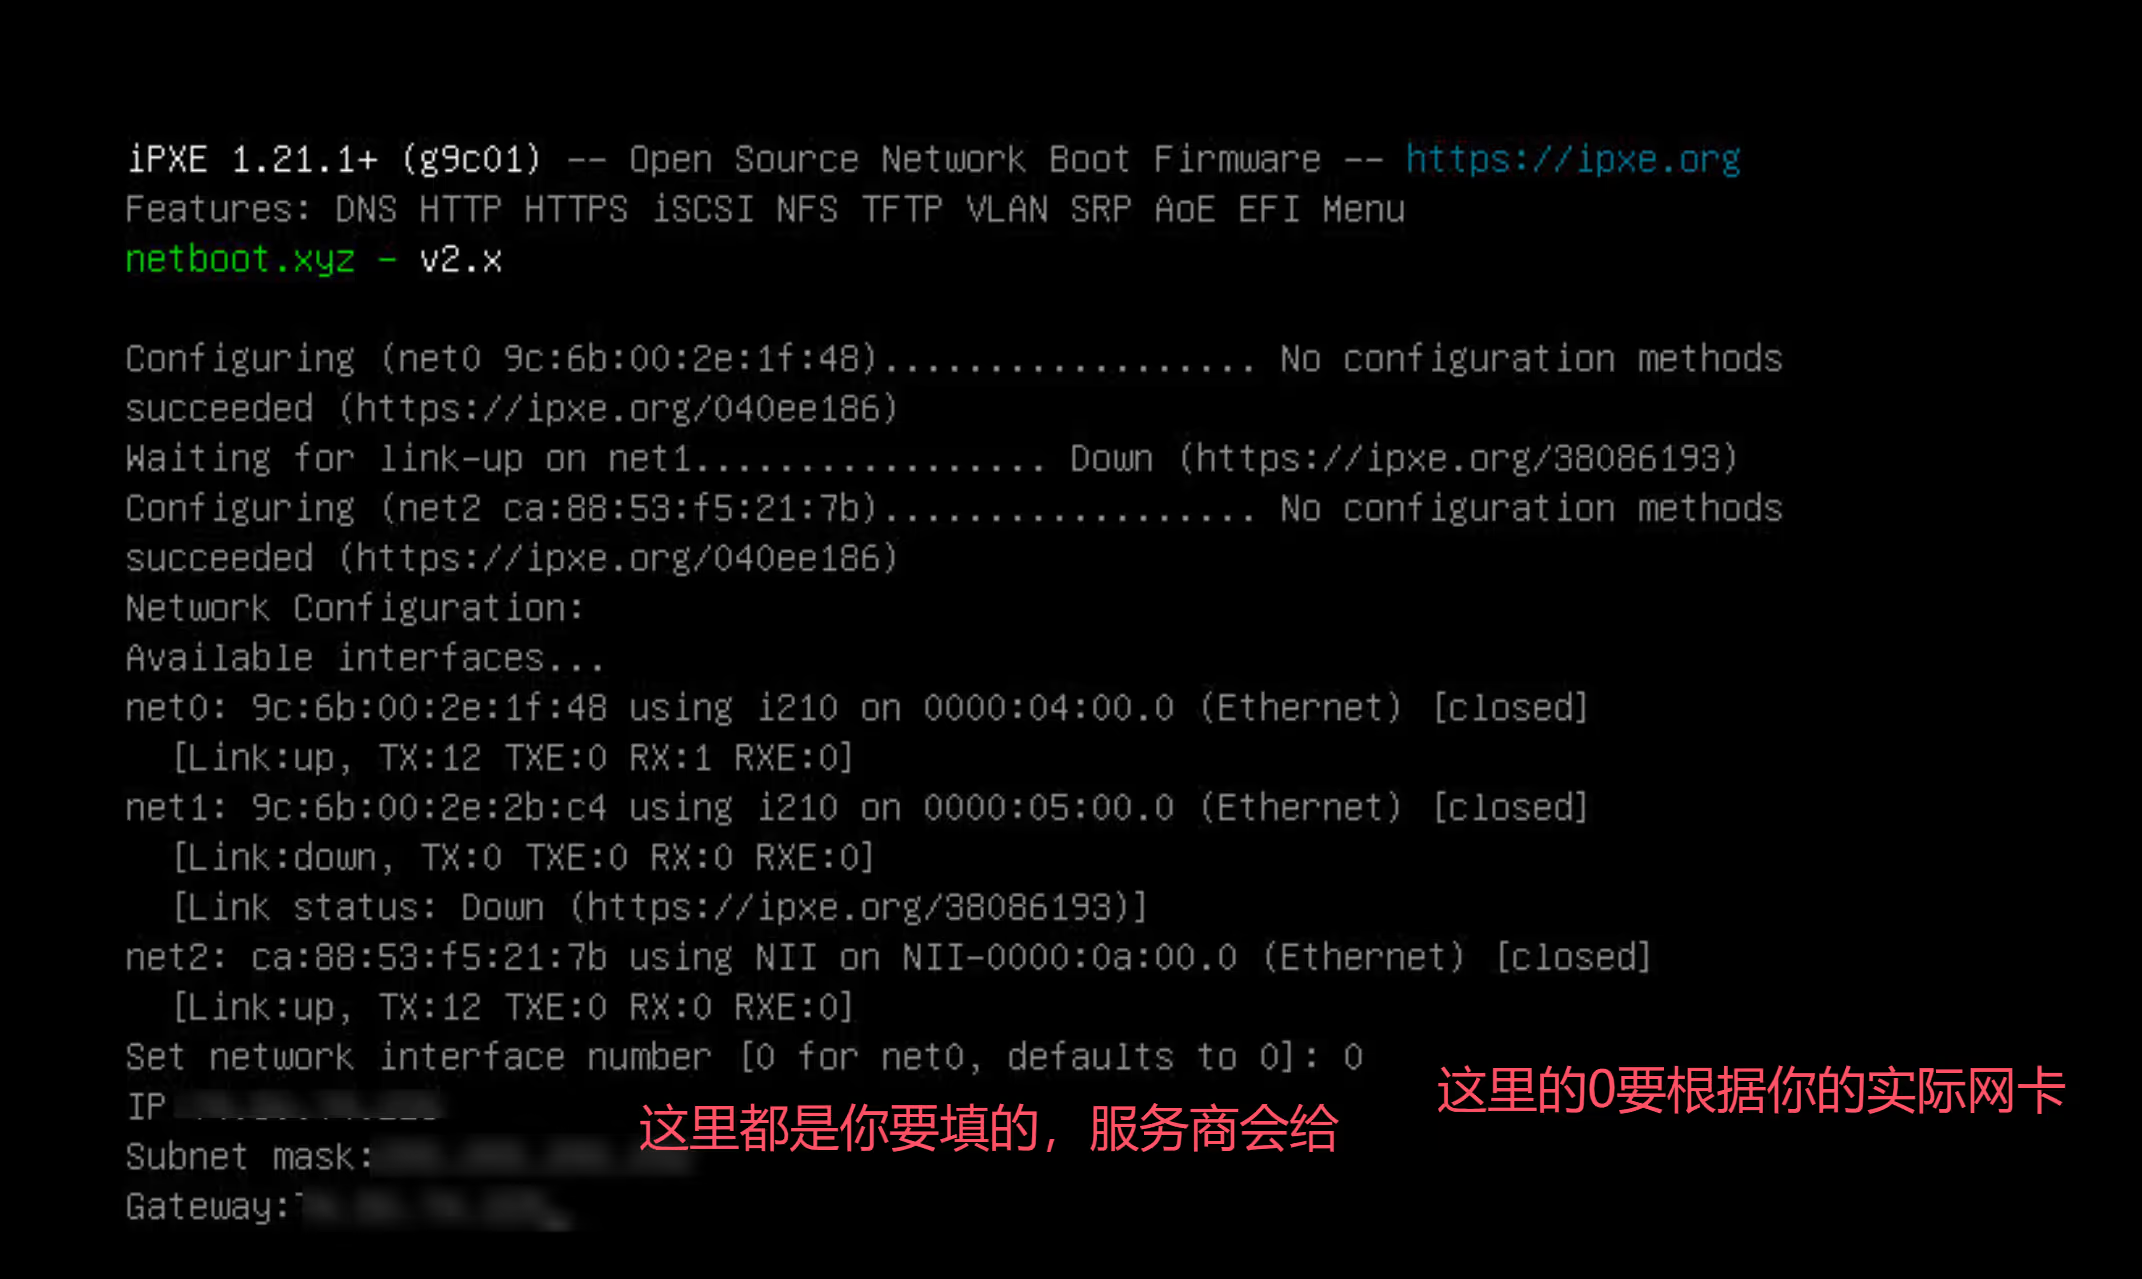
In my case, DHCP didn’t work, so manual configuration was needed:
Select the system you want to install. Here’s an example with Proxmox VE:
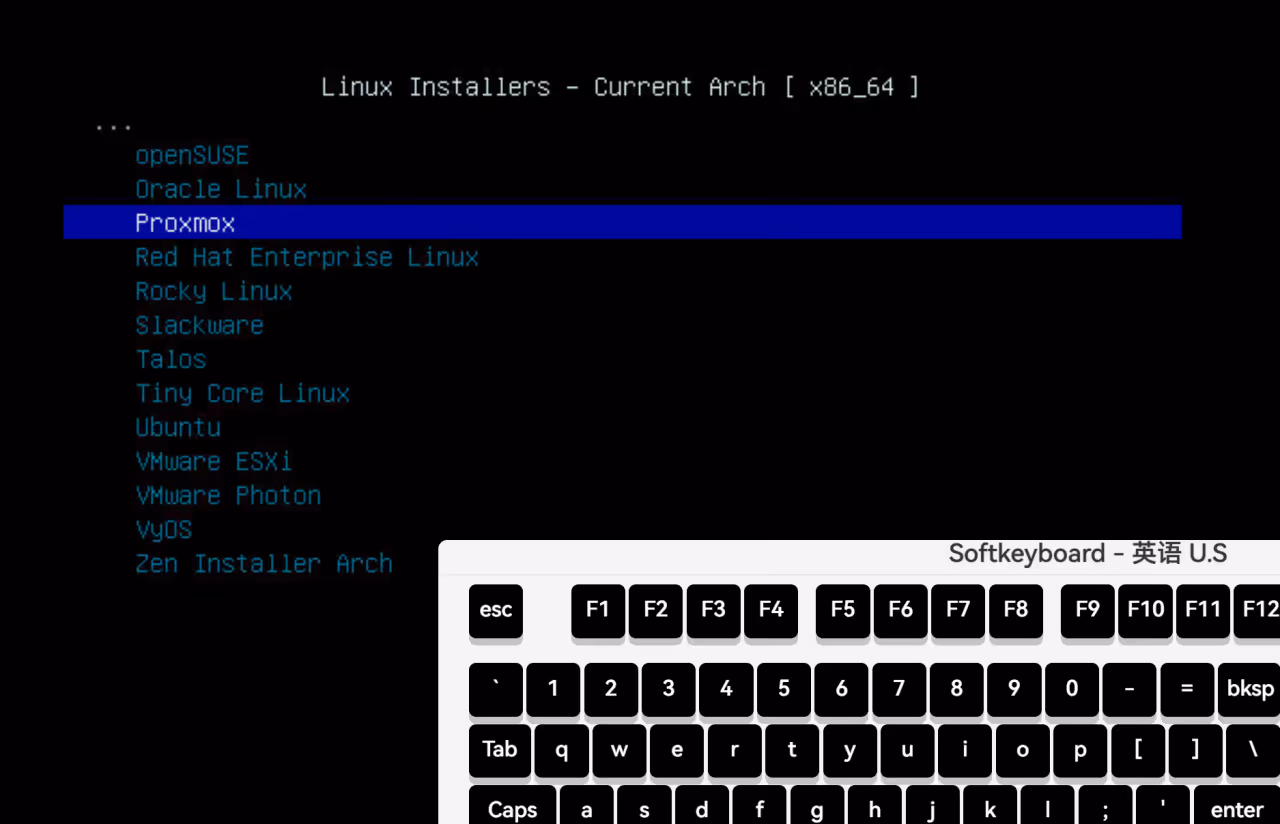

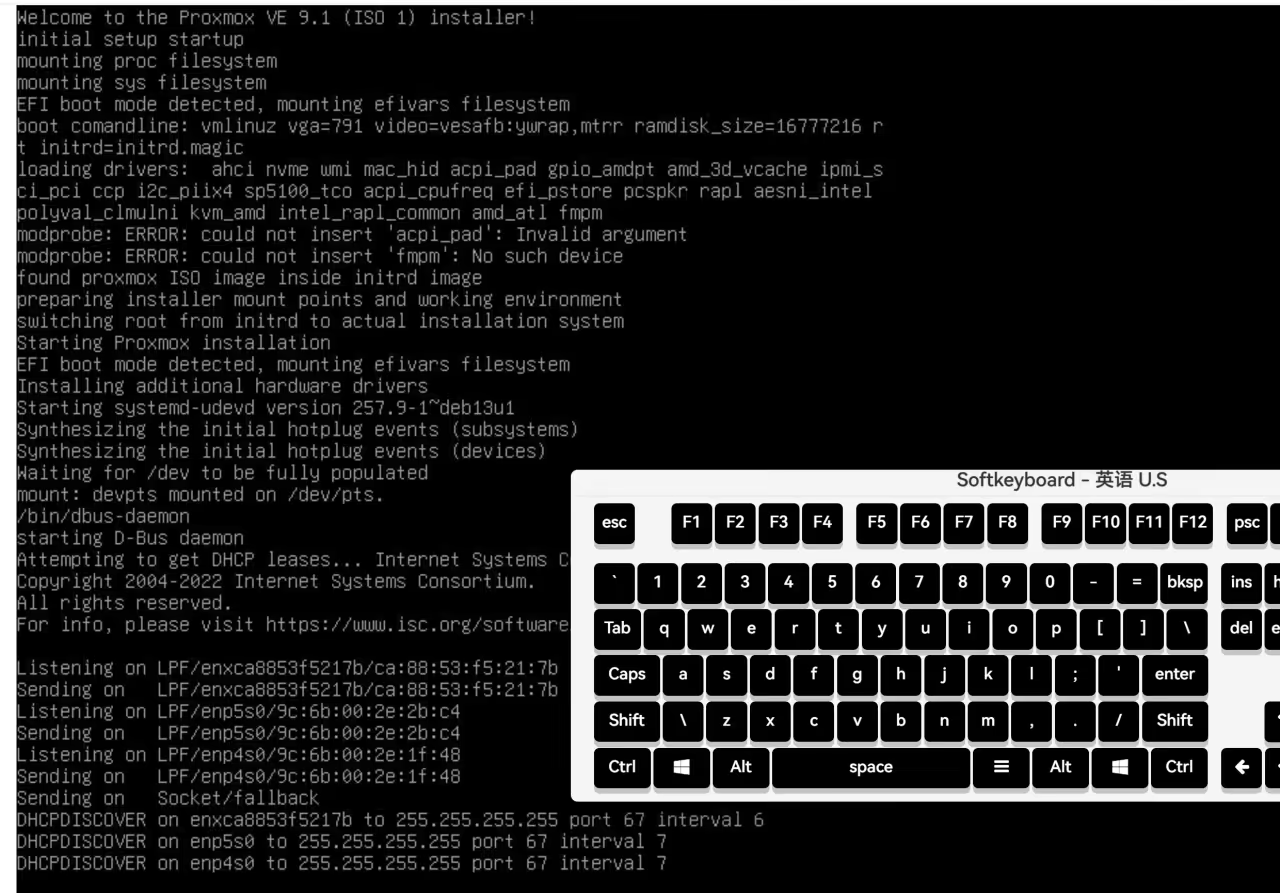
From this point on, it’s the same as a normal ISO installation. The main advantage is saving time — you don’t need to download a large ISO and upload it to the IPMI, which can be slow especially when uploading from certain regions to overseas servers.
netboot.xyz Menu Overview
Linux Network Installs
This is the most commonly used option, supporting network installation of major Linux distributions:
| Distribution | Notes |
|---|---|
| Debian | Supports Stable, Testing, Unstable |
| Ubuntu | Server and Desktop versions |
| CentOS / Rocky / Alma | RHEL-based distributions |
| Fedora | Server and Workstation |
| Arch Linux | Rolling release distribution |
| openSUSE | Leap and Tumbleweed |
| NixOS | Declarative configuration distribution |
After selecting a distribution, you can usually choose specific versions and installation modes (minimal install, desktop environment, etc.).
Live CDs
Live systems that run directly in memory without modifying the disk:
- System Rescue - System rescue toolkit
- GParted Live - Partition management
- Clonezilla - Disk cloning and backup
- Various distro Live versions - For testing or temporary use
WARNINGLive CDs need to load the entire system into memory, typically requiring 4GB+ RAM. Insufficient memory will cause boot failure.
Utilities
Various useful tools:
| Tool | Purpose |
|---|---|
| Memtest86+ | Memory testing |
| Hardware Detection Tool | Hardware detection |
| DBAN | Secure disk wiping |
| Super Grub2 Disk | Boot repair |