ServerStatus-Rust Hands-on Deployment Guide on Debian 11
Originally the probe was deployed on Oracle Arm in Osaka, but the account got reclaimed, so I had to redeploy.
Result

Preparation
-
TG BOT API
-
TG CHAT ID
-
Vercel
-
VPS
-
Domain name (optional)
Deploying the Server
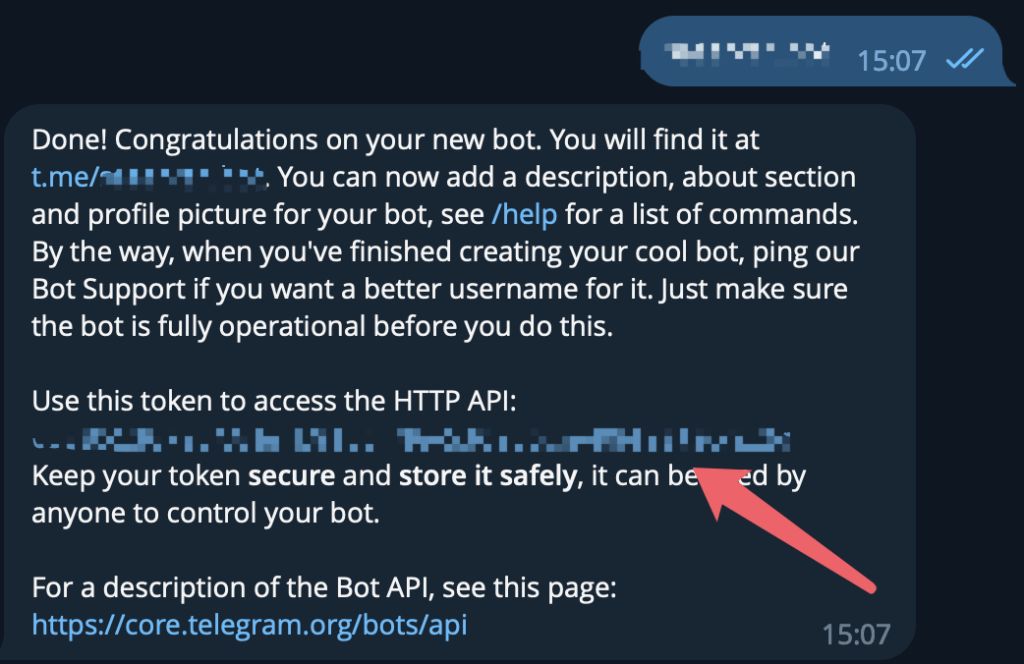
Get your bot_token from @BotFather. The content pointed to by the red box is your token.
Get your chat_id from @Get My ID.

Server-side Deployment
apt install wget curl unzip vim新建目录并且进入mkdir -p /opt/ServerStatus && cd /opt/ServerStatus编辑.sh文件vim server.shIf you are deploying on ARM architecture, remember to modify the OS_ARCH variable as indicated in the comment. File content is as follows:
#!/bin/bashset -ex
WORKSPACE=/opt/ServerStatusmkdir -p ${WORKSPACE}cd ${WORKSPACE}
# 下载, arm 机器替换 x86_64 为 aarch64OS_ARCH="x86_64"latest_version=$(curl -m 10 -sL "https://api.github.com/repos/zdz/ServerStatus-Rust/releases/latest" | grep "tag_name" | head -n 1 | awk -F ":" '{print $2}' | sed 's/\"//g;s/,//g;s/ //g')
wget --no-check-certificate -qO "server-${OS_ARCH}-unknown-linux-musl.zip" "https://github.com/zdz/ServerStatus-Rust/releases/download/${latest_version}/server-${OS_ARCH}-unknown-linux-musl.zip"
unzip -o "server-${OS_ARCH}-unknown-linux-musl.zip"
# systemd servicemv -v stat_server.service /etc/systemd/system/stat_server.service
systemctl daemon-reload
# 启动systemctl start stat_server
# 状态查看systemctl status stat_server
# 使用以下命令开机自启systemctl enable stat_server
# https://fedoraproject.org/wiki/Systemd/zh-cn# https://docs.fedoraproject.org/en-US/quick-docs/understanding-and-administering-systemd/index.htmlRun the .sh file:
bash -ex server.shEdit the config.toml configuration file. You can edit it locally with reference to config.toml.
vim /opt/ServerStatus/config.tomlconfig.toml reference
# 管理员账号,不设置默认随机生成,用于查看 /detail, /mapjwt_secret = "" # 修改这个, 使用 openssl rand -base64 16 生成 secret 第8行admin_user = "" 第9行admin_pass = "" 第10行hosts = 第22行# 开关 true 打开enabled = false 第60行bot_token = "<tg bot token>" 第61行chat_id = "<chat id>" 第62行Test the configuration file:
# 测试配置文件是否有效./stat_server -c config.toml -t# 根据配置发送测试消息,验证通知是否生效./stat_server -c config.toml --notify-testRestart the server-side service:
systemctl restart stat_serverTest access (ip:8080).
Theme Configuration
Theme configuration is implemented via frontend–backend separation, with the frontend deployed on Vercel.
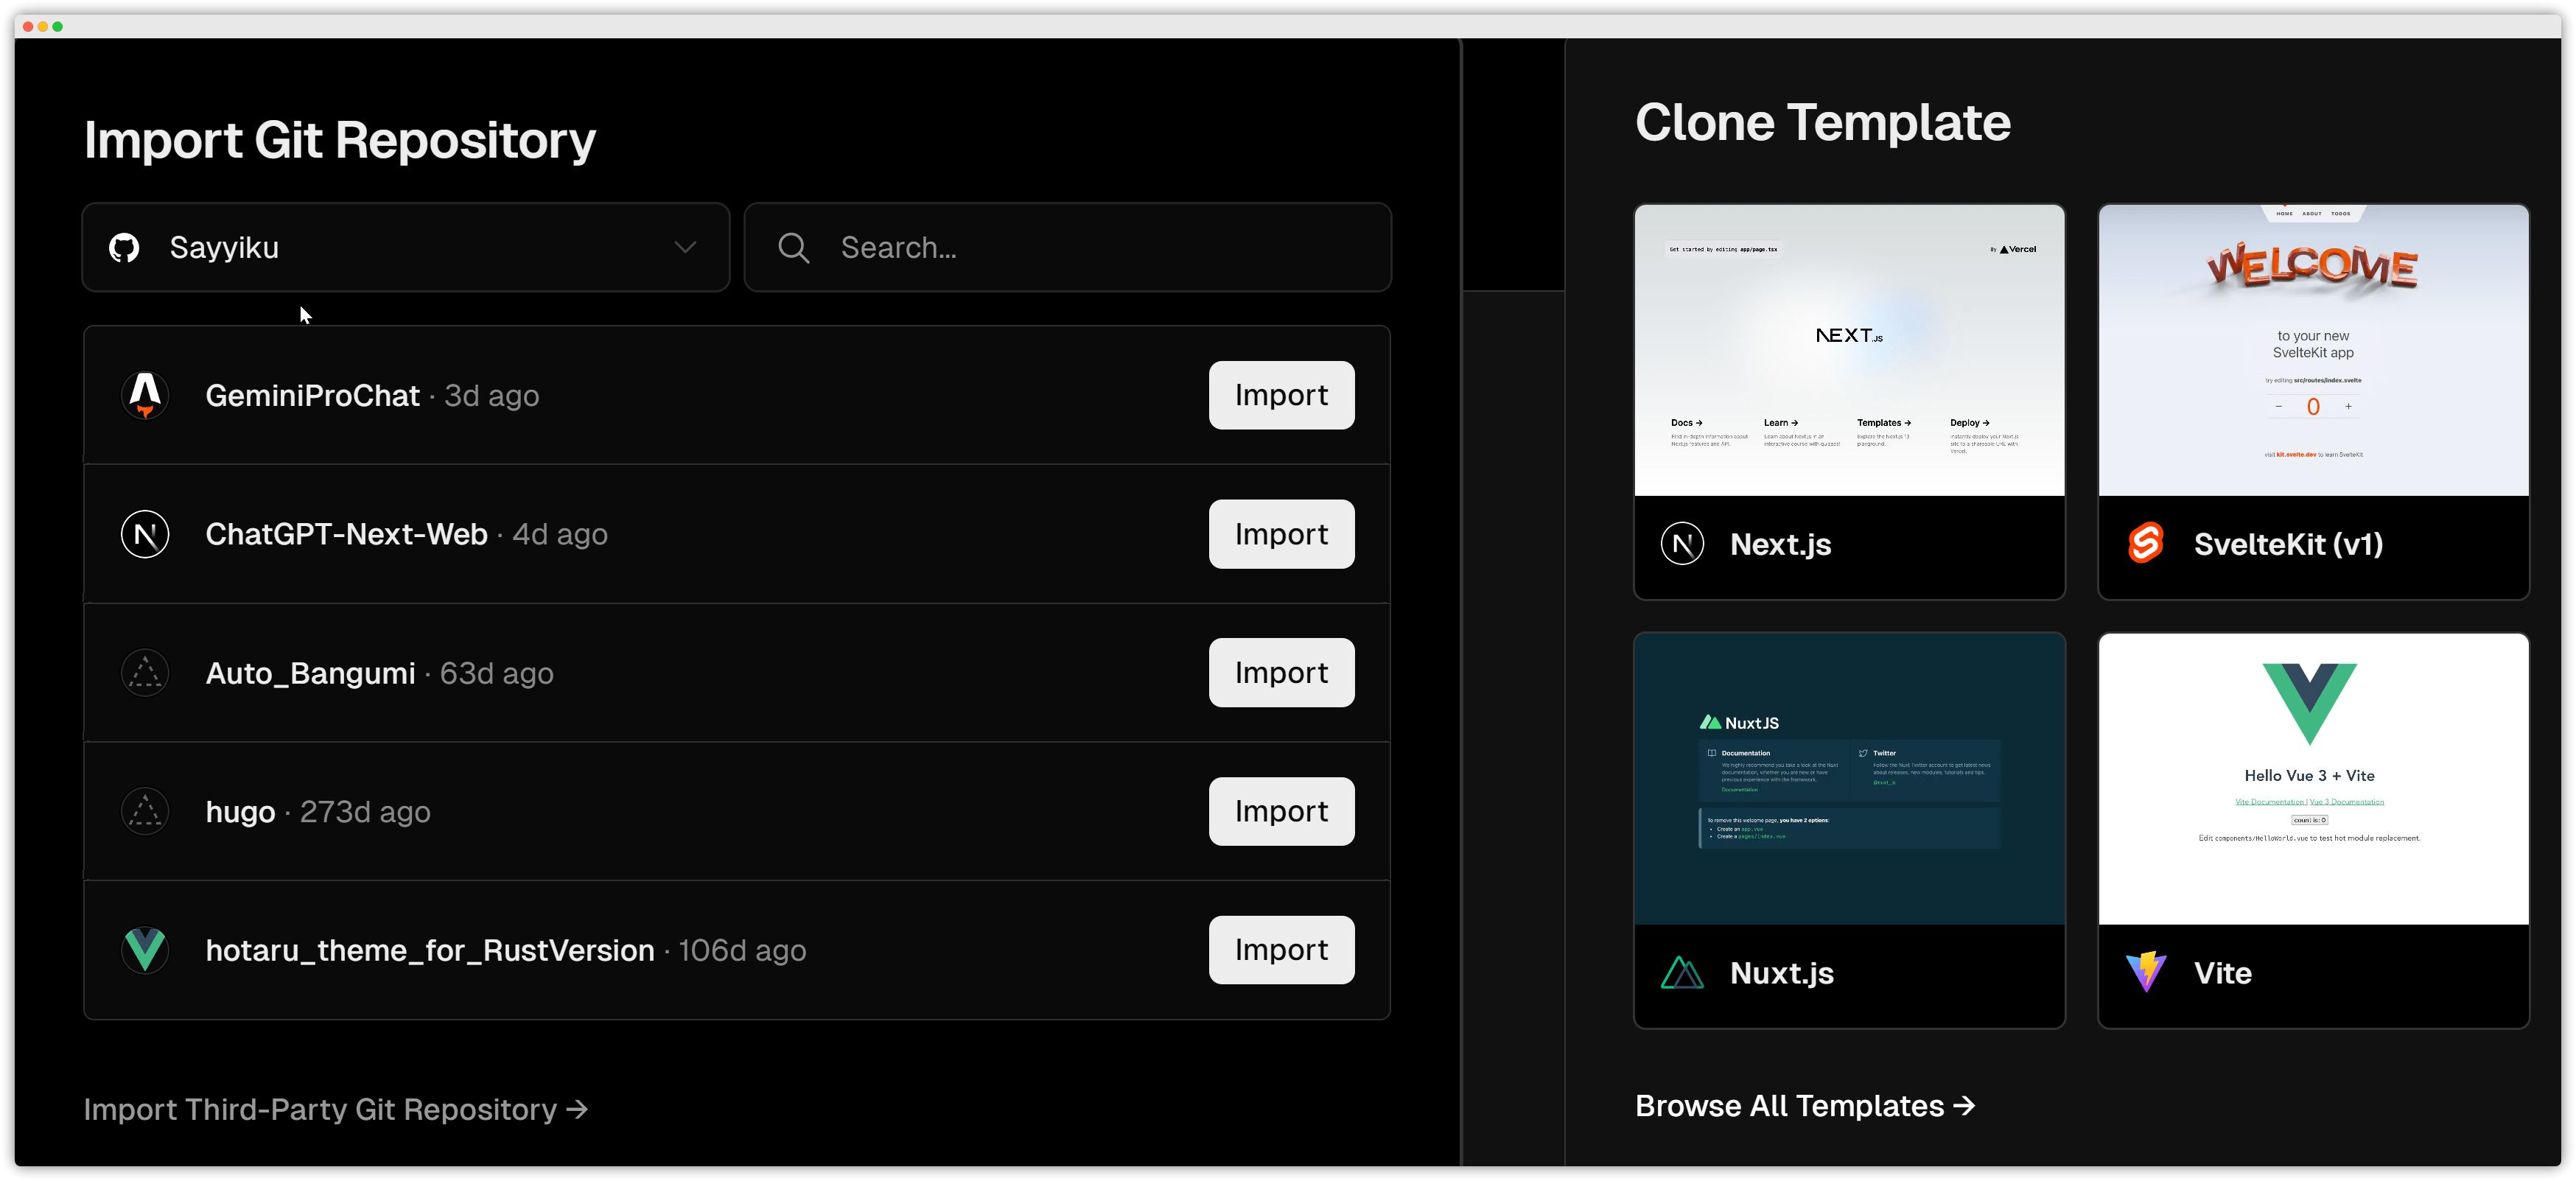
First fork HinataKato/hotaru_theme_for_RustVersion: The frontend of ServerStatus-Hotaru based on Vue 3.0 (github.com) to your own account:

Import this repo into Vercel:
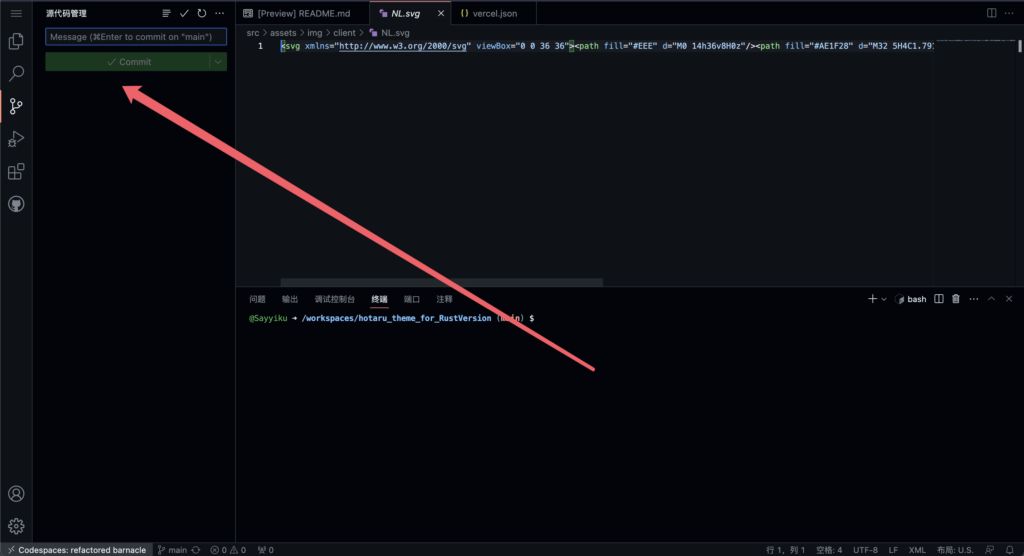
Just deploy directly; no need to modify anything. After deployment finishes, open the forked repository in GitHub and use Codespaces to modify the project.

Create vercel.json in the repo root directory. The file content is as follows. Replace http://xxx.com/ with your own domain name or IP:port. If you support HTTPS, remember to change all http:// to https://:
{ "routes": [ { "src": "/json/stats.json", "dest": "http://ip:端口/json/stats.json" }, { "src": "/detail", "dest": "http://ip:端口/detail" }, { "src": "/map", "dest": "http://ip:端口/map" }, { "src": "/i", "dest": "http://ip:端口/i" }, { "src": "/report", "dest": "http://ip:端口/report" } ]}Commit and push the branch with any message you like.
Wait for it to redeploy and connect to the backend.

Add your own domain name:

Wait a bit for it to take effect and the deployment is complete.
Deploying the Client
Create the directory:
cdapt install wget curl unzip vim vnstatmkdir -p /opt/ServerStatus && cd /opt/ServerStatusEdit the .sh file:
vim client.shIf you are deploying on ARM architecture, remember to modify the OS_ARCH variable as indicated in the comment. File content is as follows:
#!/bin/bashset -ex
WORKSPACE=/opt/ServerStatusmkdir -p ${WORKSPACE}cd ${WORKSPACE}
# 下载, arm 机器替换 x86_64 为 aarch64OS_ARCH="x86_64"latest_version=$(curl -m 10 -sL "https://api.github.com/repos/zdz/ServerStatus-Rust/releases/latest" | grep "tag_name" | head -n 1 | awk -F ":" '{print $2}' | sed 's/\"//g;s/,//g;s/ //g')
wget --no-check-certificate -qO "client-${OS_ARCH}-unknown-linux-musl.zip" "https://github.com/zdz/ServerStatus-Rust/releases/download/${latest_version}/client-${OS_ARCH}-unknown-linux-musl.zip"
unzip -o "client-${OS_ARCH}-unknown-linux-musl.zip"
# systemd servicemv -v stat_client.service /etc/systemd/system/stat_client.service
systemctl daemon-reload
# 启动systemctl start stat_client
# 状态查看systemctl status stat_client
# 使用以下命令开机自启systemctl enable stat_client
# 停止# systemctl stop stat_client
# https://fedoraproject.org/wiki/Systemd/zh-cn# https://docs.fedoraproject.org/en-US/quick-docs/understanding-and-administering-systemd/index.html
# 修改 /etc/systemd/system/stat_client.service 文件,将IP改为你服务器的IP或你的域名Run the .sh file:
bash -ex client.shIf you need to use vnStat data, follow zdz/ServerStatus-Rust: ✨ Rust 版 ServerStatus 探针、威力加强版 (github.com) to install and configure vnStat:
# 在client端安装 vnstat## Centossudo yum install epel-release -ysudo yum install -y vnstat## Ubuntu/Debiansudo apt install -y vnstat
# 修改 /etc/vnstat.conf# 一般来说只要修改BandwidthDetection和MaxBandwidth就够了# BandwidthDetection 0# MaxBandwidth 0# 默认不是 eth0 网口的需要置空 Interface 来自动选择网口# 没报错一般不需要改# Interface ""systemctl restart vnstat
# 确保 version >= 2.6vnstat --version# 测试查看月流量 (刚安装可能需等一小段时间来采集数据)vnstat -mvnstat --json mBefore editing the configuration file, you can first test whether your service works. (Here the domain is the one where you deployed on Vercel; the username and password correspond to the host.)
./stat_client -a https://probe.catcat.blog/report -u 用户名 -p 密码If it works, you can edit the stat_client.service configuration file:
vim /etc/systemd/system/stat_client.serviceRefer to the following and only modify the line ExecStart=/opt/ServerStatus/stat_client. If you’re using HTTP, remember to change https to http. If you don’t use vnStat, remove -n, i.e. only keep -a "https://probe.catcat.blog/report" -u 用户名 -p 密码.
[Unit]Description=ServerStatus-Rust ClientAfter=network.target
[Service]User=rootGroup=rootEnvironment="RUST_BACKTRACE=1"WorkingDirectory=/opt/ServerStatus# EnvironmentFile=/opt/ServerStatus/.envExecStart=/opt/ServerStatus/stat_client -a "https://probe.catcat.blog/report" -u 用户名 -p 密码 -nExecReload=/bin/kill -HUP $MAINPIDRestart=on-failure
[Install]WantedBy=multi-user.target
# /etc/systemd/system/stat_client.service# journalctl -u stat_client -f -n 100After editing, reload the unit file and then restart the client service:
systemctl daemon-reload && systemctl restart stat_clientCheck the service status with systemctl status stat_client.