Deploy OpenClaw: Open-Source AI Personal Assistant from Installation to QQ Bot Integration

OpenClaw is an open-source AI personal assistant that runs on your local machine and interacts with you through various chat applications. It supports multiple AI model providers and features a rich plugin and skill system, making it easy to build your own AI assistant.
- Website: https://openclaw.ai
- Documentation: https://docs.openclaw.ai
What is OpenClaw?
OpenClaw is a local-first open-source AI personal assistant framework. Key features include:
- Multi-platform chat integration: Supports QQ, Telegram, Discord, WeChat, and other popular chat platforms
- Model agnostic: Works with Anthropic, OpenAI, DeepSeek, Moonshot, and many other AI models
- Plugin/skill system: Extend functionality through plugins with support for custom skills
- Local-first: Data stored locally to protect your privacy
- Visual dashboard: Built-in management dashboard
Supported chat channels:
- QQ (via QQ Open Platform)
- Telegram
- Discord
- WeChat (Enterprise WeChat)
- Slack
- Command Line (CLI)
Supported AI model providers:
| Provider | Recommended Model | Notes |
|---|---|---|
| Anthropic | Claude 4 Sonnet | Strong overall capabilities |
| OpenAI | GPT-4o | Great multimodal support |
| OpenRouter | Various models | Aggregation platform, choose as needed |
| DeepSeek | DeepSeek-V3 | Cost-effective |
| Moonshot (Kimi) | Kimi 2.5 | Optimized for Chinese, long context |
| Local models | Ollama / LM Studio | Fully offline operation |
Prerequisites
OpenClaw runs on Node.js and requires Node.js 22+.
It’s recommended to use nvm to manage your Node.js version:
# Install nvmcurl -o- https://raw.githubusercontent.com/nvm-sh/nvm/v0.40.1/install.sh | bash
# Install Node.js 22nvm install 22nvm use 22
# Verify versionnode --version # Should show v22.x.xNOTEFor users in China experiencing slow npm downloads, you can use the npmmirror registry:
Terminal window
Step 1: Install OpenClaw
Install OpenClaw globally via npm:
npm install -g openclawVerify the installation:
openclaw --version
Step 2: Run the Onboarding Wizard
After installation, run the onboarding wizard to configure OpenClaw:
openclaw onboardThe wizard will guide you through the following steps.
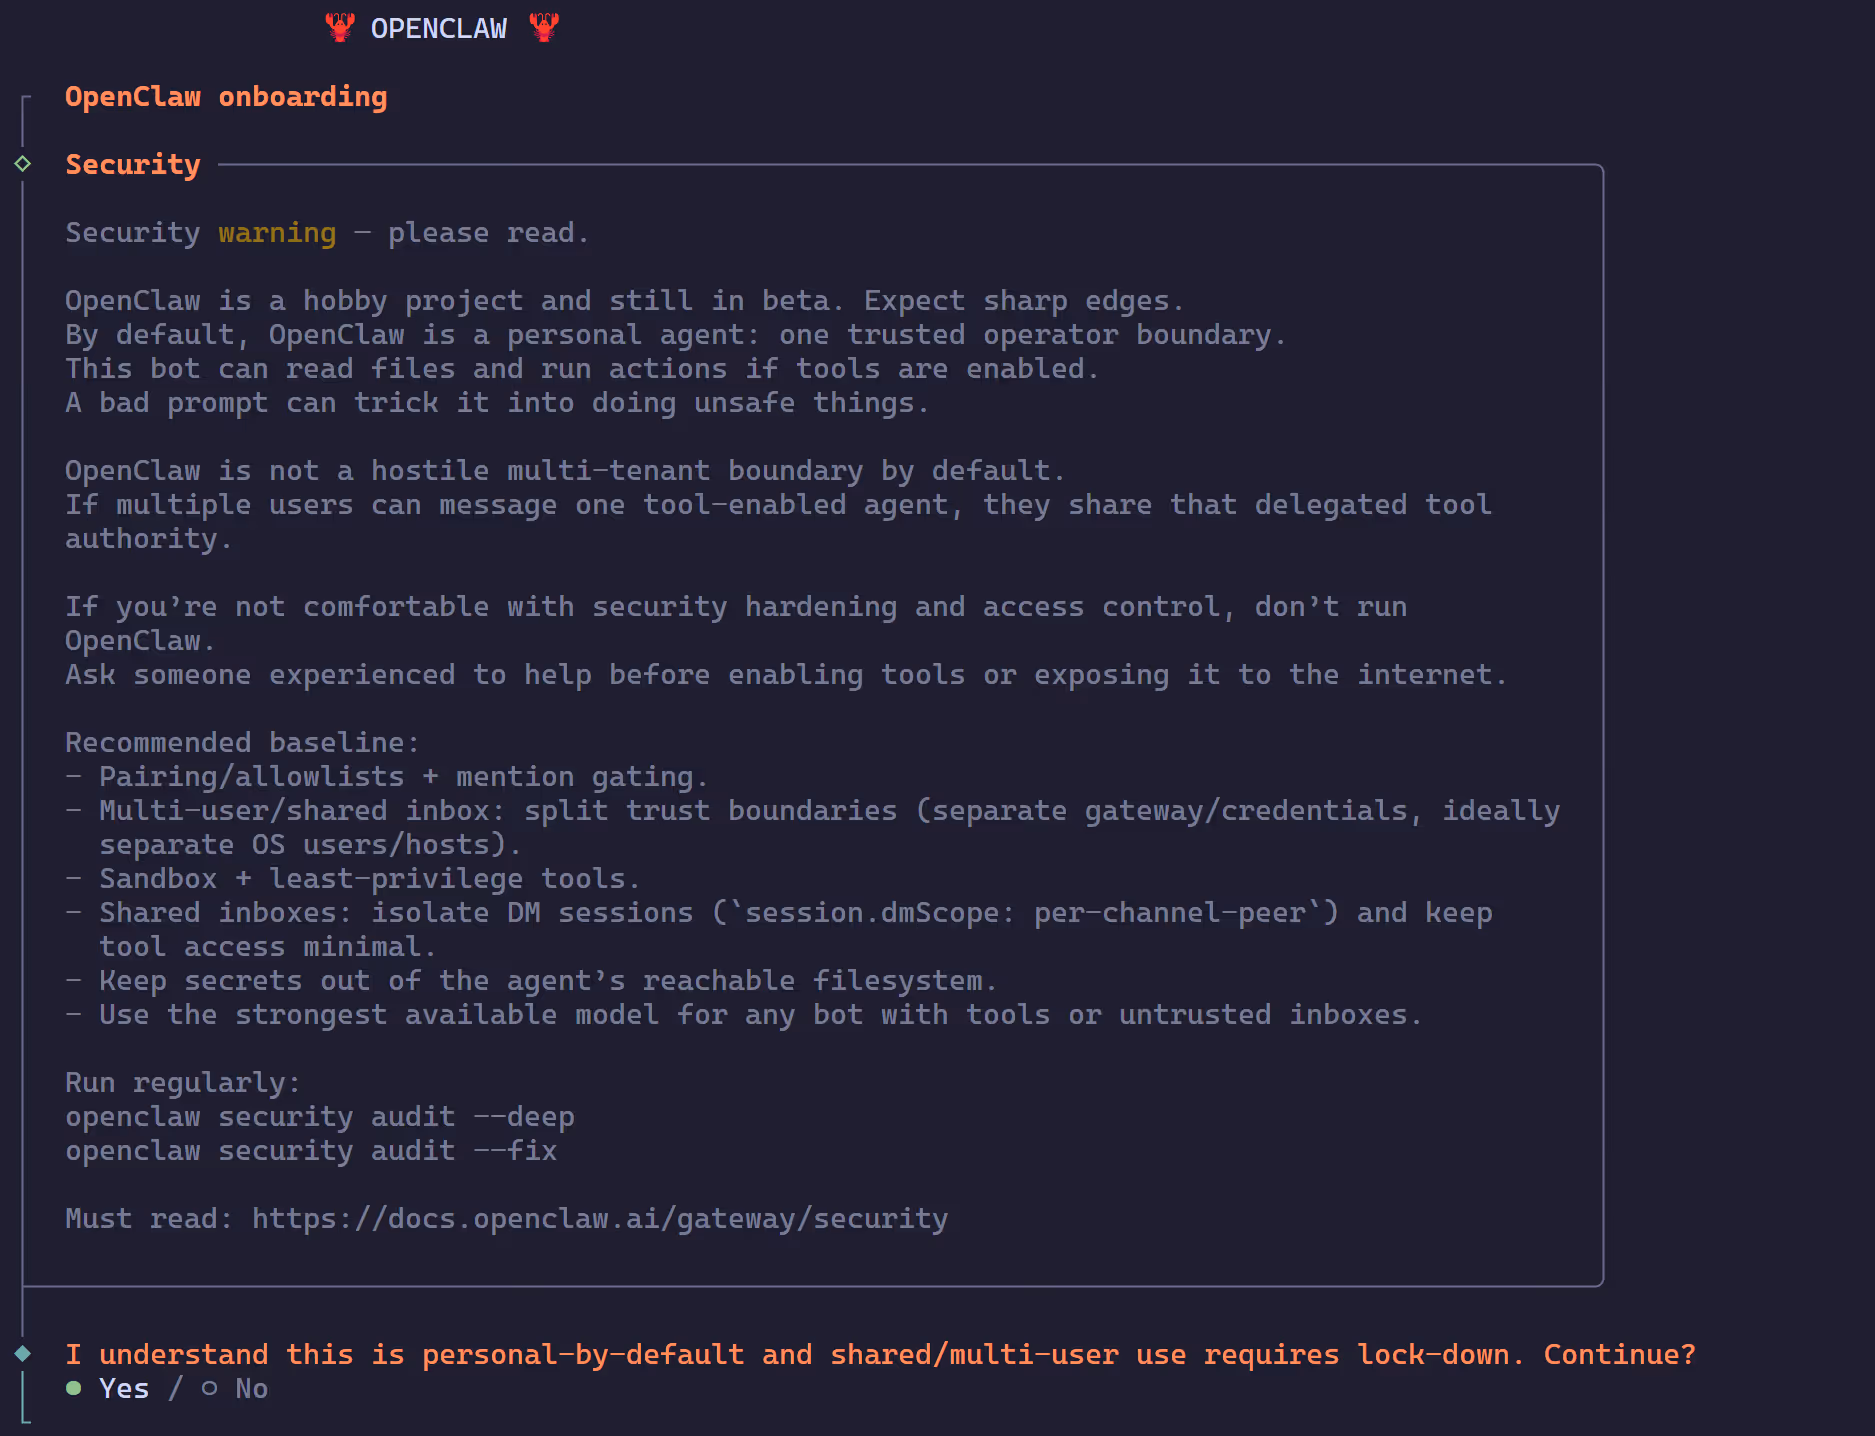
Security Notice
On first run, a security notice will appear informing you that OpenClaw will start a Gateway service locally. Confirm and select Yes to continue.
Choose Onboarding Mode
The wizard offers two modes:
- QuickStart (Recommended): Quick setup, suitable for most users
- Advanced: Advanced configuration with more customization options
It’s recommended to choose QuickStart mode to get started quickly.
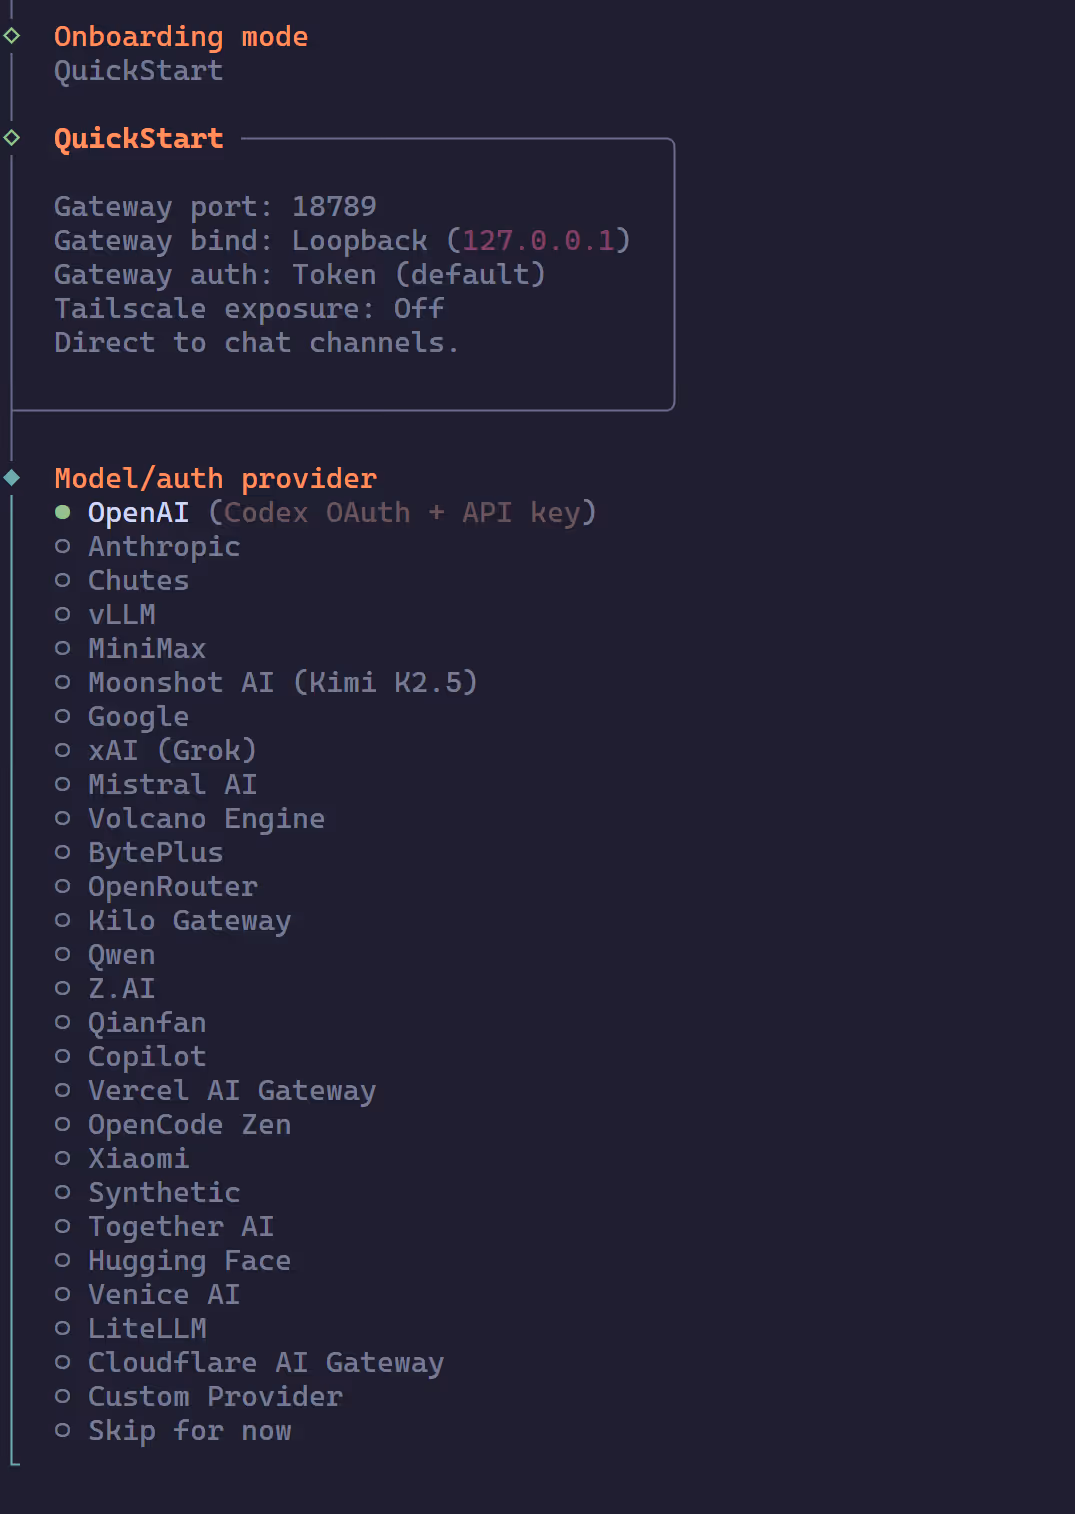
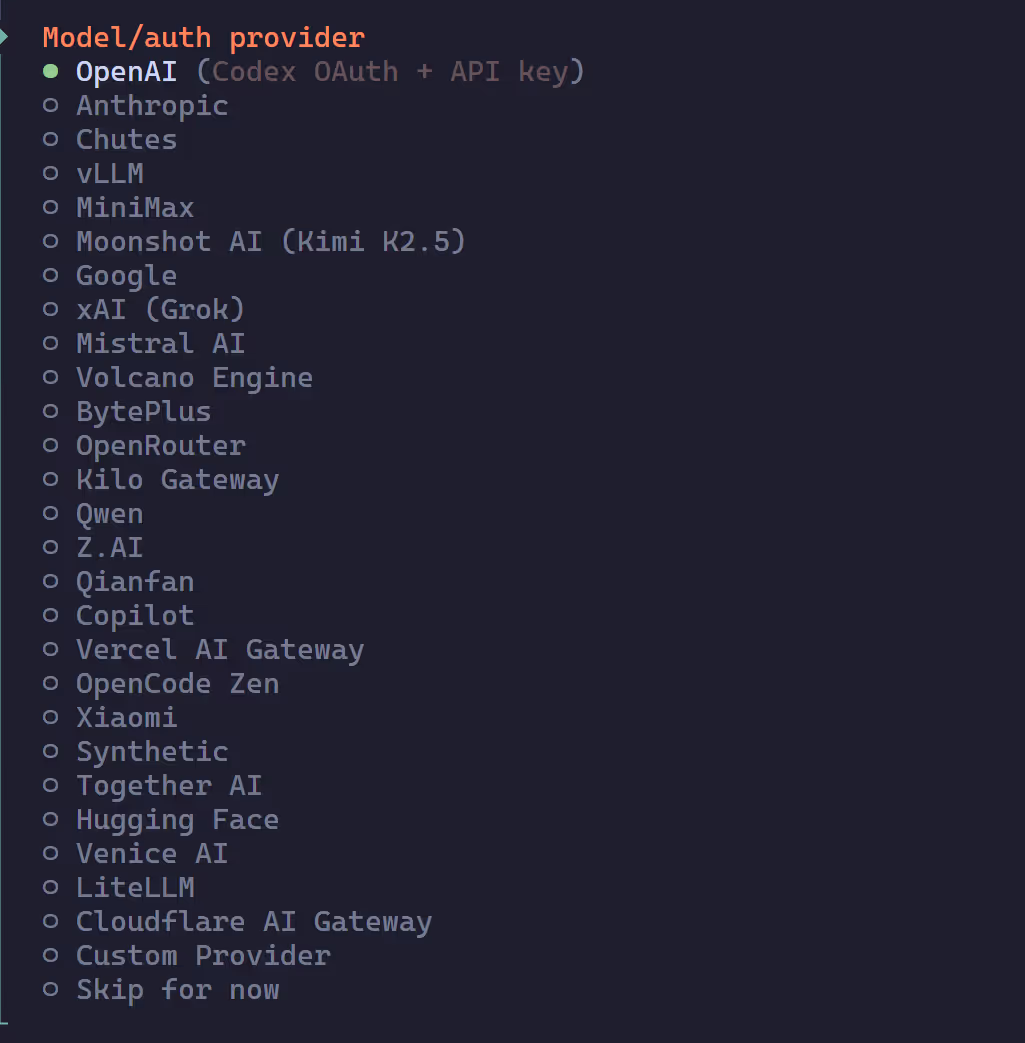
Configure AI Model
Select your AI model provider and enter the corresponding API Key.
| Provider | API Key URL | Notes |
|---|---|---|
| Anthropic | https://console.anthropic.com | Claude series models |
| OpenAI | https://platform.openai.com | GPT series models |
| OpenRouter | https://openrouter.ai | Aggregates multiple models |
| DeepSeek | https://platform.deepseek.com | Cost-effective Chinese provider |
| Moonshot | https://platform.moonshot.cn | Kimi series models |
| Local models | Ollama / LM Studio | No API Key needed |
Here we use Kimi 2.5 as an example — just get your API Key from the Moonshot platform and enter it. The configuration process is similar for other providers.
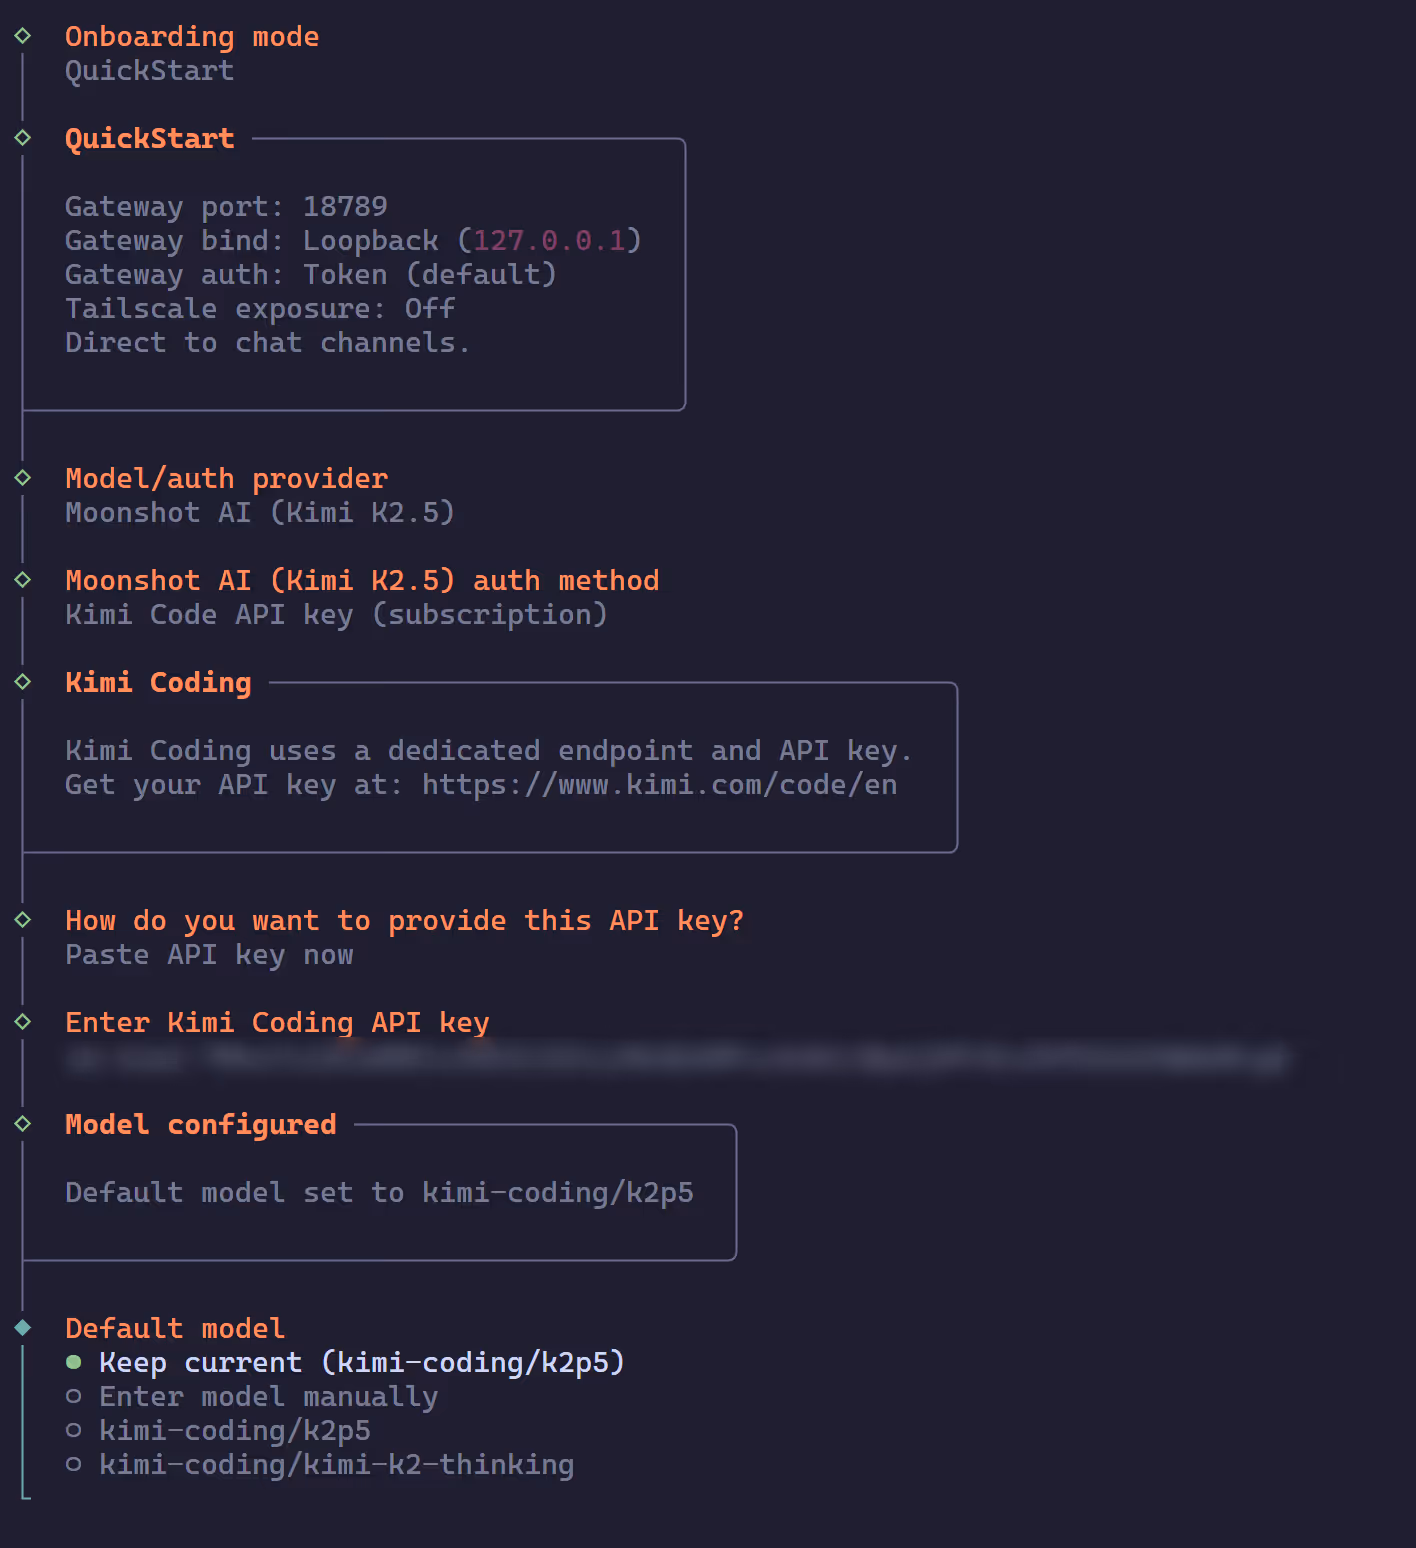
TIPFor detailed configuration instructions for each provider, refer to the OpenClaw official documentation: https://docs.openclaw.ai/models
Select Chat Channels
Choose the chat platforms you want to integrate. You can select multiple channels and add more later from the Dashboard.

NOTEThe QQ channel requires additional configuration steps (registering on QQ Open Platform, creating a bot, etc.), which will be covered in detail in the next section. You can skip QQ during initialization and set it up later.
Configure Skills
Choose skills based on your needs. If you’re on Linux/macOS, it’s recommended to install brew.
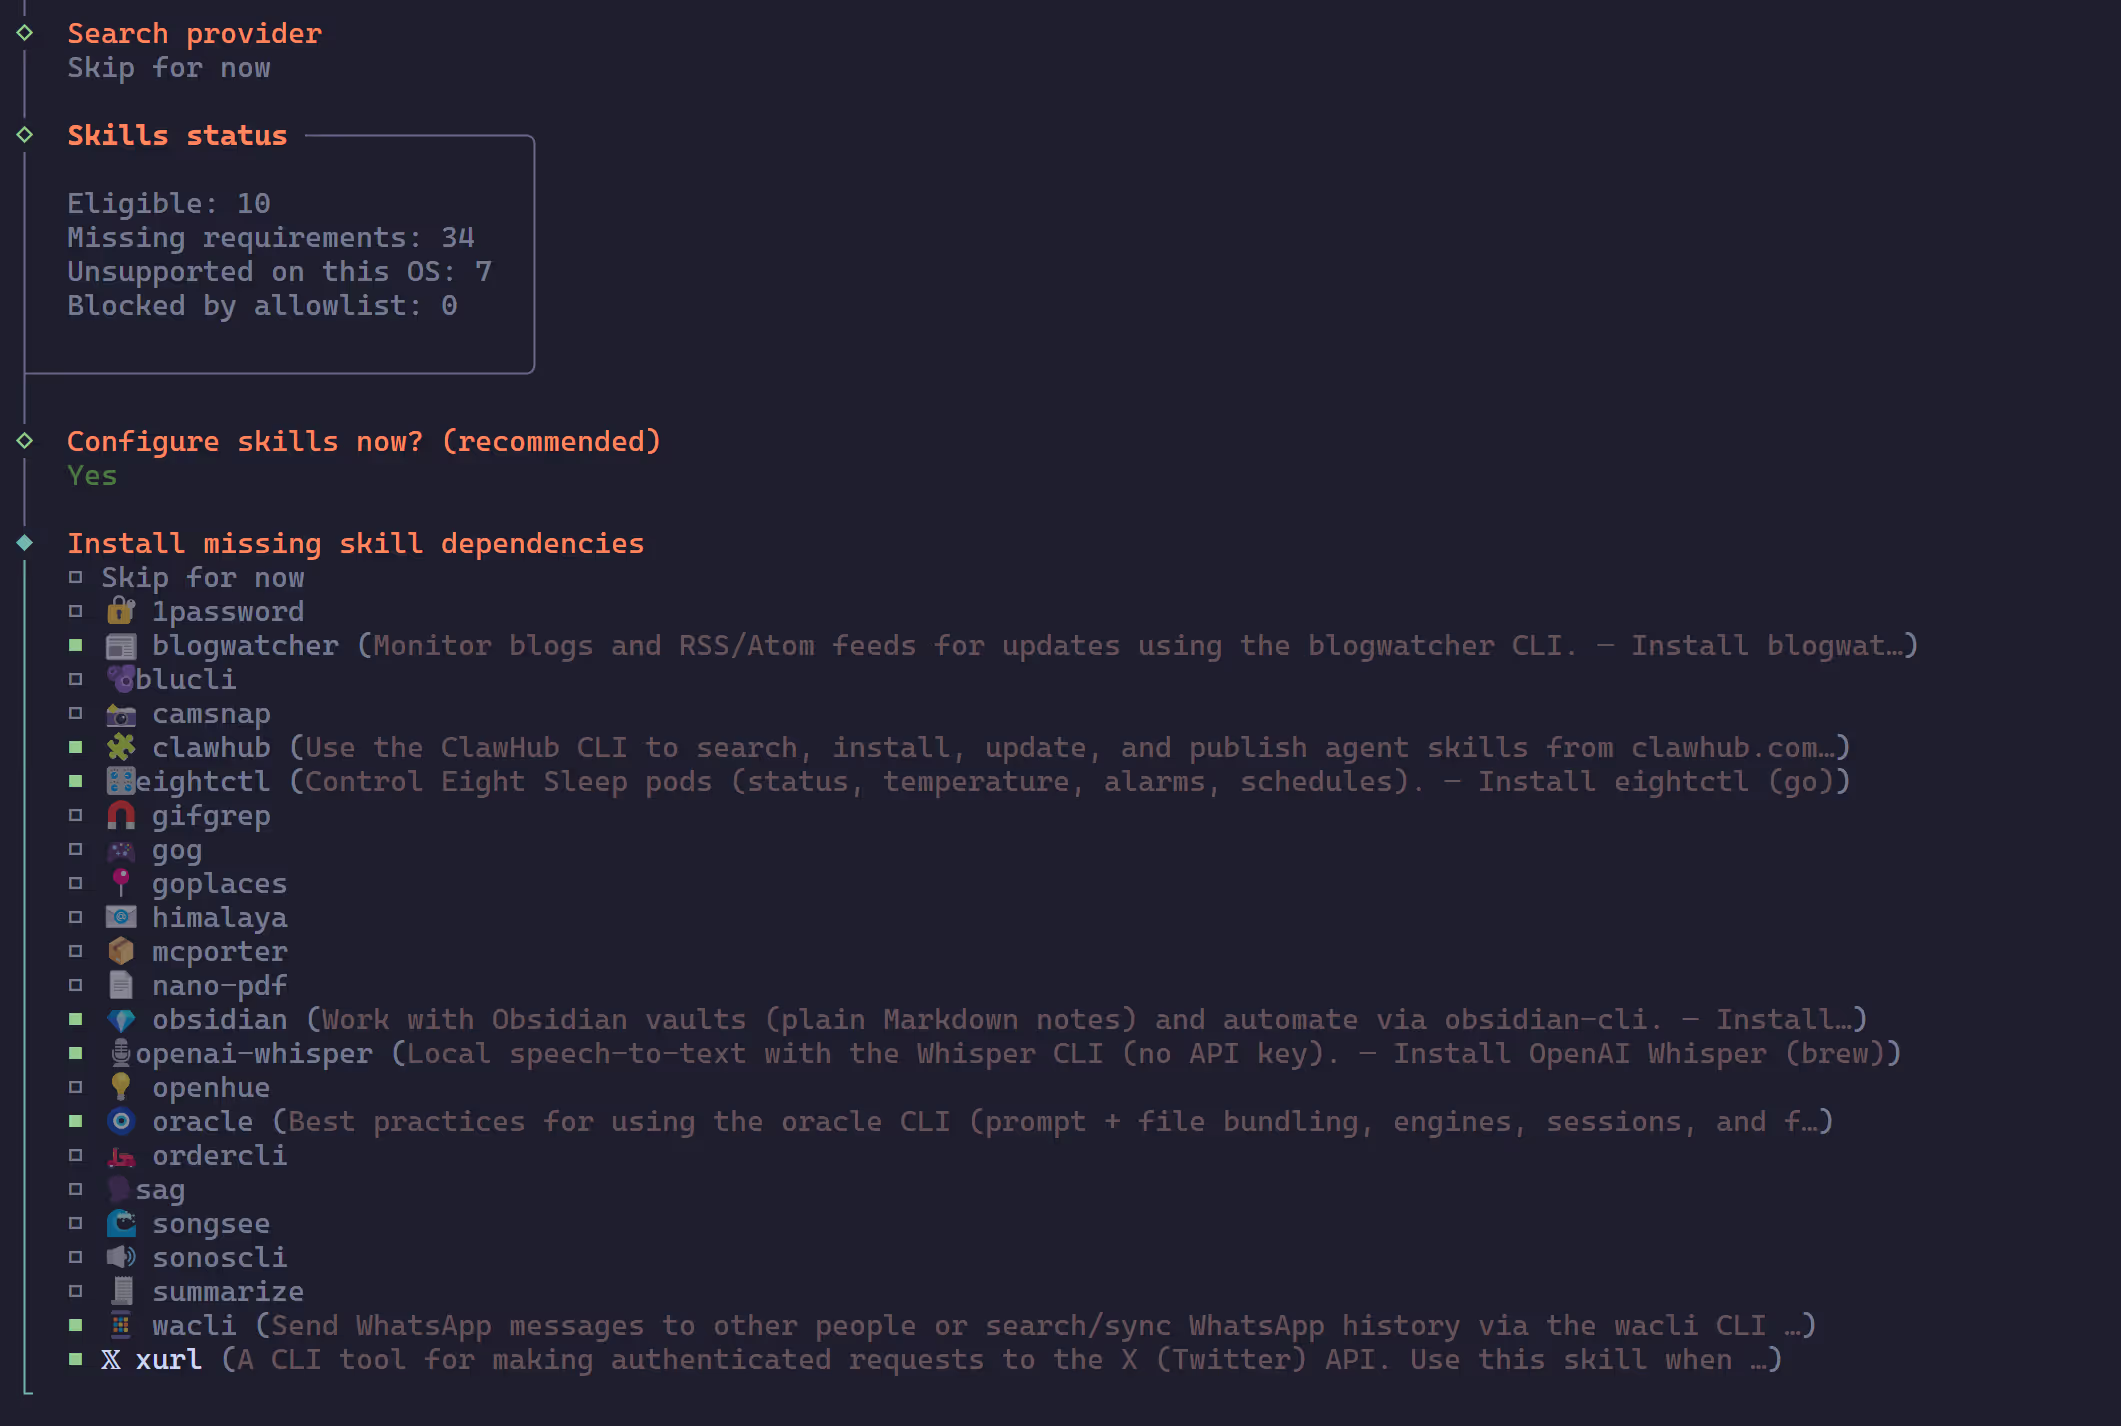

NOTEThese API Keys are all optional and used for specific skills. If you don’t have them, just select No for all and skip — you can add them later via
openclaw configureat any time.
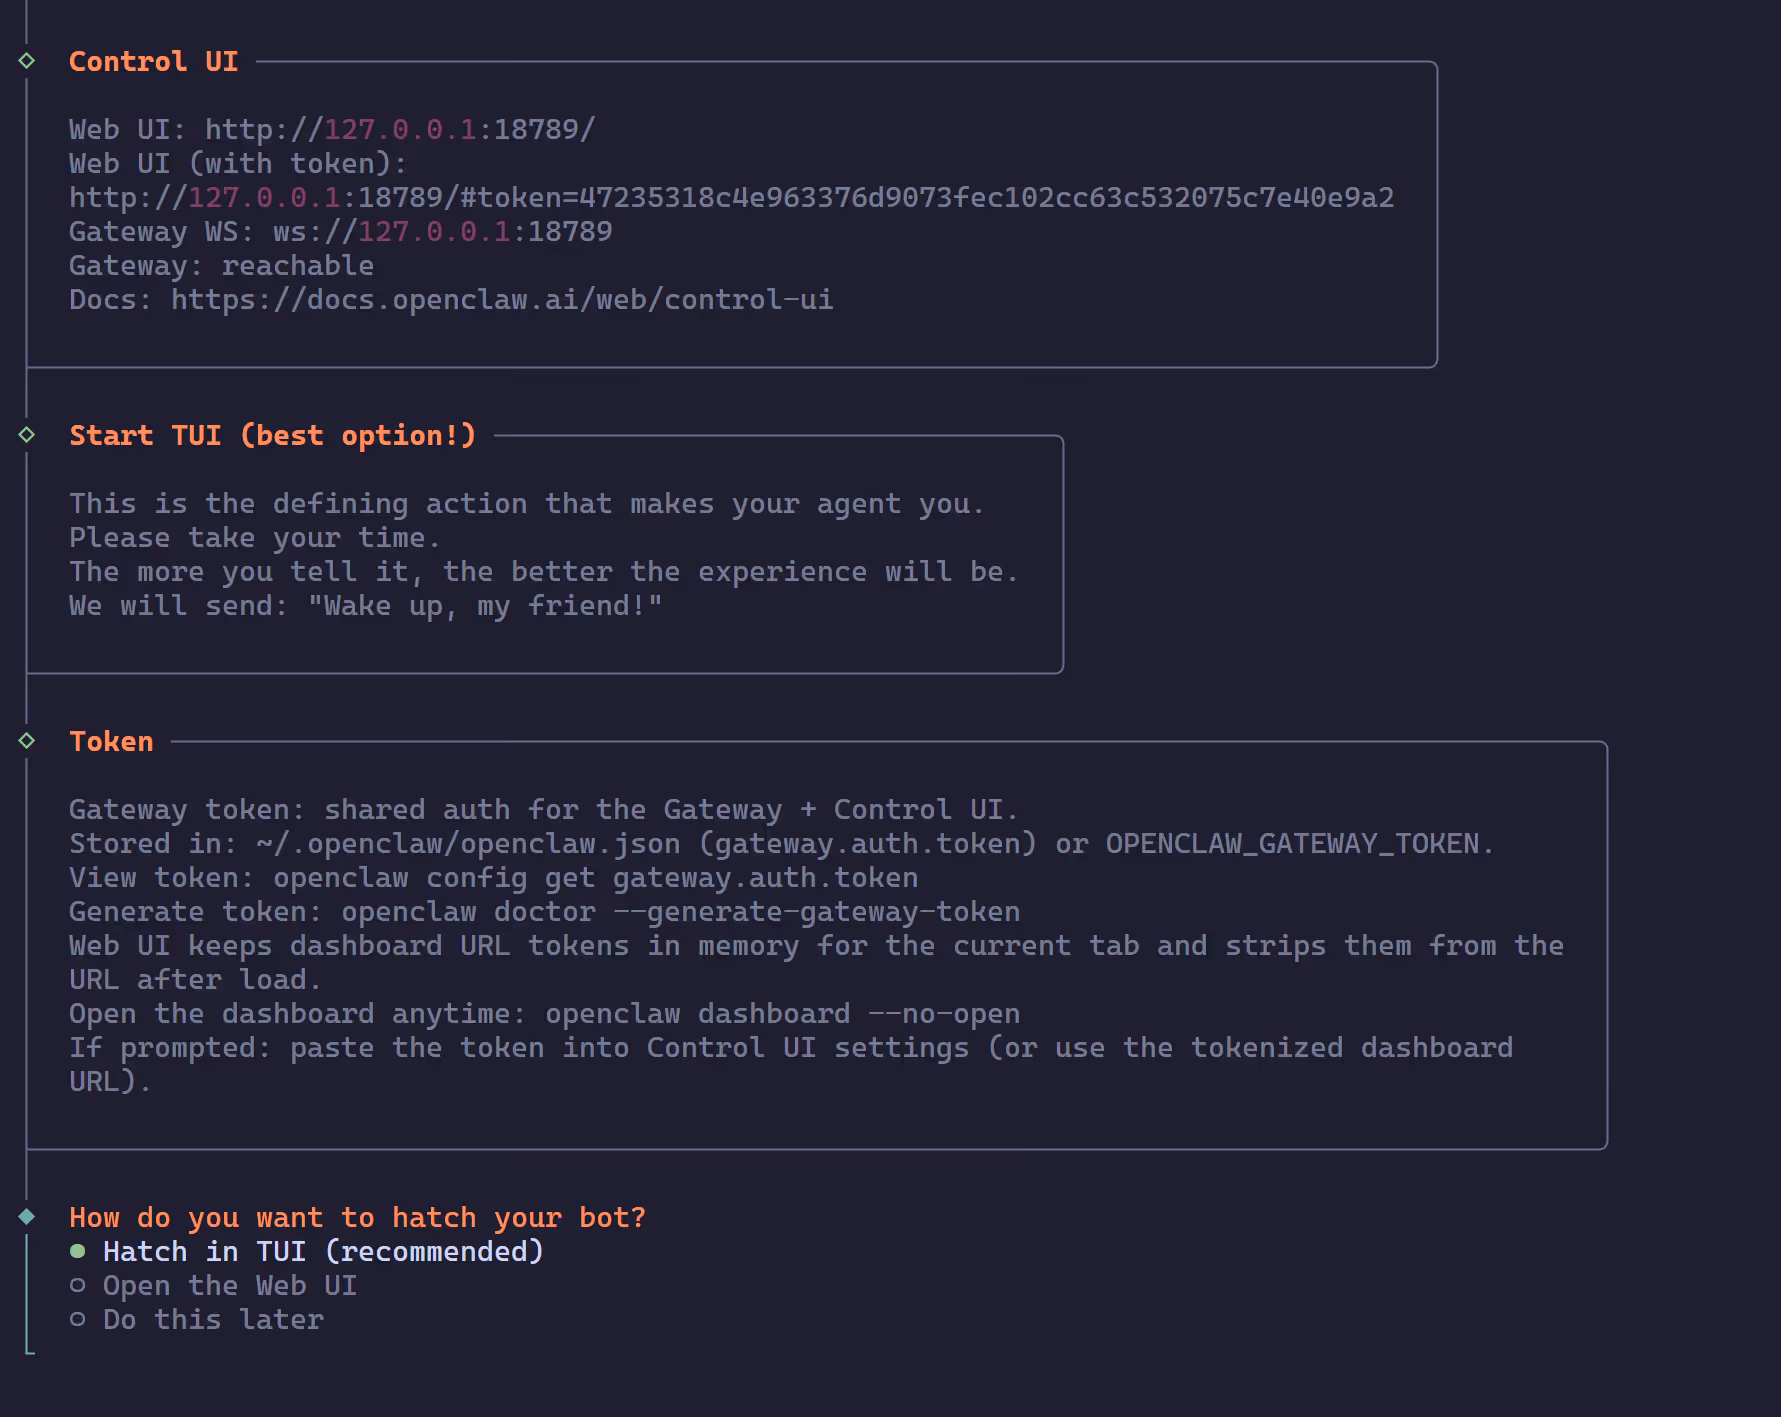
Confirm UI
This is the final step.
| Option | Description |
|---|---|
| Hatch in TUI (recommended) | Enter the interactive TUI interface directly in the terminal to chat with the Bot and set up its persona. Recommended. |
| Open the Web UI | Open the browser-based Web dashboard to complete the initial configuration. |
| Do this later | Skip the initialization process and set it up later. |
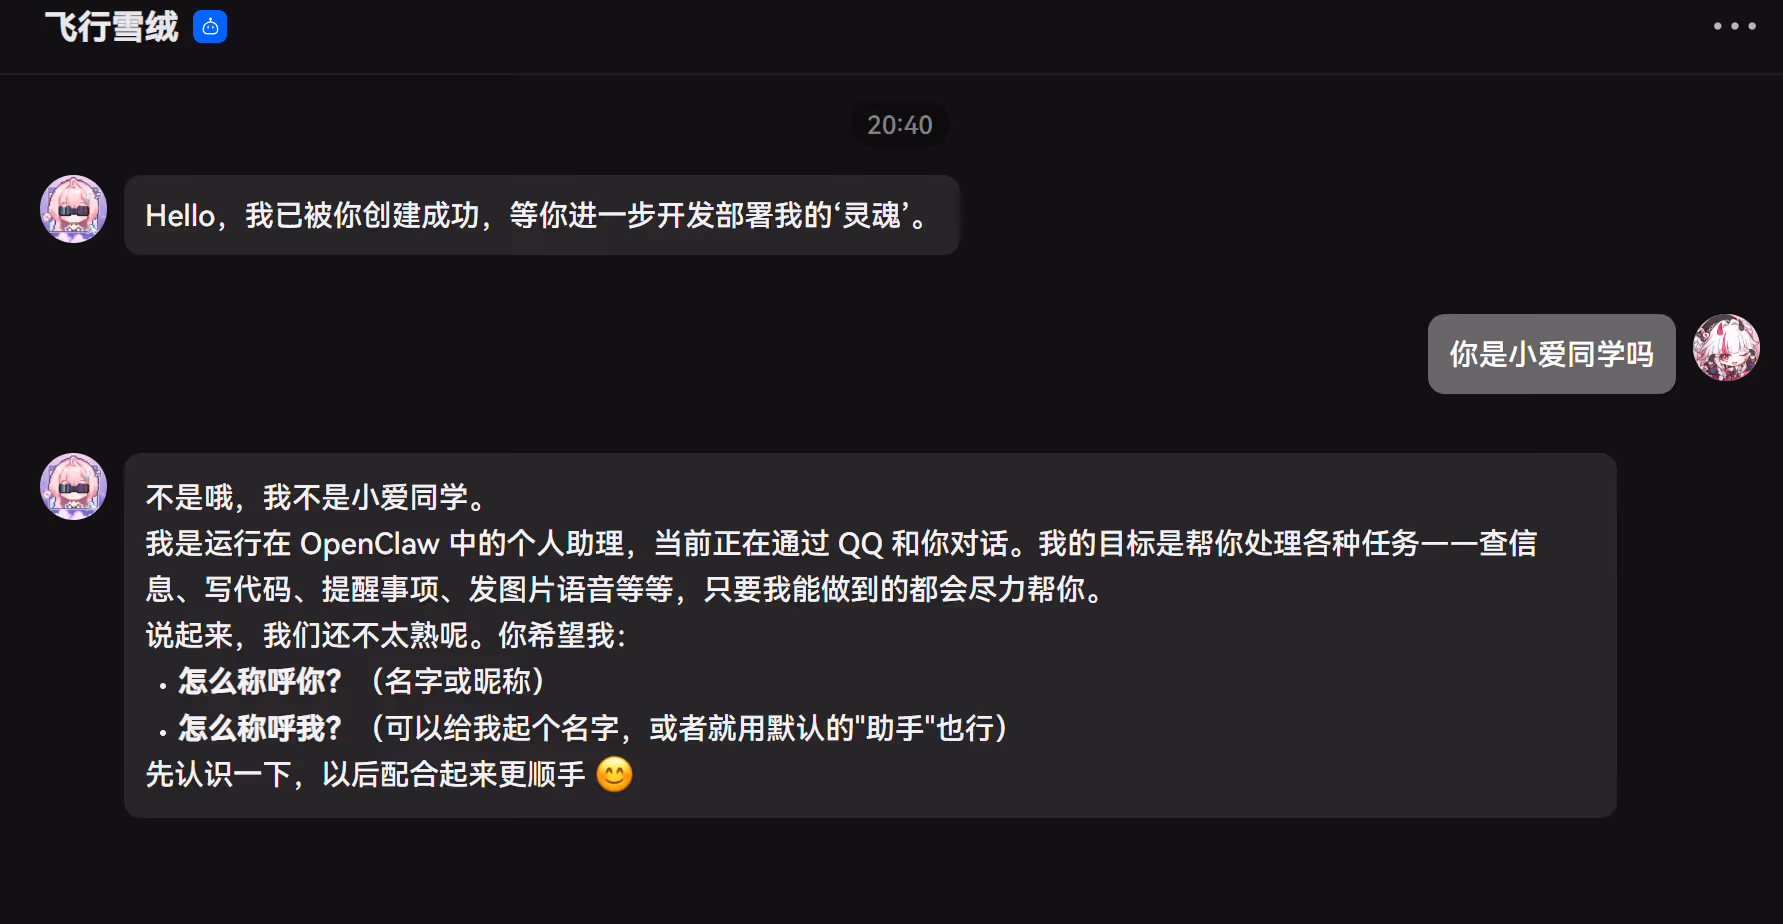
After selecting Hatch in TUI, you’ll enter the terminal chat interface:
openclaw tui - ws://127.0.0.1:18789 - agent main - session main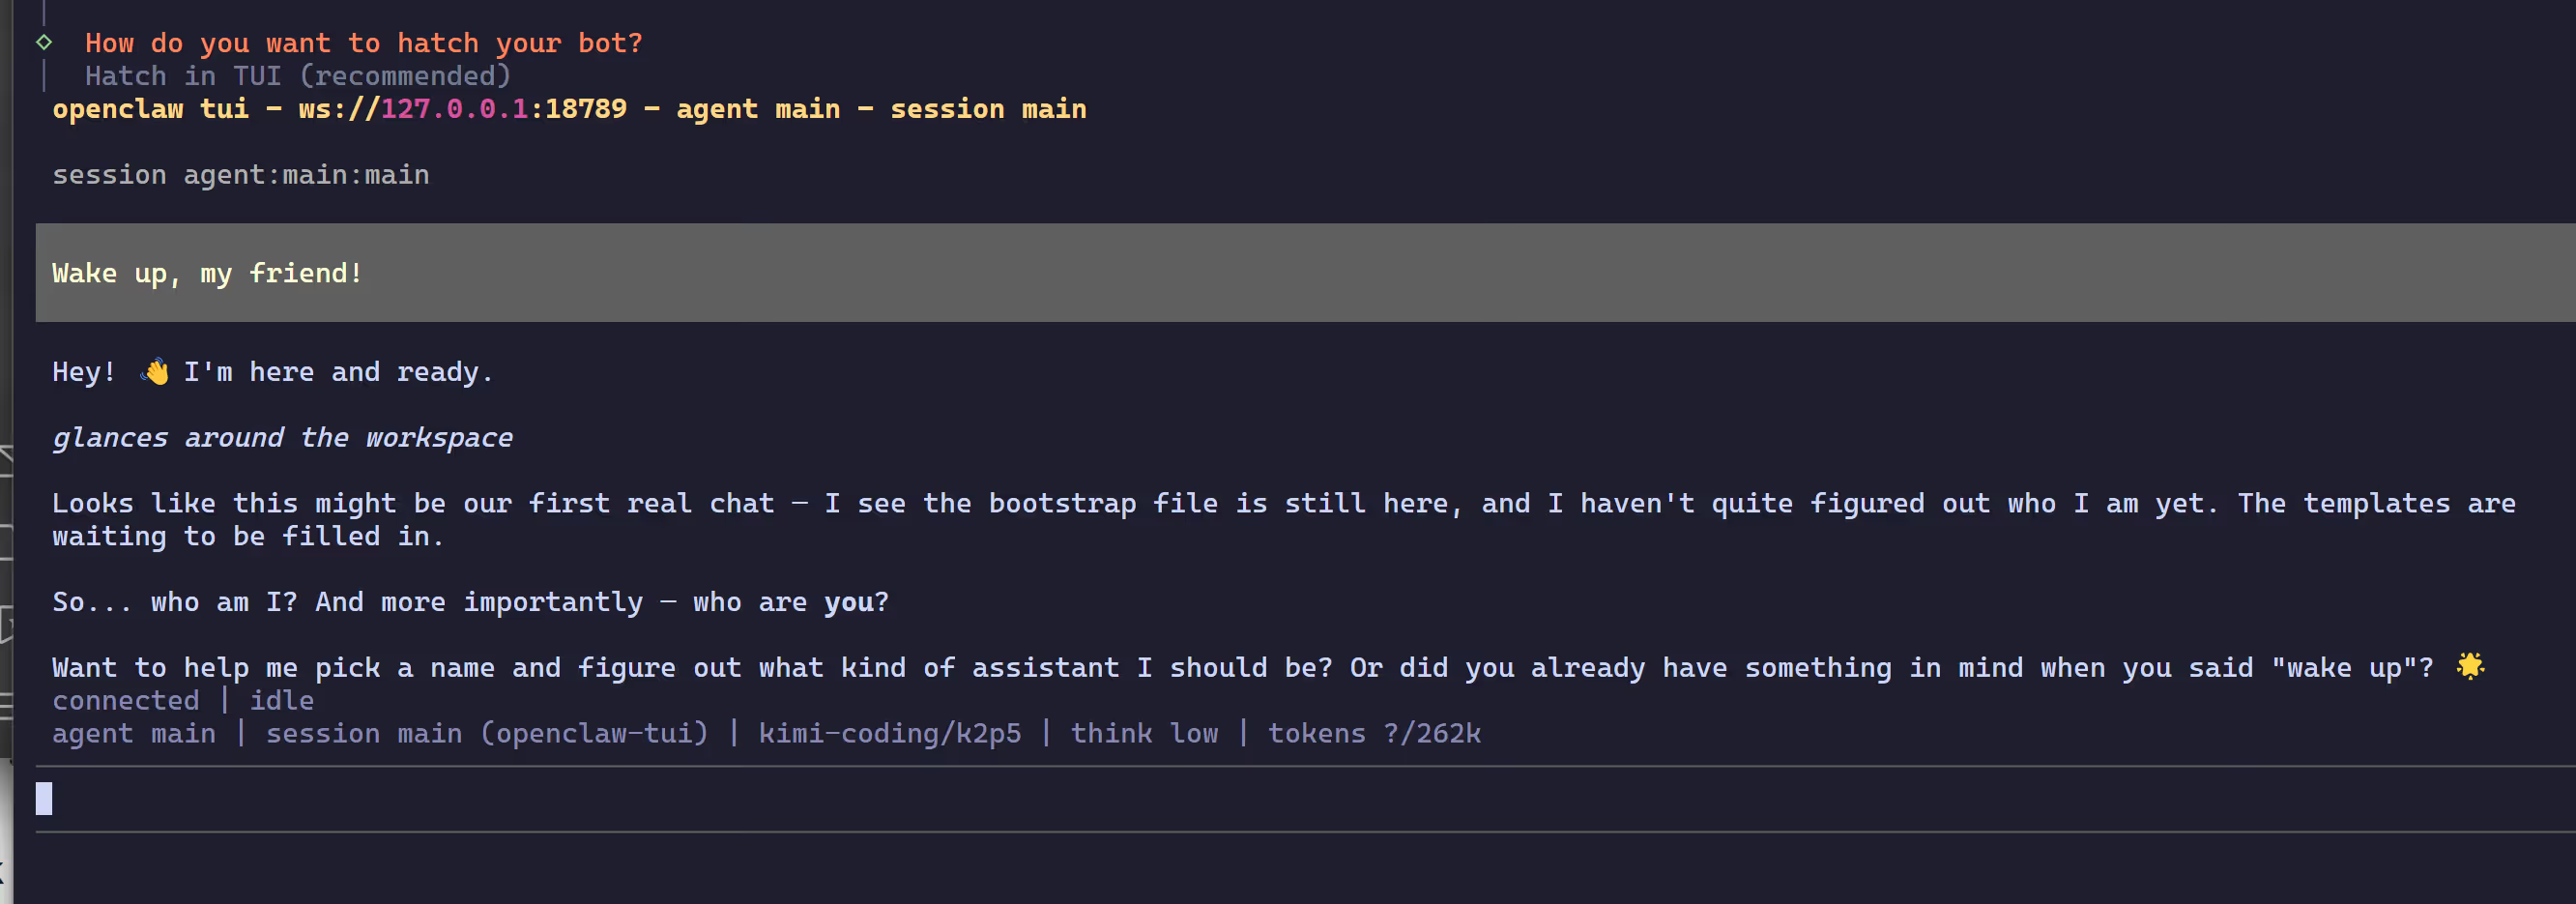 The Bot will send “Wake up, my friend!” as its first message. You can start chatting with it, telling it your needs and preferences — the more detailed your description, the better the subsequent experience.
To exit TUI: Press Ctrl+C. The Bot’s Gateway service will continue running in the background.
Complete Installation
After the wizard finishes, OpenClaw will automatically start the Gateway service.
Verify the running status:
openclaw statusOpen the visual management dashboard:
openclaw dashboardThe default dashboard address is http://localhost:3210, where you can view and manage your AI assistant.
Step 3: QQ Bot Integration
To integrate OpenClaw with a QQ bot, follow these steps.
Register on QQ Open Platform
- Visit QQ Open Platform
- Scan the QR code with your mobile QQ to log in or register a developer account
- Complete developer verification
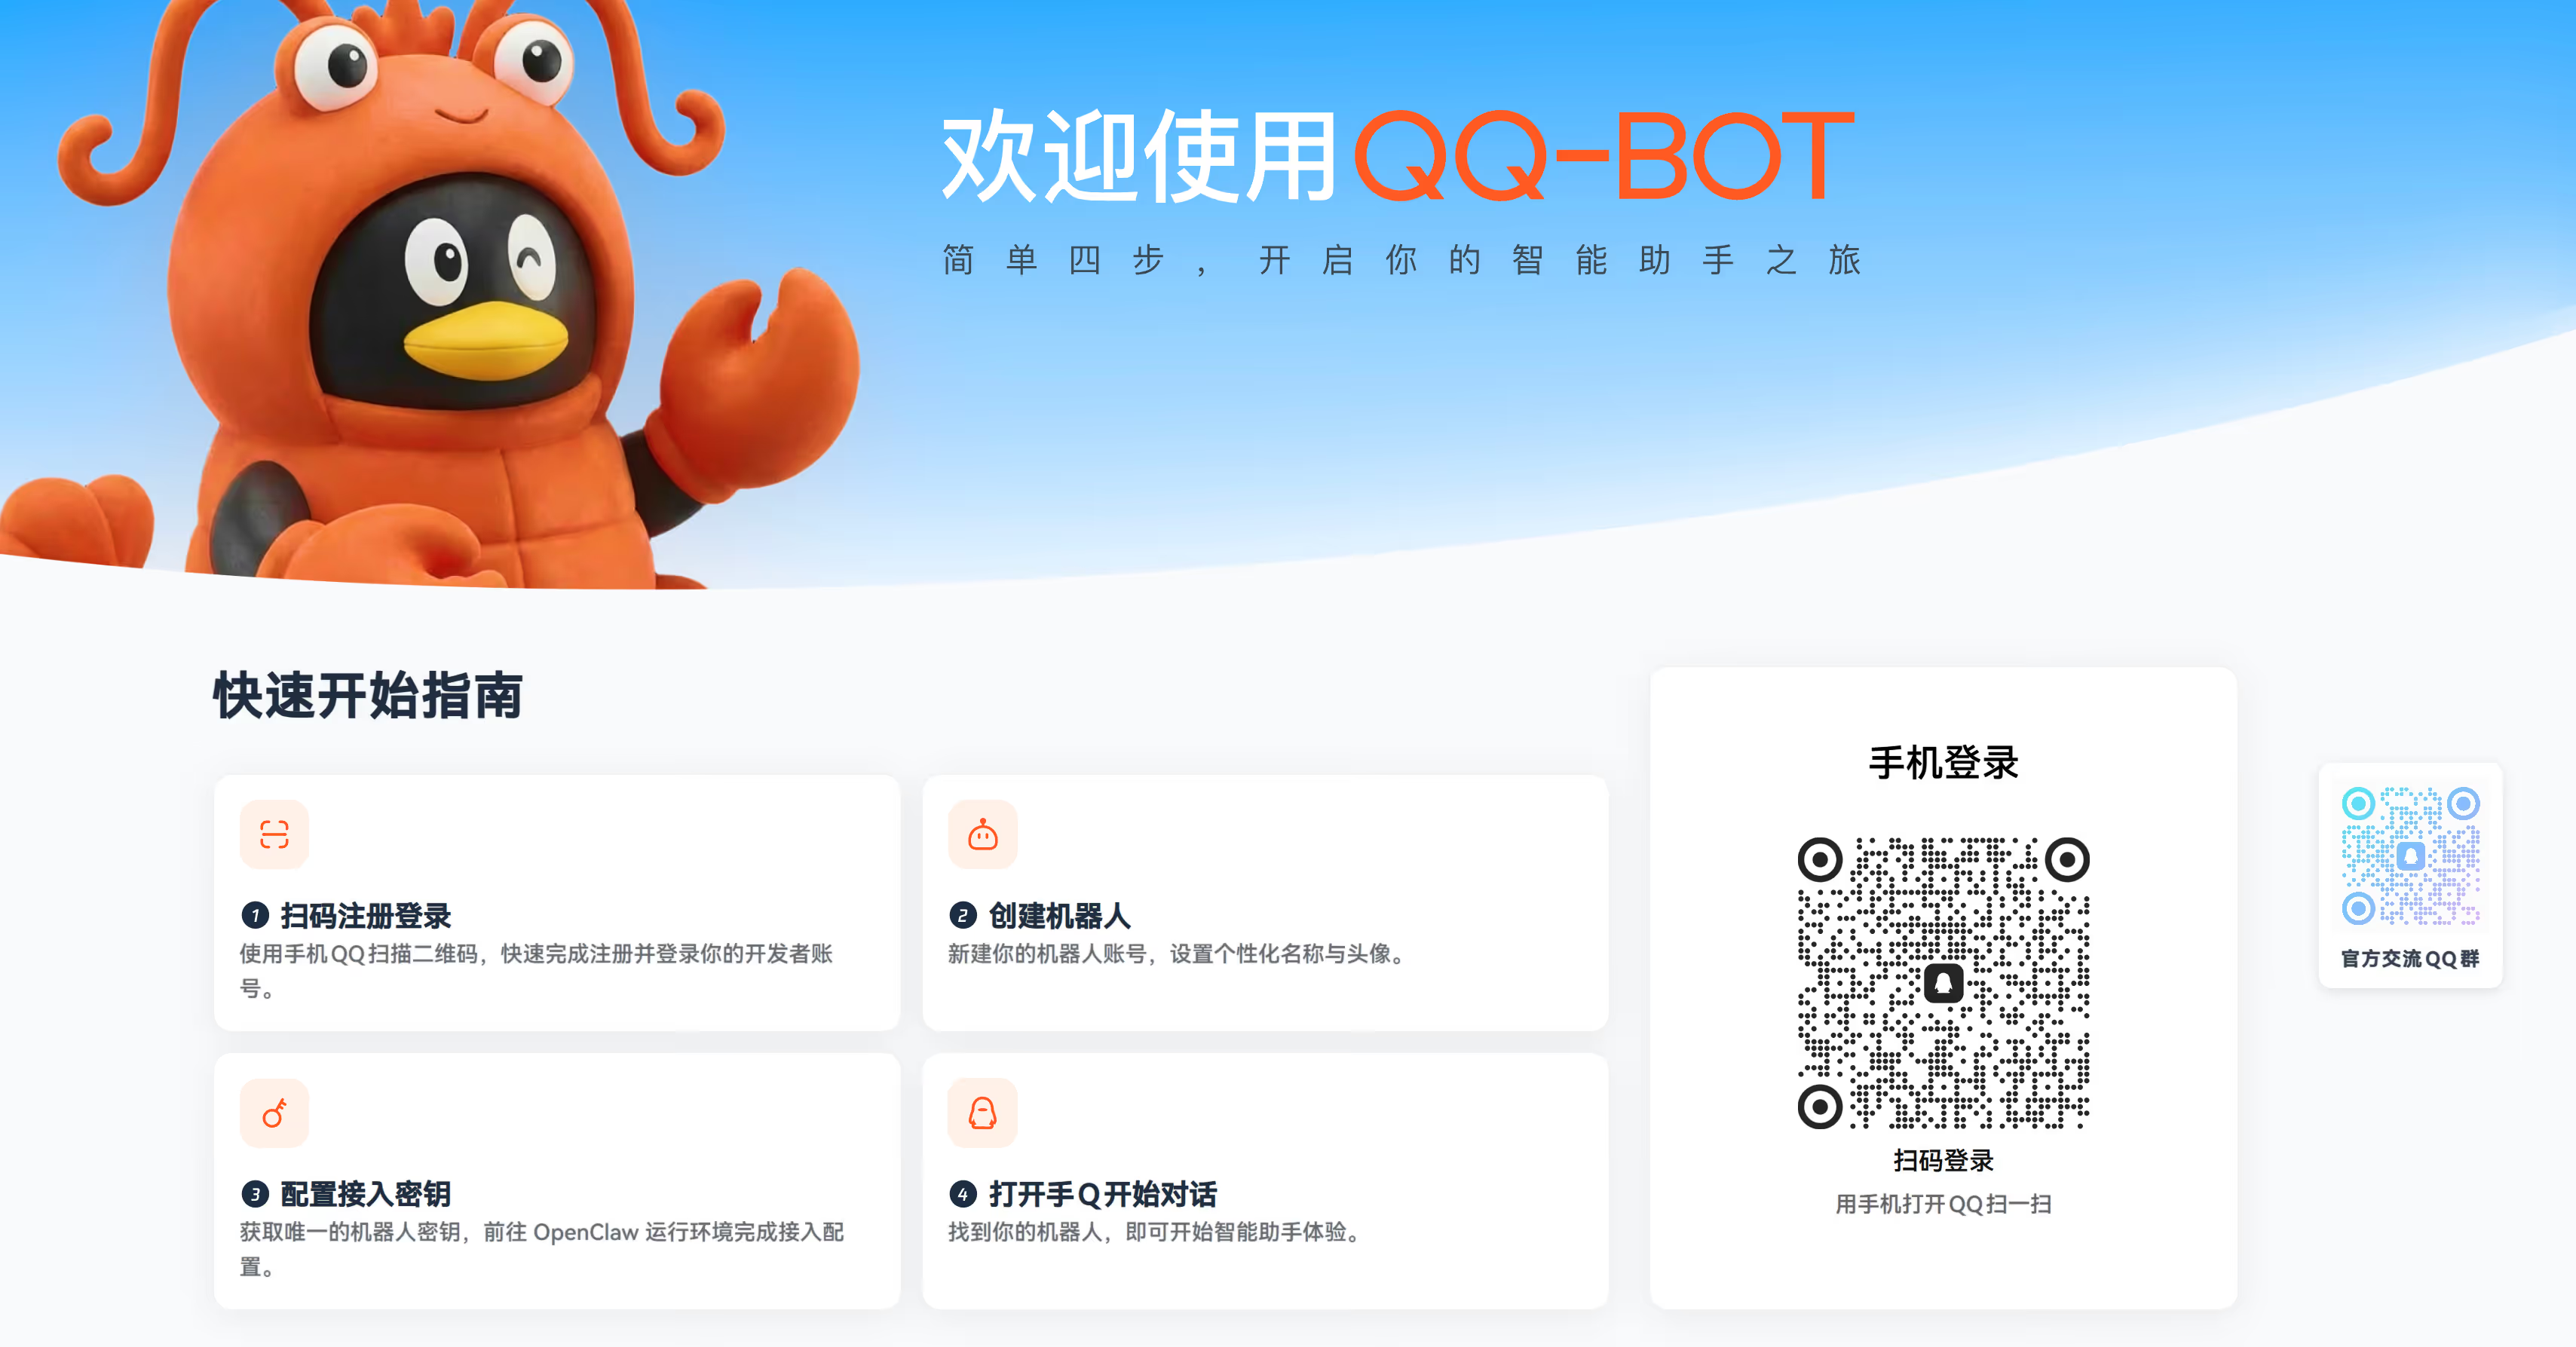
Create a QQ Bot
- After logging in, go to the QQ Bot Management Page
- Click Create Bot
- Fill in the bot’s basic information (name, avatar, description, etc.)
- After creation, obtain the AppID and AppSecret from the bot’s detail page
IMPORTANTThe AppID and AppSecret are the bot’s core credentials. Keep them safe and never expose them in public repositories or share them with others.
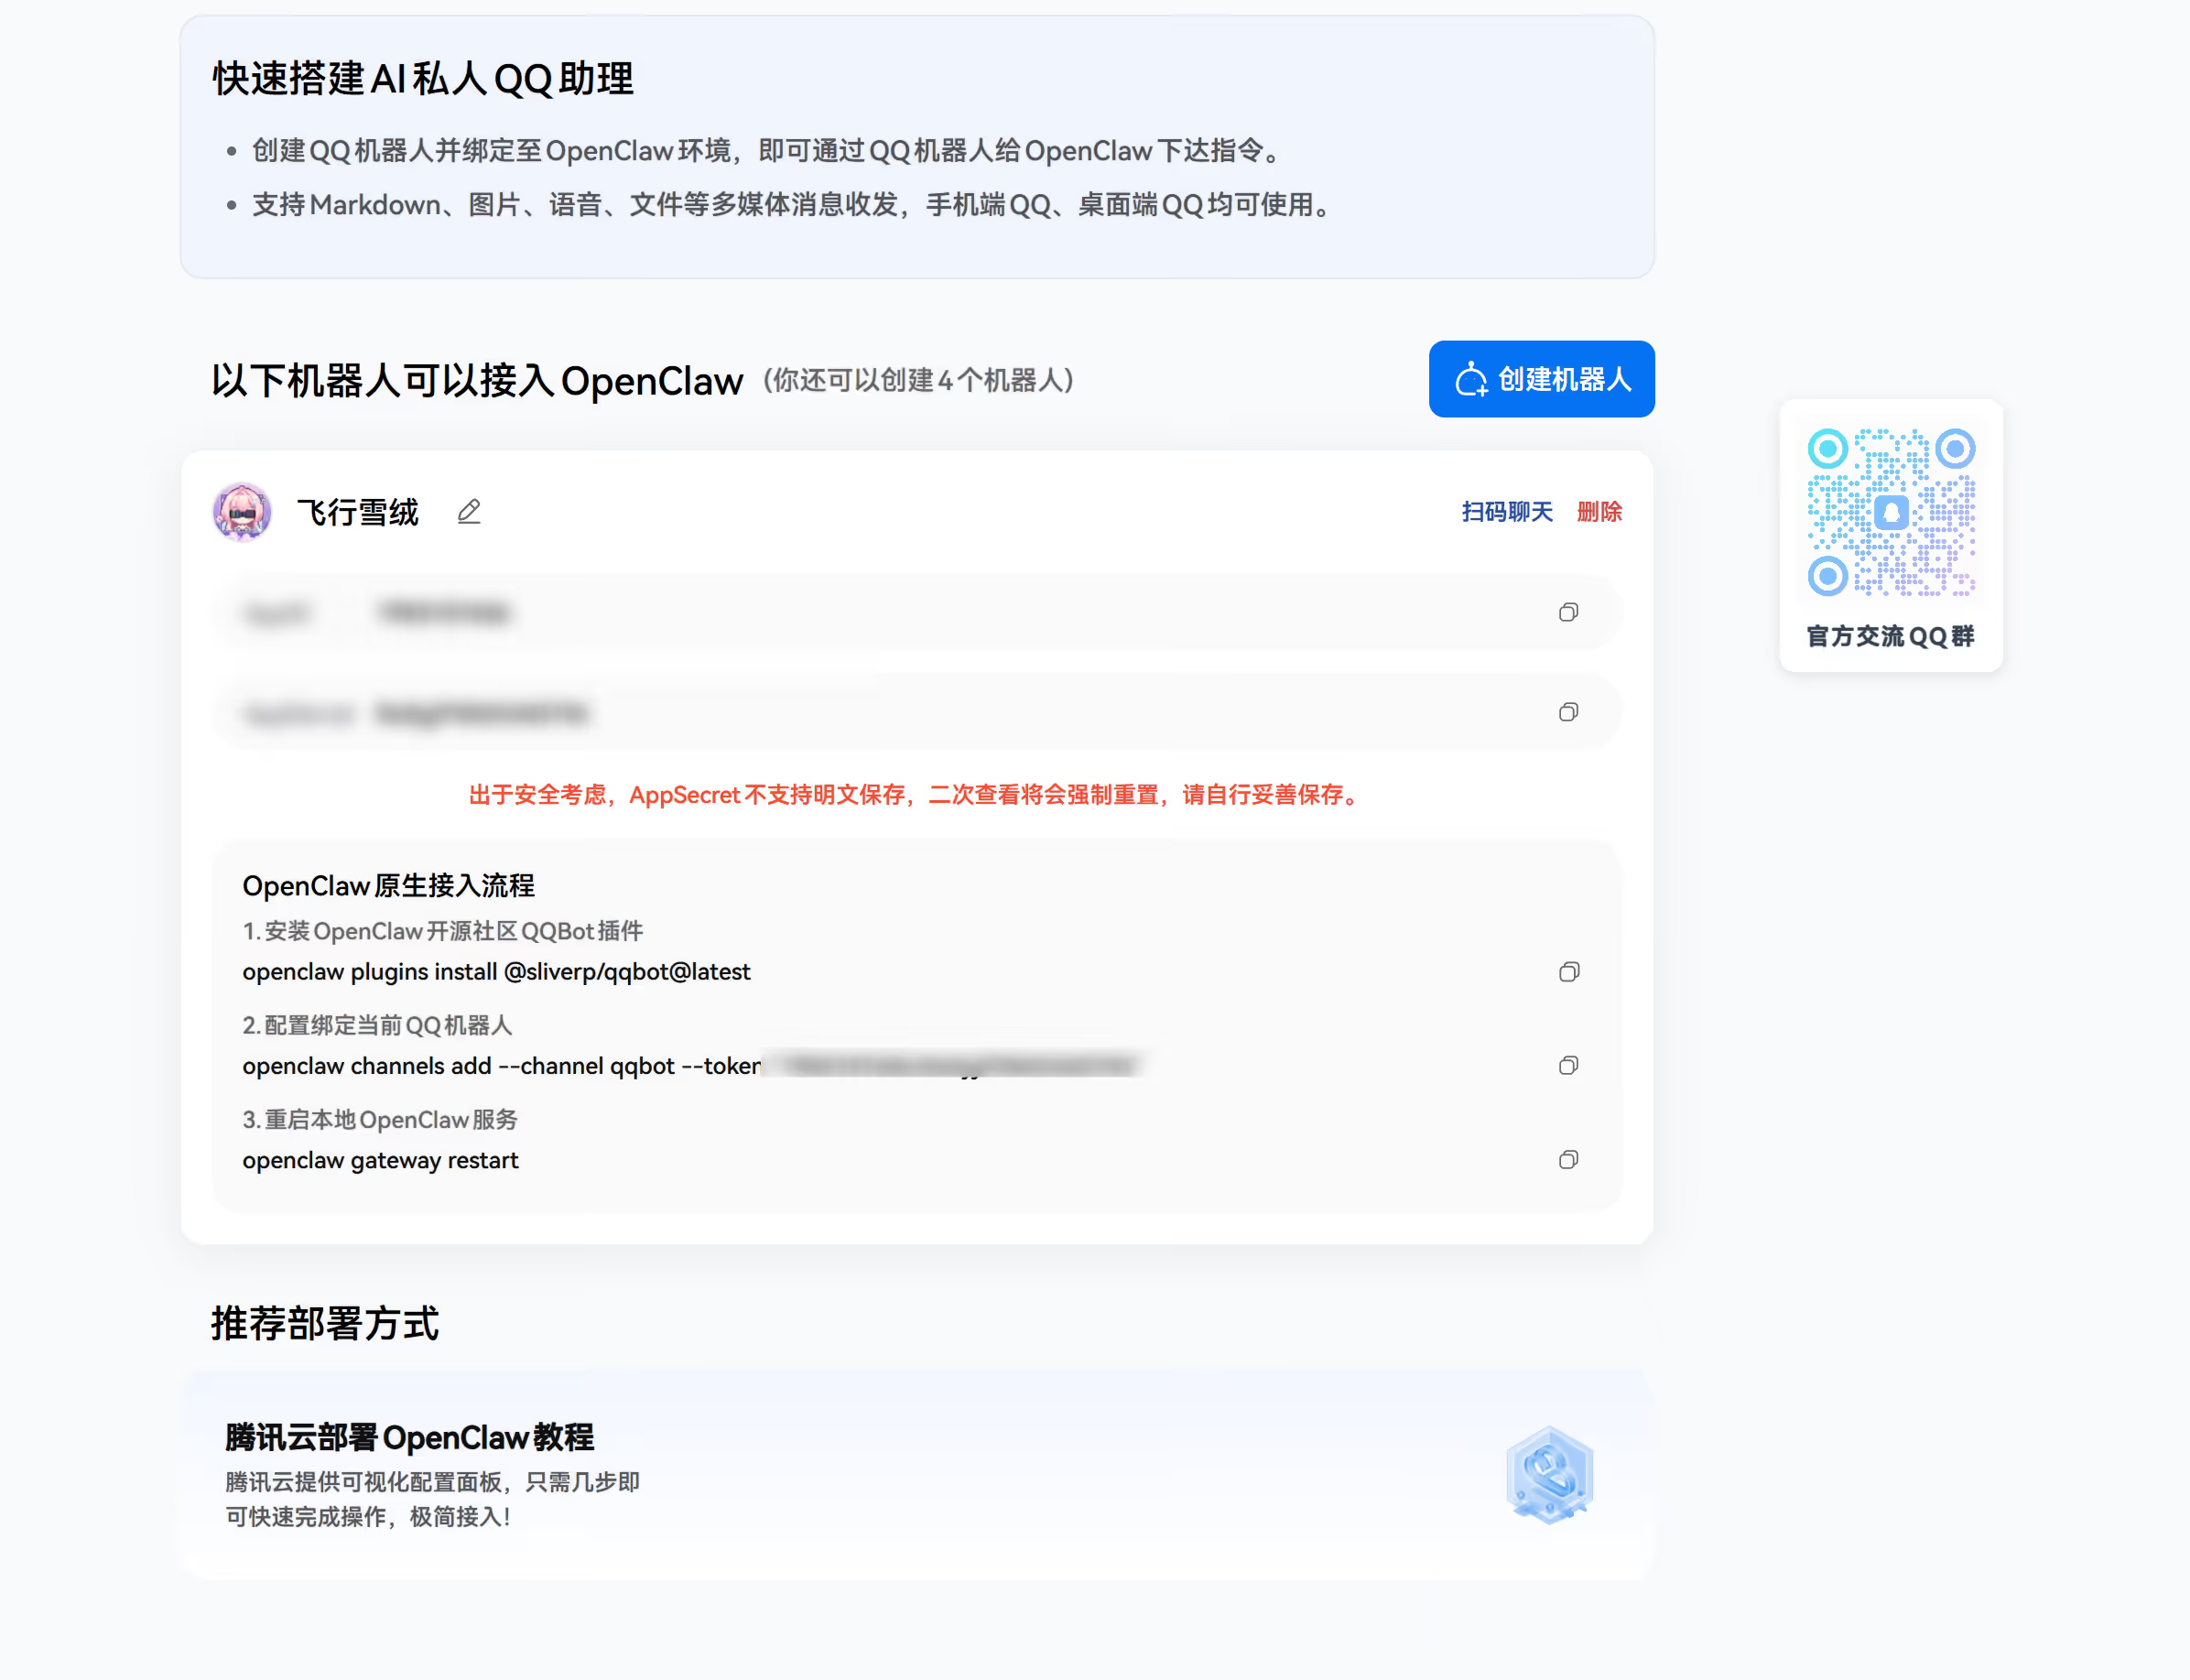
Install the QQ Bot Plugin and Configure
Install the OpenClaw QQ Bot plugin:
openclaw plugins install @sliverp/qqbot@latest
openclaw channels add --channel qqbot --token ""
openclaw gateway restartUsage
Security Considerations
WARNINGThe OpenClaw Gateway service listens on a local port by default. Please pay attention to the following security recommendations:
- Do not expose the Gateway port directly to the public internet to prevent unauthorized access
- For remote access, use a reverse proxy (such as Nginx or Caddy) with HTTPS encryption
- Regularly update OpenClaw to the latest version to get security fixes
- Do not commit API Keys or other sensitive information to version control systems
Common Commands
| Command | Description |
|---|---|
openclaw init | Run the initialization wizard |
openclaw status | Check running status |
openclaw dashboard | Open the management dashboard |
openclaw gateway start | Start the Gateway |
openclaw gateway stop | Stop the Gateway |
openclaw gateway restart | Restart the Gateway |
openclaw plugins install <name> | Install a plugin |
openclaw plugins list | List installed plugins |
openclaw skills list | List available skills |
openclaw config edit | Edit the configuration file |
openclaw update | Update to the latest version |
Summary
In this guide, we completed the following steps:
- Install OpenClaw: Global installation via npm
- Initial configuration: Run the wizard to configure AI models and chat channels
- QQ Bot integration: Register on QQ Open Platform, create a bot, install the plugin, and configure
OpenClaw’s plugin and skill system is very flexible. We recommend further exploration:
- Install more plugins to extend functionality
- Try different AI models to compare performance
- Create custom skills to meet your specific needs
Related Links:
- OpenClaw Website: https://openclaw.ai
- OpenClaw Documentation: https://docs.openclaw.ai
- OpenClaw GitHub: https://github.com/openclaw/openclaw
- QQ Open Platform: https://q.qq.com